Sunday 26 December 2021

Review of 2021

With the end of the year approaching it is time to review how my wargaming year progressed. Text in italics are taken directly from the year's plans. 

BATTLES

ANCIENTS:

Early Imperial Roman 16th Legion v Ancient British Trinovantes tribe in East Anglia.

Played and a Roman victory - AAR on the blog.

2nd Punic War - Battle of Trebia (Both sides need painting so 50:50 if achieved this year).

Complete failure! Figures acquired but that is as much as I have achieved.

Continued -

Thursday 16 December 2021

On The Workbench: Pony Wars US Cavalry & Dismounted Braves

An absolute barnstormer of a cold has disrupted my wargaming! Any thought of putting something on the table was out although I did manage to keep some semblance of figure painting ongoing. 

200 more Zulus were completed before I ran out of steam - my goodness do I find them boring to paint! Pony Wars though pulled me back and very much looking forward to getting some games played. 

I have been getting in the mood watching old John Wayne films such as 'Fort Apache' and 'She Wore a Yellow Ribbon' along with the more recent non-Wayne 1967 film 'Custer of the West'. The latter film I first saw as an 11 or 12 year old soon after it was released at our boys school cinema club. At the time I thought it was fantastic although a little dated now. 

First up was a batch of 96 dismounted braves:


Continued -

Tuesday 23 November 2021

Zulu Wars - The Men Who Would Be Kings test battle

In preparation for Rorkes Drift (followed by Isandlwana) I have been on the look out for suitable rules. Until recently the front runner has been The Sword and the Flame which I used in days gone by for my 15mm Sudan collection.

Recently though, two more have materialised that have caught my eye. One is a Pony Wars conversion but I am holding on that until I become more familiar with them.

The second is The Men Who Would Be Kings.

Inspiration for this is down to Little Wars TV who used them for a 6mm Isandlwana game. This piqued my interest being a skirmish game written for larger scales and how it could be adapted for large battle small scale actions. If this worked I could see all sorts of possibilities in other periods, in particular Ancients which my own rules are really only intended as a stop-gap until I find something I like.

There are actually very few changes, in fact really only one - distances. I have opted to simply convert from inches to centimetres as I have done in other rulesets.

Continued -

Sunday 14 November 2021

WW2 Operation Compass: Turn 2 - 11th December 1940 Air Phase

The result of the air phase will determine who has air superiority in the land battles of this turn. Dice rolls ascertain who is doing what.

In this case, 2 squadrons of Blenheim bombers escorted by Hurricanes are intercepted by Italian fighters. As before, each of my aircraft represent 3 and Bag the Hun rules will be used.

Orders of Battle:

RAF
274 Squadron        4 x Hurricane I
45 Squadron          4 x Blenheim IV
113 Squadron         3 x Blenheim IV

Regia Aeronautica
1st Sqn 2 Stormo        2 x Fiat Cr32
4th Sqn 50 Stormo    3 x Meridionali Ro37 bis
5th Sqn 50 Stormo    4 x Caproni Ca310

A view during the first move as the Italians move to intercept the British (top right). The sun was shining from top left. The Italian's intention to approach the British from out of the sun but at this stage had failed to spot them.

Continued -

Monday 8 November 2021

ACW Warplan Campaign: Map Moves 4 - 5

I have tidied up the maps which were a little messy in my attempt to represent many of the formations. Where several are now in the same square the topmost counter indicates the senior commander with the total number of troops under his command. 

On to the maps:

MOVE 4

As the Union forces push north, the Confederate units in reserve are called forward.

Continued -

Wednesday 3 November 2021

ACW Warplan Campaign: Battle of Krell

Before I begin the AAR of the next ACW battle in my campaign I will recap the circumstances leading to this action.


As the Union forces drive north into Confederate held territory, Ewell with two brigades sees an opportunity of giving them a bloody nose. He intercepts Caldwell's Union division in the area circled.


Zooming in on the area shows that Ewell is taking a risk of being surrounded.

Continued -

Saturday 23 October 2021

On the Workbench: Pony Wars Indians

The first batch of Baccus' Pony Wars Indians have been completed. 42 down 558 to go! The base frontage at 10mm per figure as as recommended in the rules. I have gone for a slightly narrower depth though at 15mm rather than 20mm. It is purely down to my aversion for overly large bases.

Judging by comments on social media, I was not alone agonising over the skin tone. Scouring photos online of painted figures in larger scales it would appear most have gone for a rather dark tone. Scaled down to 6mm dark can quickly appear almost black or make the figure look very dull. In the end I settled on the Foundry mid-tone flesh which was then given a nutbrown ink wash. They are probably a little too light but overall I am happy with the results. When sat next to the pale flesh of my European figures there is a clear difference.

Another factor I had trouble with was the base edge. I wanted their bases to be equally at home on the plains as in the desert, or at least acceptable to each. I settled on a sandy finish to the edge but now having completed the figures I have had a change of mind! It is not quite so obvious in the raw as in the photos but I aim to find a shade that blends in more with the base topside. I will experiment on the next batch and when happy will repaint these.


  Continued -

Sunday 17 October 2021

On The Workbench: Rorke's Drift Garrison

The garrison for Rorke's Drift has now been completed on a 1:1 figure ratio. Most of the characters have been included with just the Chaplain and Surgeon Reynolds missing. I have yet to find a suitable figure for those two in 6mm.


Men of the 2/24th battalion to the rear and a detachment of 10 men from the 1/24th on the left.

Continued -

Saturday 9 October 2021

Pony Wars

 A new project!

It's probably not healthy starting another project when I have so many others on the go, but when Pete Berry at Baccus announced the release of the rejuvenated Pony Wars rules along with a new 6mm range it was too much to resist.

Even better, the rules are based on the films and TV show depictions of the US Cavalry v the Red Indians from days gone by rather than historical reality. As a child in the 60's my imagination was fired by the westerns of these presentations and many a happy time was had playing on the floor with my collection of Airfix figures along with the 'Fort Apache'. 

I have always had a soft spot for gaming the wild west but aside from my Airfix days, have only ever dabbled with 28mm and 15mm. This though is an opportunity to properly game the period with my favourite scale! Although described as 'skirmish' rules, up to 600 mounted braves will be required. A considerable task for the 15mm scale the rules were originally designed for.

Continued -

Tuesday 5 October 2021

On the Workbench: Zulus!

 My Rorke's Drift project almost reached a milestone. 

Rorke's Drift will be played on a figure ratio of 1:1 with Zulu casualties recycled. To that end I planned on using around 1,200 Zulus which are now complete and appear in the photos below. I had not calculated on the number of figures per Zulu regiment which in the end gravitated towards 240 figures each. This left one regiment not quite complete and another only half complete. Another 145 figures required!

A rarity for me is movement trays. 40mm x 40mm mdf edged with the same card I use for the figure bases house 20 figures each. The Zulu warriors are 5 to a 18mm square base. Rifle armed Zulus are on the same sized bases but broken down into 1's. 2's and 3's. They are 12 to a movement tray 50mm x 25mm.

On now to the Rorke's Drift garrison while I wait for more Zulus from Baccus.


Continued -

Friday 24 September 2021

On the Workbench: A Medieval Walled Town

For the next battle in my Napoleonic campaign I needed a walled town which gave me an excuse to finish the one in my possession.

It is manufactured by Total Battle Miniatures and is ideal for Wars of the Roses or the ECW. As my Napoleonic campaign is entirely fictional I calculated that it would be fine as a Prussian town!

Most of the buildings had already been painted and you will have seen them periodically in some of my games. I needed to finish the base, walls and gatehouses. I also based the whole thing on a piece of softwood and finished to match my terrain boards. 

I have added some ECW figures to the photos to give some idea of scale. All buildings are removable and hence can be reused elsewhere.


Continued -

Thursday 9 September 2021

Battle of Talavera - Turns 25 - Conclusion

As the French columns began to ascend the steep slopes of the Medellin, the British began to open fire as they came into effective range.

On the northern slope the British look on as Ruffin's division begins to approach. The last British artillery battery opens fire plunging shot into the dense columns.

Continued - 

Thursday 2 September 2021

Battle of Talavera - Turns 17 - 24

 
On the French right, Maubourg's dragoon division, lead by Cavrois' brigade, receive their orders to attack.

As the French dragoons advance, the 4th Dragoons on the middle left of the photo becomes unformed crossing the defile. Fane (bottom left) sees his chance and orders the 3rd Dragoon Guards to charge.

Continued -

Friday 27 August 2021

Battle of Talavera - Turns 11 - 16


Having stated that the French should secure their right flank barring any major setbacks by their cavalry, that setback appears to have arrived! On the right of the photo the French 2nd Hussars charged the Spanish levy dragoons. Halfway into the charge, the morale of the 2nd Hussars evaporated and they halted. The Spanish had no such qualms and counter-charged into the static French light cavalry. In the ensuing melee they defeated the French causing them to retreat.

The French cavalry problems mounted as the rampaging British 3rd Dragoon Guards, pursuing the Hanoverian Chasseurs (on the left), came face to face with the reforming Vistula Legion. Being outpaced by the French light cavalry they ploughed into the Polish cavalry instead comprehensively routing them (I was a little hasty and removed the Poles before taking the photo!).

This also resulted in the demise of the Hanoverians being unable to rally with the British cavalry continue to pursue anything in sight! 
Continued -

Thursday 19 August 2021

Battle of Talavera - Turns 1 - 10

The French plan of attack differed from the original in that they aimed to turn both flanks with less emphasis on the allied centre at least in the initial stages.

On the French right, the attack on the Medellin would be delayed. Ruffin would be tasked with clearing the Spanish infantry from the Segurilla hills while Merlin and Beaumont's cavalry supported by a brigade of dragoons from Maubourg's division would see off the allied cavalry. While this is underway, the grand battery on the Cerro de Cascajal along with skirmishers would clear the western slopes of the Medellin of any British forces.

A combined attack from Ruffin and Vilatte would then descend on the Medellin and hopefully overwhelm it.

On the French left, Leval will aim to capture Talavera with Liger-Belair angling to assault the Pajar redoubt and the junction between the Spanish and British troops. All being well they will rout the Spanish allowing them to turn on the British right flank. Lapisse will keep the British occupied in the centre while both flanks are rolled up.

The first turn consisted of a purely artillery barrage with both sides targeting infantry formations.
Continued -

Sunday 8 August 2021

Battle of Talavera - Introduction

I shall be taking up the action on day 2 of the battle with initial historical deployments. So with that straight onto the AAR:

Scale - 6mm
Figures - Baccus
Rules - General de Brigade
Table size - 6' x 3'9"
Figure ratio - 1:20
Number of turns - 32 (representing a full day's action)


The deployment is after Bassecourt and Alburquerque have reinforced the allied left flank.

Terrain

Medellin - North and East slopes are steep. South slope is good terrain but cavalry and artillery move at half speed.

Cascajal and Segurilla slopes are gentle and good terrain.

Olive Groves - All classed as difficult terrain but only apply a -1 target fire modifier (-2 if behind wall in enclosure). Artillery may only pass through on roads or gaps. Cavalry may operate but only at half speed. May charge but must take a formation test. If unformed they can still charge. Visibility - 10cms.

Pajar Redoubt - Only partially completed. Max 30 figures or 5 gun models. Classed as cover but no morale modifier.

Portina Stream - Good terrain and no obstacle.

Hidden Ravine - Any cavalry crossing must take a formation test. If charging may complete charge even if unformed.

Continued -

Sunday 1 August 2021

On the Workbench: Talavera - Leval's Division

Well not quite the whole of Leval's division but most of it. The two Nassau battalions will be drawn from my Waterloo collection and two artillery batteries are on the verge of completion. There are also two cavalry regiments for Merlin's brigade.

The two artillery batteries will bring to a conclusion all the figures I need for Talavera. It will then be just down to a decision on whether to use terrain mats or my terrain tiles. The concern I have with my tiles are that they are really designed for a more northern European setting and a little too green for this part of the world.

I recently purchased a Geek Villain Sicily battle mat which is the right sort of colour but a little concerned the green patches, which are a little dark, may have a tendency to 'swallow' the 6mm figures. Ideally I need something a little more subtle to allow the figures to stand out and to that end I plan on lightly spraying my felt desert mats patches of green.

Click on 'read more' for detailed photos.

Friday 30 July 2021

On the Workbench: Napoleonic Prussian 28th (Berg) Infantry Regiment

The next battle in my Napoleonic campaign is Grazzbenn which sees a large Prussian army pitted against Napoleon. Over 5,000 figures will be on the tabletop, 3,000 of which are Prussians.

On examining the orders of battle I found I was several Prussian units short amounting to over 700 figures. It gave me an opportunity to further build on my Prussian collection bringing my long term aim of refighting Ligny and Wavre a step closer.

One of the more interesting units to paint was the 28th Infantry regiment. This was a Berg unit and differed from the standard Prussian line and reserve regiments in having a white uniform.


I used Baccus French line infantry being fairly close to the illustrations of these troops. I can find no record of flags issued to the 28th in 1815 but gave their 1st and 2nd battalions generic Prussian standards to more easily identify them.  


Sunday 25 July 2021

On the Workbench: Napoleonic Spanish for Talavera

The next game due on my tabletop will be Talavera. Having thought I had painted all the figures required I discovered I was missing one battery of Baden artillery and now awaiting a delivery from Baccus. In the meantime I am reverting to my "On the Workbench" updates to provide a flavour of what I have been painting over recent months.

One of the larger painting projects was the completion of the Spanish contingent for the battle:

The row of units on the left together with some Guerrillas at the top middle row of the left box had previously been completed. All other units are new and all are Baccus. 

Continued -

Friday 28 May 2021

WW2 Reconnaissance in Strength: Part 5 - Map 9

 The next random map is Map 9:

MAP 9

MAP 5
Continued -

Sunday 23 May 2021

WW2 Reconnaissance in Strength: Part 4 - Map 5

 The next random selection is Map 5.

MAP 5

MAP 6
Continued -

Wednesday 19 May 2021

WW2 Reconnaissance in Strength: Part 3 - Map 6

The time came to test to see which map from 3 to 9 was next. I used a D10 using the first relevant number that was rolled. And that was a '6' so that map has now been added.

This map has no German forces positioned. However, 5% of the German total is deployed in concealed positions on such maps. In the book it describes that when blue (Russian) forces approach an area where troops can be concealed (e.g. a wood) they roll a D6 with a 5 or 6 revealing red (German) troops. A further die roll determines if it is the entire 5% (4, 5 or 6) or half that number with the remainder concealed elsewhere. The revealed troops immediately open fire. 

To define what "approach" means in BKCIV I have included two methods. The first is to Reconnoitre the area using Recce troops. If successful then the D6 is rolled to determine if concealed troops are present. The second method is where troops move within 10cm of that area at which point the test is made. The revealed troops will immediately open fire using Opportunity fire.

As you will see in the photographs I have introduced a second area of potential concealment, a couple of industrial buildings.

MAP 6

MAP 2
As previously only the bottom half of Map 6 will be represented rolling over to the full map as the Soviets advance.

Continued -

Tuesday 11 May 2021

WW2 Reconnaissance in Strength: Part 2 - Maps 1 - 2 Soviets Advance into the Pass

This first posting of the action will cover the first two maps and the initial arrival of the Soviet forces. The tabletop will initially represent Map 1 and the bottom half of Map 2 rolling over to the entirety of Map 2 as the Soviets advance.

MAP 2


MAP 1
Continued -

Wednesday 5 May 2021

WW2 Reconnaissance in Strength: Part 1 - Mini Campaign Introduction

Back to WW2 and a long-awaited mini-campaign involving the Soviets.

I recommend checking my previous post under this label for background information relating to the campaign. The rules used will be Blitzkrieg Commander 4. Figures and vehicles are a mix of Heroics & Ros, 2D6 Wargaming and GHQ.

The action will be reported on the blog from a Russian perspective with the Germans controlled by AI. 

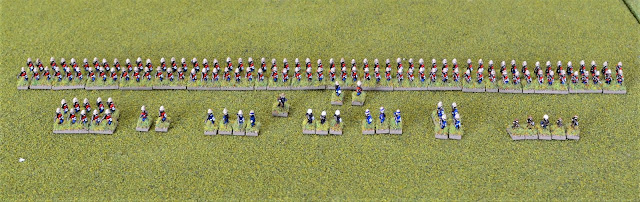
Orders of battle have been changed from the book increasing them in size. 

The Scenario

Russians

The force commander has been instructed to reconnoitre a mountain pass preparatory to a new Russian offensive. Not expecting any material opposition, Russian High Command believe they are incredibly generous allocating a reinforced motorised infantry regiment to complete the task. 

His task is to establish what, if any, German forces are occupying the pass and aggressively drive them out if he is confident of success. Which of course the High Command have no doubt that this is precisely what he will do!

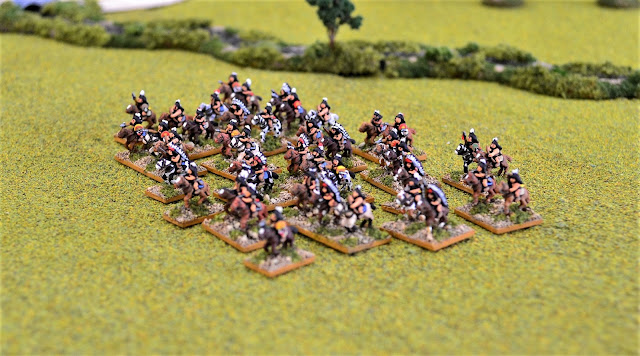
The Russian commander despairs of the largely clapped out early model T34's making up his armoured support and the addition of a naval infantry battalion does not assuage his concerns. Its all very well believing there will be little opposition but the narrow steep-sided pass could prove to be a killing ground to a well organised defence. 

Germans

Several Fallschirmjager and SS units have been sent to a mountain pass, ostensibly to rest having been heavily committed in the fighting, but to hold it should the Russians foolishly attempt to find a way through. Their victory condition is simple to prevent the Russians from taking the valley.

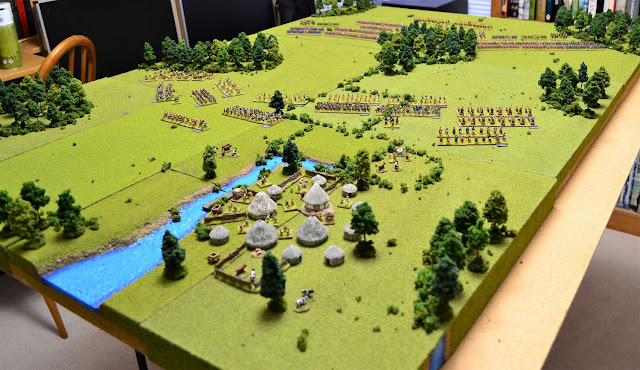
This is the map from the book. I have recreated these to take account of my terrain which you will find below.

Continued - 

Sunday 2 May 2021

ECW The Battle of Chewton Mendip - Part 3 of 3: Turns 7 - 14 (Conclusion)

 Turn 7

The battlefield remains blanketed by mist leading to some startling results. On the left the Forlorn Hope has rallied and as it moves forward a mass of swirling cavalry appears before them. A panic overcomes the dragoons and they promptly flee the field!

Continued -

Monday 26 April 2021

ECW The Battle of Chewton Mendip - Part 2 of 3: Turns 1 to 6

It was my intention to wrap up this AAR in one post, but a combination of available time to play it through and it being rather more involved than I anticipated, I have decided to get part 2 onto the blog rather than wait any longer. So - onto the battle: 

Turn 1

The presence of Waller's dragoons lining hedgerows did not deter the Royalists from seeking to engage the Parliamentarian horse at the earliest possible moment. They were supremely confident of driving them from the field. 

Prince Maurice with his lifeguard leading paid a heavy price for that optimism losing 25% of their number to Waller's dragoons firing into their flank from the hedgerows. Maurice had his horse shot from beneath him removing him from the proceedings for one turn.

The Veteran/Elite troopers shrugged off their losses and continued towards the Forlorn Hope.

Continued -

Sunday 18 April 2021

ECW The Battle of Chewton Mendip - Part 1 of 3: Introduction

The Battle of Chewton Mendip is the second battle in my project playing historical encounters from the Campaign Scenarios book - 'The 1643 Campaign for the South-West' by Robert Giglio. Principally written for 'Forlorn Hope' rules it can be used for any.

This is part 2 of a 2-part battle, the first being Glastonbury. There is an option in the scenario to treat both as a mini campaign with casualties carried over from Glastonbury. I decided to replay the action as a stand-alone battle using historical orders of battle.

After Glastonbury, the pursuing Royalist cavalry the same day met the Parliamentarians about a mile before the village of Chewton Mendip "the enemy faced about againe with theire horse" in Chewton Mendip Heath.

The Battle of Chewton Mendip
12th June 1643
Table Size 3'9" x 3'
Rules - Forlorn Hope


Continued -