Turn 7
 |
| The battlefield remains blanketed by mist leading to some startling results. On the left the Forlorn Hope has rallied and as it moves forward a mass of swirling cavalry appears before them. A panic overcomes the dragoons and they promptly flee the field! |
Continued -
 |
| Waller's squadron of dragoons that had been occupying a forward position behind a hedgerow from the start, observed a great mass of mounted troops emerging from the gloom. They chose not to wait a moment longer. Mounting up they rode from the field in great haste! |
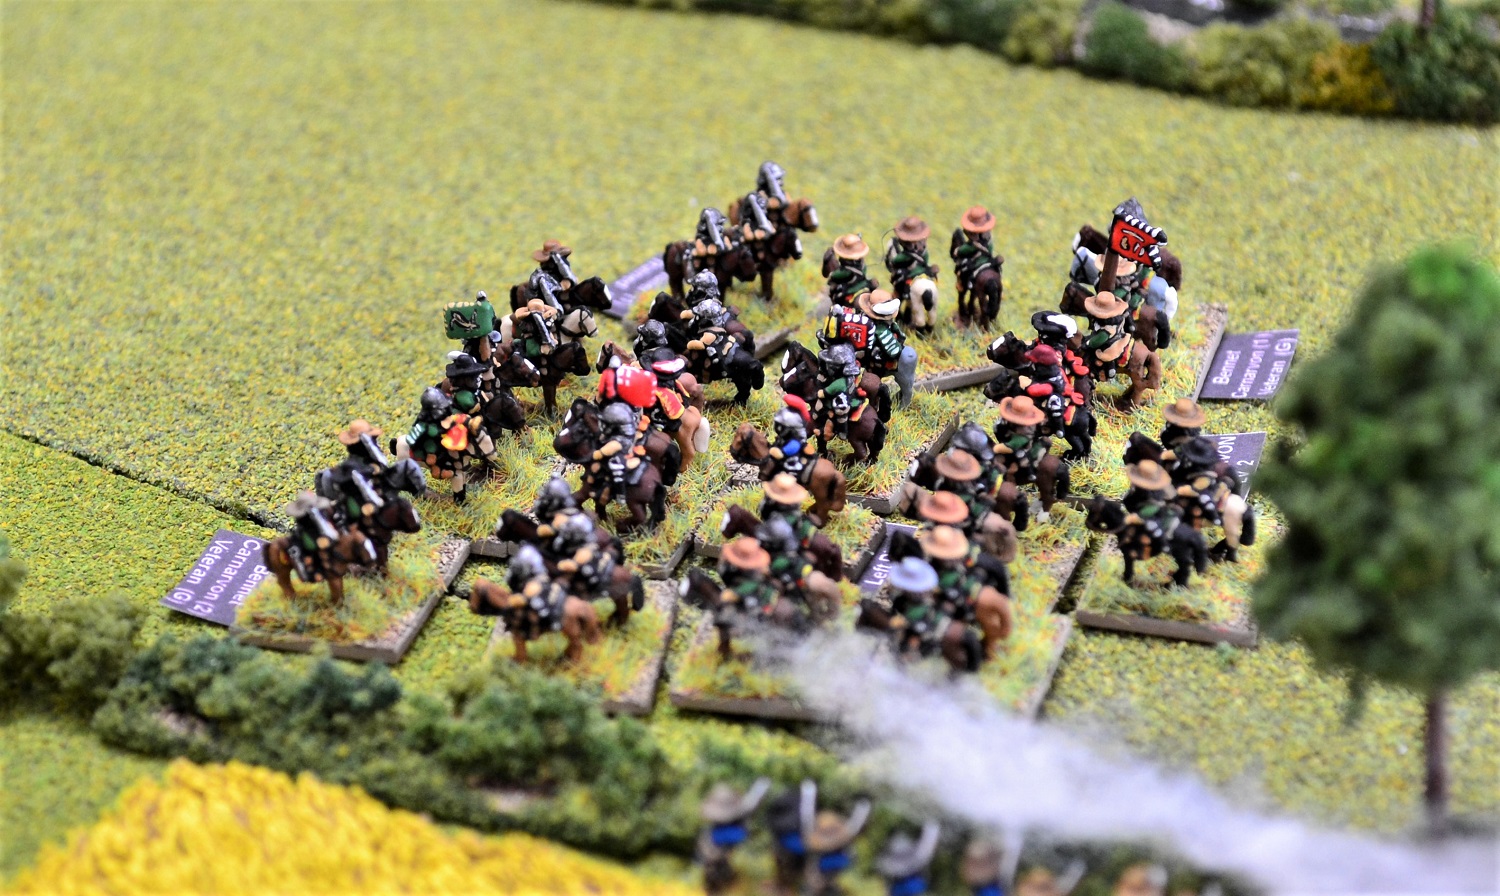 |
| Caernarvon with his 1st squadron charged from the right into the rear of Vandruke with Waller's 1st squadron. The Royalists sustained a casualty from dragoons in the foreground on the way in. Despite the shock of being struck in the rear, Waller's cavalry stubbornly hung on. |
 |
| The greatly outnumbered Prince Maurice Horse were finally rolled over by 2 squadrons of Burghill's cavalry and now routed. |
 |
| Prince Maurice with his dwindling lifeguard pushed back Burghill's 1st squadron another cm but struggled to make their small numbers count. |
 |
| Waller's 2nd squadron pushed back Bennet's horse again which now caused the Royalists to rout. |
 |
| The situation at the end of turn 7. The severe loss of 2 dragoon squadrons proved to be not too much of a disaster for the Roundheads with 2 Royalist squadrons routed, and although the lifeguards of Prince Maurice were still pushing Burghill back, they were perilously thin on the ground. |
The mist lifts!
 |
| As the mist disperses, Sir George Vaughan at the head of the Royalist reinforcements, was greeted with the sight of 2 Royalist squadrons routing towards him pursued by Parliamentarians. He has few options in the confined space but orders those troopers that are able to fan out from the road intending to intercept the pursuers. |
 |
| Caernarvon's cavalry finally overcame Landruke with Waller's 1st squadron. Sandwiched between the two Royalist squadrons and defeated in the melee, there was nowhere for them to go resulting in them begin captured. The victorious Royalists were dismayed though to learn that Caernarvon had received a mortal wound. He would be dead at the end of the turn. |
 |
| More bad news for the Royalists. Prince Maurice with his last lifeguards failed to make any further headway against Burghill. The latter had stiffened the resistance of his troopers killing the last of the lifeguards along with Prince Maurice! |
 |
| Having had his wounds treated, Haynes now sped across the battlefield to get back into the thick of it. |
 |
| Waller's dragoons from the left division mounted up ready so support the increasingly victorious Roundhead cavalry. |
 |
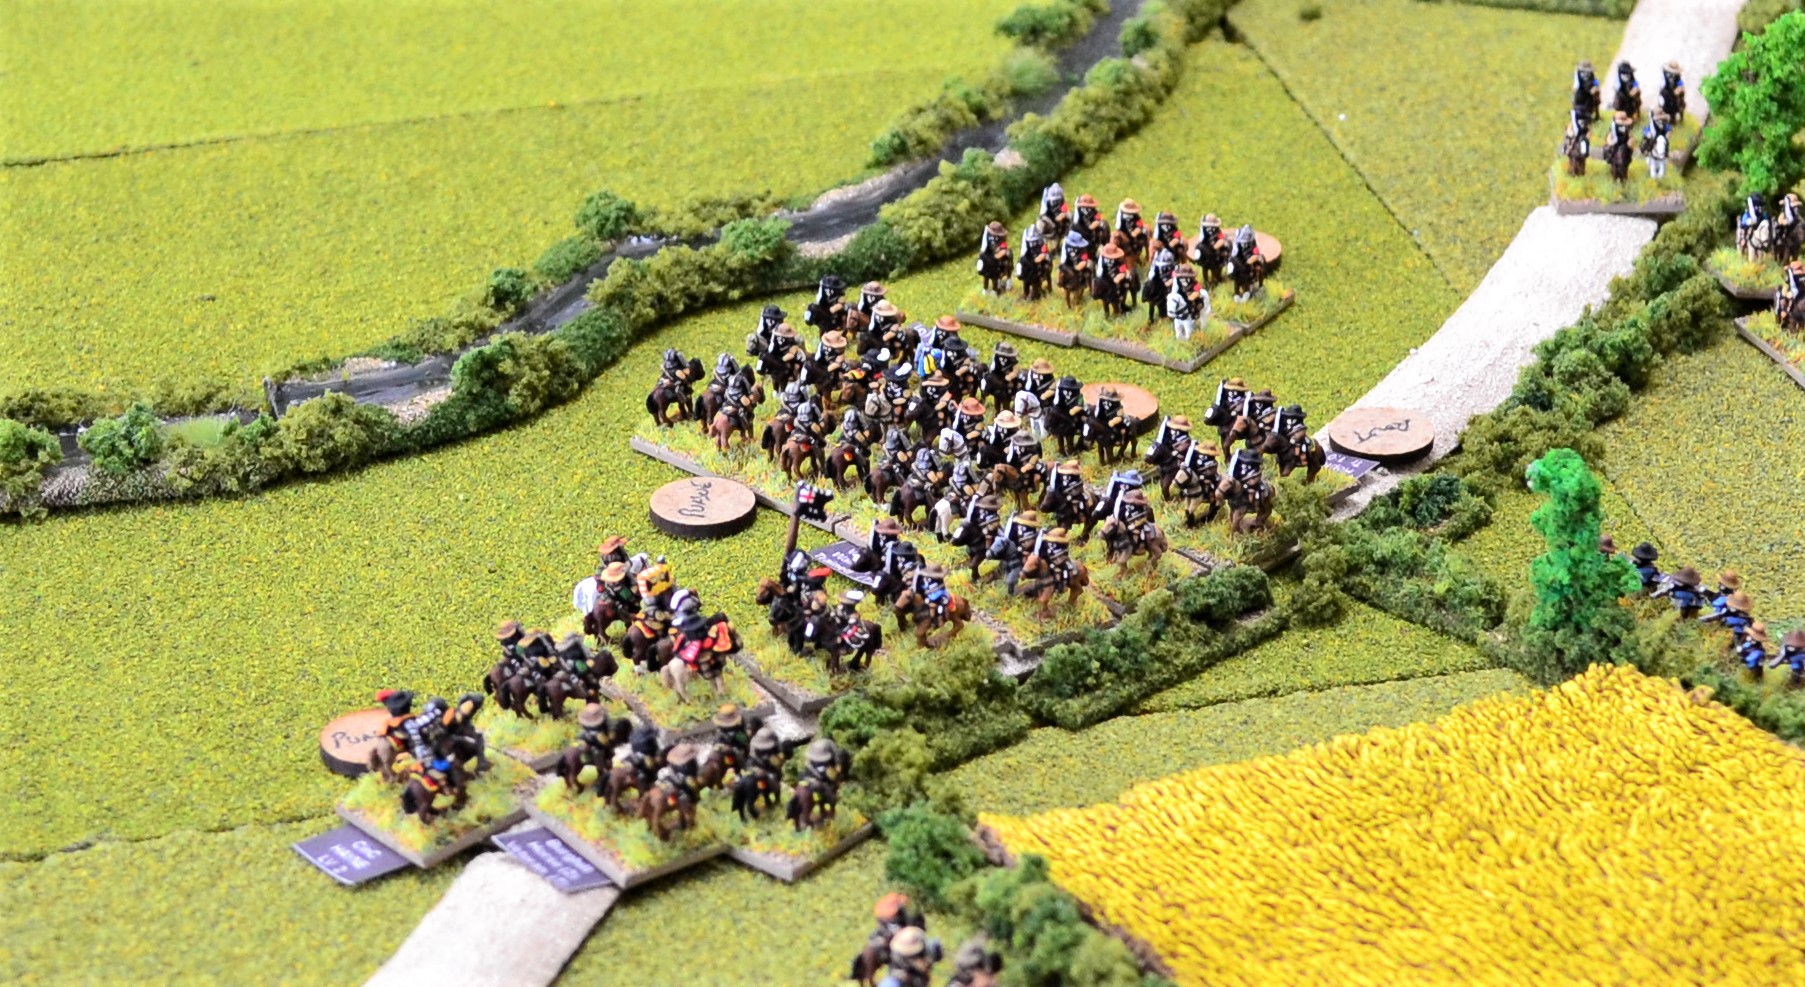
| An overview at the end of turn 8. The routing Royalist squadrons outpaced the slower Roundheads who now began to rally their pursuing cavalry. |
 |
| In the lower middle of the photo, Bennet's horse has successfully rallied from rout. As they began to reform they were caught by the pursuing Waller's 3rd squadron. Despite being disordered they held their own reasonably well killing 2 Roundheads for the loss of 3 and suffering only a push back of 1cm. The smoke is from a volley from the mounted dragoons as the pursuing Roundheads passed them by but to no effect. |
 |
| The 2nd and 3rd squadrons of Burghill's horse have rallied from pursuit. Haynes joins the 2nd squadron in the foreground. |
 |
| Bennet (top of photo) now moves to rejoin his troopers having been treated for his wounds. To the left, Waller's 3rd squadron of dragoons has just negotiated a hedgerow to find themselves dangerously close to Royalist horse! |
 |
| An overview at the end of turn 9. The Royalists have made little headway on their left and relying on Vaughan's reinforcements to turn the tide. |
Turn 10
 |
| The Parliamentarians begin to scent a victory! Waller's 3rd squadron succeeds in routing Bennet's horse again! In the foreground, Haynes leads a charge by Burghill's 2nd squadron into Hopton's 1st squadron of dragoons lead by Vaughan. Vaughan receives a serious wound in the fighting and the mounted dragoons prove no match for the Roundhead cavalry. Seeing their leader wounded and suffering badly at the hands of Burghill's troopers they rout. |
 |
| Hopton's 2nd Dragoon squadron dismounts ready to fire on any enemy attempting to outflank the Royalists. |
 |
| Caernarvon's 2nd squadron charges Wallers 3rd dragoon squadron who attempt to turn preventing their flank from being rolled up. Not being in a position to counter-charge they receive the Royalist cavalry. They fight desperately but suffer from being outclassed and are pushed back 3cm. |
 |
| An overview at the end of turn 10. The battle now effectively split into two separate actions. |
 |
| Burghill's 2nd squadron, having crossed a hedgerow, receive a full volley from Hopton's dragoons losing 2 of their number. |
 |
| With Bennet's horse streaming past them Prince Maurice' 2nd squadron holds firm and charges the pursuing Roundhead cavalry (lower middle). This is enough to remove the threat from Waller's horse and they are pushed back 3cm having lost a casualty for no loss on the Royalists. |
 |
| Aside from Maurice' horse and Hopton's dragoons lining the hedgerow, the prospects for the Royalists on this flank are looking bleak. With two cavalry and one dragoon squadron routing it was bad enough but..... |
 |
| Vaughan's raw cavalry squadron in the middle of the photo, already retreating shaken as units begin to rout around them, experience a total collapse of morale as yet another Royalist squadron routs past them. They flee the field with no prospect of rally. |
 |
| At the opposite end of the battlefield, Caernarvon's horse continue to make headway and push Waller's dragoons back again. They are dangerously close to routing. |
 |
| Bennet has now rejoined the fight having been treated for his wounds. He prepares to meet Burghill's 1st squadron as they cross the stream. |
 |
| An overview at the end of turn 11. |
 |
| Waller's dragoons proved no match for Caernarvon's horse and after another round of melee routed. With it being so close to the board edge they will the battlefield pursued by the Royalist cavalry. |
 |
| Bennet with the smaller 2nd squadron of Caernarvon's horse counter-charged Burghill's 1st squadron. They succeeded in pushing back the Roundheads although they lost the only casualty of the melee. |
 |
| Maurice's 2nd squadron pushed back Waller's 3rd squadron again which turned into a rout. Ominously for the Royalists, Haynes had turn Burghill's 2nd squadron threatening their flank. |
 |
| Burghill's 3rd squadron charged Hopton's dragoons who took the chance of holding fire until point blank range. They succeeded in holding their nerve delivering a devastating volley into the hapless Roundhead cavalry. They lost 4 of their number turning their charge into a retreat. |
 |
| Bad news for the Royalists though as 2 more units fled the field. |
 |
| An overview at the end of turn 12. |
 |
| Bennet and Caernarvon's horse again defeated Burghill's 1st squadron inflicting 2 casualties which included Burghill himself. With another push back the Roundheads are on the verge for routing. |
 |
| Haynes launches his charge into the flank of the pursuing horse of Prince Maurice. They are pushed back suffering 2 losses for none on the Roundheads. |
 |
| An overview at the end of turn 13. |
 |
| Another victory for Bennet saw Burghill's 1st squadron rout. |
 |
| At the opposite end of the battlefield, Haynes oversaw the slaughter of Maurice's horse. |
 |
| At the end of turn 14 I decided to call the game. The way it was playing out I could easily have ended up with just 2 units left on the tabletop slugging it out. I felt at this stage both sides would have acknowledged there was nothing further to be gained and withdraw their forces. |
Not very satisfying I know, but in the end I called it a draw. This was one of the more unusual games I have played with it becoming very fragmented and neither side decisively gaining the upper hand.
As for Forlorn Hope rules, this was my second outing using them and the jury is still out. There is much to like and for the most part it chimes with my preferred style of wargaming. My main area of concern is the amount of time to play through a game, even as modest as this. I am not giving up yet though as undoubtedly me continually having to check the rulebook slowed down the process.
I have introduced a few amendments of my own for this game which was more tinkering at the edges rather than a full-blooded re-write. More detail of that in a future blog when when I am satisfied of any changes made.
Well there was an awful lot of action going on there Jon and certainly had the feel of a to and fro cavalry action. Interesting to read your thoughts at the end as about half way through I was wondering why some units seemed to carry on, when they to my eyes were already hors de combat. This may be down to my preferred type of rules that have actions over relatively quickly and with less nitty gritty. However there is a lot to like in terms of the detail of these rules, but maybe too much at times? I look forward to reading your amendments etc when you've had time to give them due consideration.
ReplyDeleteAs always the shots of the action are a joy to behold!
Thanks Steve. I made several mistakes throughout the game meaning some units lasted longer than they should. That said, even when I corrected them, some melees did seem to drag on a little too long. That was not too bad in a game of this size but could make something like Edgehill rather protracted.
DeleteI need to get a few more games under my belt to properly assess the rules and see if any changes I make improve them or not. Worst case scenario I will add yet another variant to my GdB style rules incorporating some ideas from FH but hopefully will be able to avoid that.
The horse were forever on the point of collapse and the end came long after where I thought an overall rout was about to happen
ReplyDeleteLet's see if your amendments minor or not improve matters.
Regards Peter
Thanks for your comment Peter. Did not turn out as I expected. I felt sure that with the Royalist reinforcements arriving early combined with the loss of 2 Parliamentarian dragoon squadrons that the former would roll over the latter without too much trouble!
DeleteAll the best
Jon
What a great series of posts on a most interesting action. English Civil War is so often played with small numbers of figures, so it is fantastic to see the numbers that you bring to the field—using 6 mm to best advantage. Especially those photos of the big cavalry mêlées in the early and mid stages of the battle. Mind you, the table was pretty bare by the end. They fought one another to a standstill!
ReplyDeleteRegards, James
Many thanks James. Yes the outcome is not what I expected! If I had continued playing I would not have been surprised to end with a one on one duel to see who wins.
DeleteWell that was an epic to and fro battle. I've never tried these rules.
ReplyDeleteThey are a little old school and not 100% convinced they are the best for 6mm. Will shortly be trialling Pike and Shotte.
Delete