Refurbishment of 1/3000 scale ships painted eons ago continues. All here are Navwar.
 |
| Andria Doria |
 |
| Fiume (Zara class cruiser) |
Continued - |
Refurbishment of 1/3000 scale ships painted eons ago continues. All here are Navwar.
|
| Andria Doria |
|
| Fiume (Zara class cruiser) |
Continued - |
 |
| A summary of movements and actions at the end of turn 4. |
3 attacks are launched. WAF and EAF Land Based Air and a Carrier based attack from Ryojo.
Only the WAF are successful in locating their target, and not a particularly impressive one at that! The crippled Dutch destroyer Kortenaer escorted by another destroyer, Van Nes, are attacked by bombers. Aircraft availability proved to be poor with only 8 x Nell and 3 x Betty bombers available for the strike using medium bombs on a high level bombing run.
 |
| 4 x bombers targeted the lead vessel, Van Nes, with 7 on the Kortenaer. |
Turning now to the final surface v surface action on turn 4, the US EastGroup reinforced by two New Zealand light cruisers successfully intercepts a very small Japanese invasion convoy heading for Banjermasin in Borneo.
 |
| EastGroup had come through an air attack unscathed and now had a chance to interrupt Japanese invasion plans. |
 |
| The Japanese convoy under the command of a veteran Admiral Tanaka on the flagship Jintsu. |
 |
| EastGroup under the command of Admiral Glassford on the Boise. |
Turning now to the east, the Australian Darwin group escaped unscathed from a torpedo bomber attack and now make a dash for an invasion convoy heading for Kendari. Enroute they are intercepted by the Japanese EAF patrol.

 |
| This will be yet another night time engagement. The Australians are in line astern with the Australia leading heading due north. The Japanese patrol is approaching from the west at a distance of 15,000 yards (75cm) being the maximum visibility at present. The weather is a very calm force 2 with clear skies. A new moon limits visibility. |
More progress has been made refurbishing my collection of models painted decades ago. Hence the rather random nature of the ships completed. British ships have now received their refit and the Italians and Germans are next in line.
All are 1/3000th scale Navwar models.
 |
| Left to Right: Mauritius (this was a new model and may make an appearance in the "Defending the Malay Barrier" campaign), Newcastle and Belfast. |

Continued -
Focussing on the Dutch CenGroup, their flagship has pulled out due to damage sustained in a bombing attack. The flag has been transferred to the light cruiser Java and the group has continued north with the intention of disrupting a Japanese convoy headed for the Malay peninsular.
 |
| Before they have any chance of engaging the convoy, they in turn are intercepted by the Japanese Distant Cover Group under the command of Admiral Kondo in the heavy cruiser Atago. |
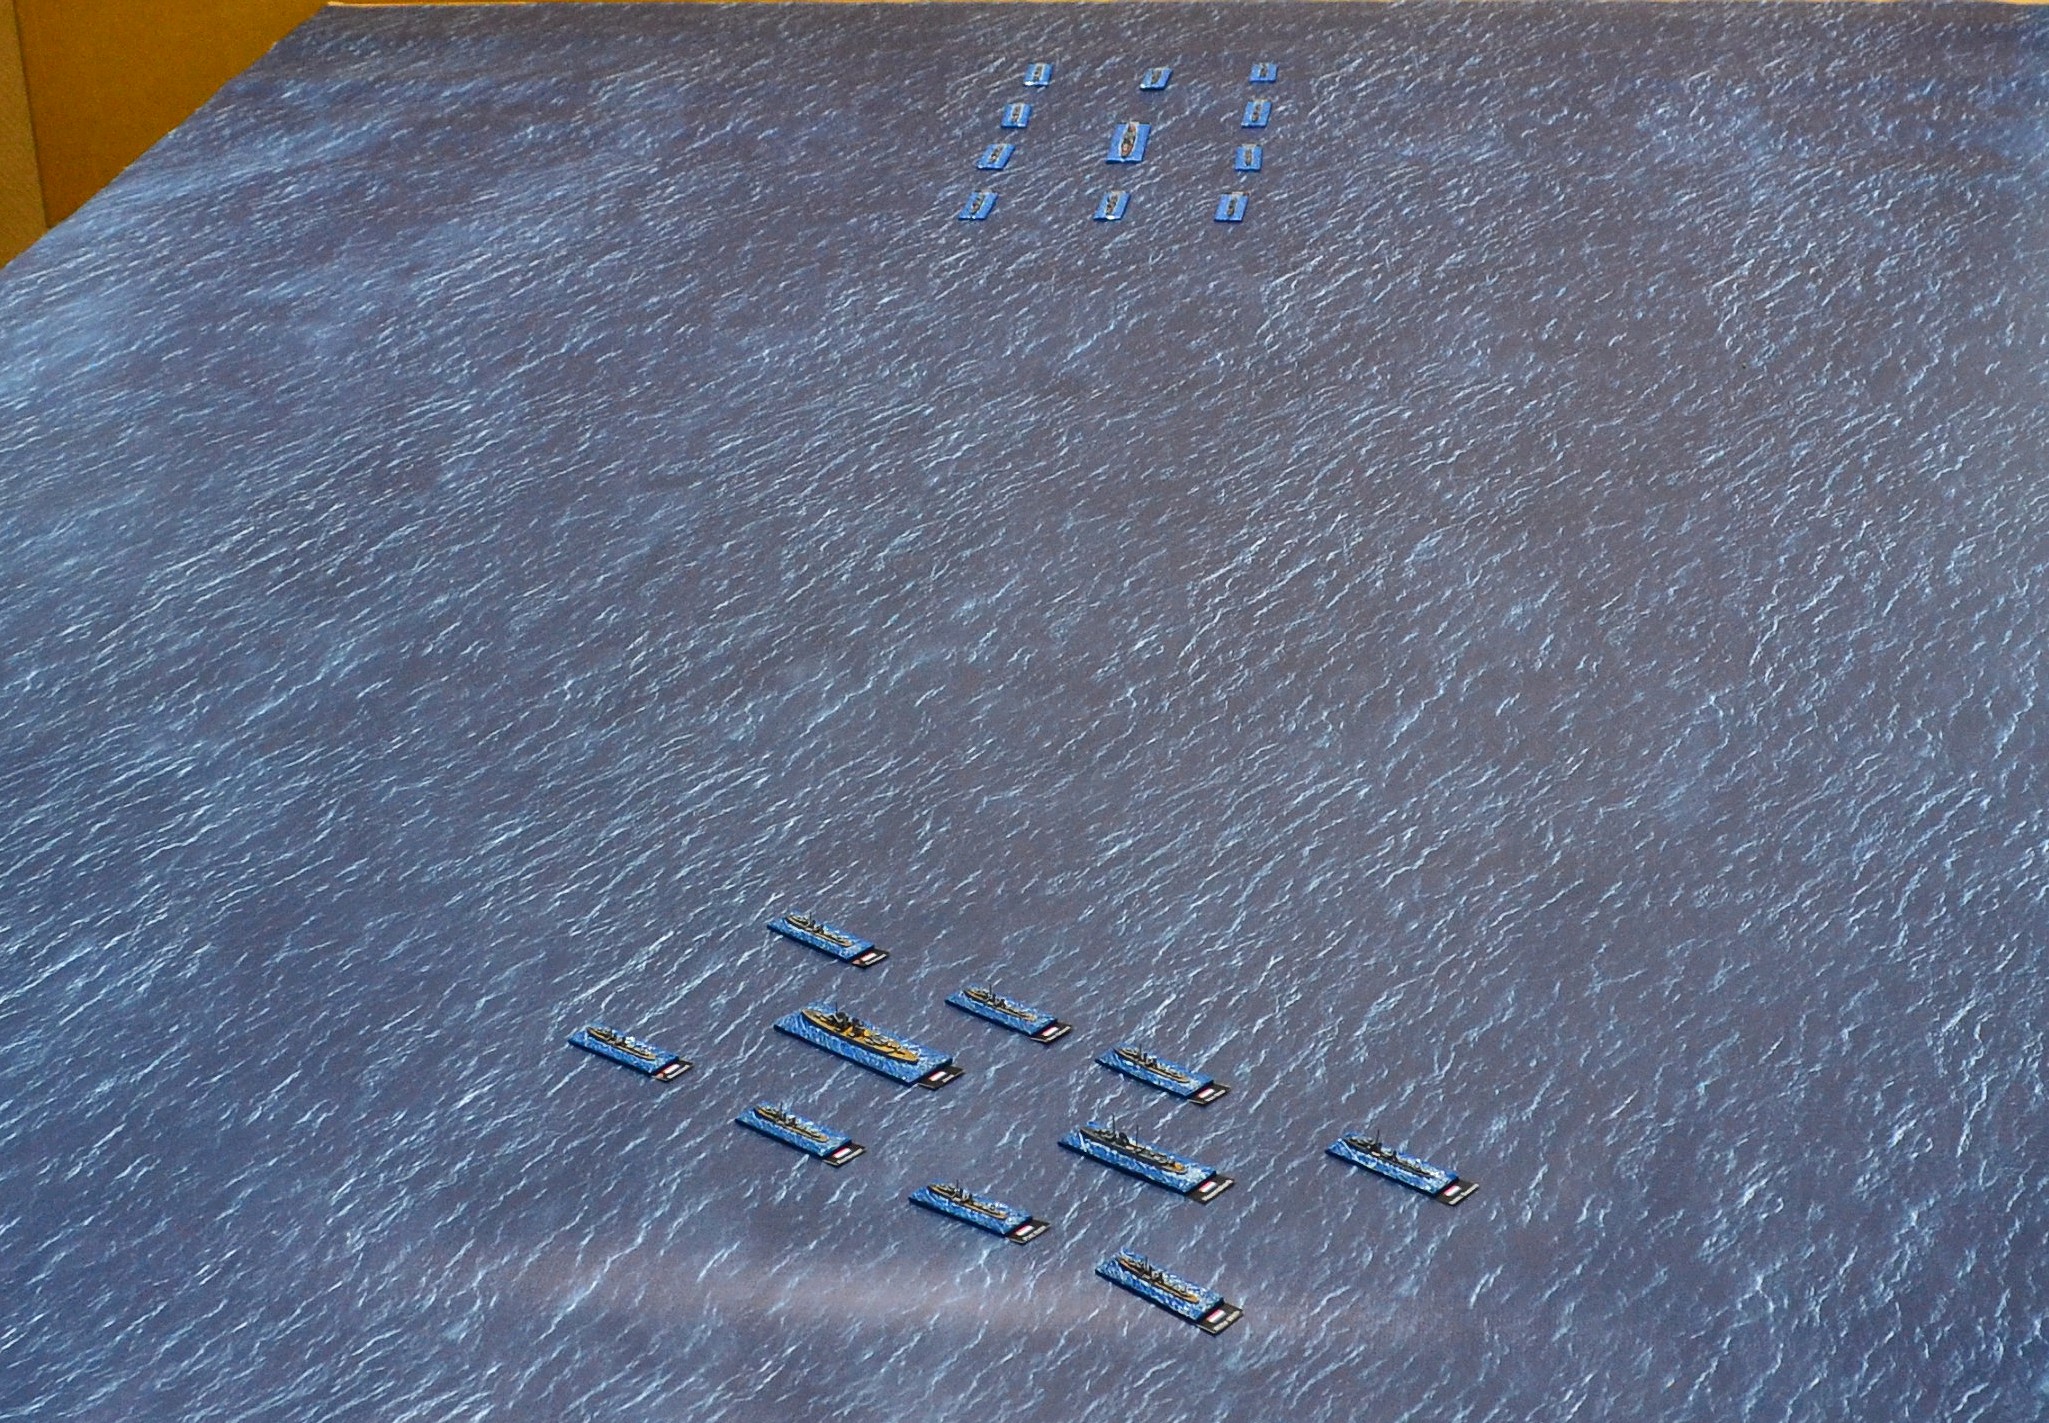 |
| Nearest the camera are the Dutch consisting of 2 light cruisers and 8 destroyers sailing north west. At the top of the photo is the Atago group consisting of 1 heavy cruiser and 10 destroyers approaching from the north. The action starts during the 0400 - 0800 watch and therefore during the dark hours at this stage. No ships have yet been spotted by either side. After 10 turns dawn will break. Neither side has the benefit of radar. |
 |
| A reminder of the situation at the end of turn 3. Japanese objectives captured are circled. |
 |
| WAF has completed 2 tiers and the EAF 1. |
Continued -
 |
| A reminder of the situation at the end of turn 2 with objectives captured by the Japanese circled. |
 |
| For this turn it will be a priority for the Japanese to complete tier 2. |
Continued -
More additions to the Carthaginians for Trebia have been completed along with several more refurbished 1/3000 scale ships.

 |
| Only 2 bases will be required for Trebia but with an extra pack in the unpainted pile it needed to be done. A little more uniform in appearance than I originally intended! As with nearly all my 6mm figures they are from the Baccus range. |
The final actions of campaign turn 2 are potential air attacks on crippled or disabled ships underway for repair.
The first phase is a carrier strike group from the Ryojo attempting and failing to locate the crippled Houston and its destroyer escort.
The final phase are the Land Based Aircraft attempts. The WAF fail to locate the crippled HMS Dragon in poor weather. The EAF however, are blessed with clear skies and good weather and do find HMAS Canberra escorted by HMAS Hobart.
I used the Campaign Air Ops in GQ3 rather than Tactical Air Ops to speed things along.
 |
| The first attacking wave consisted of 9 flights of 'Nell' bombers. 4 targeted Hobart and 5 Canberra. Medium bombs were dropped keeping the aircraft out of short range AA fire. Neither Australian ship scored any hits using their long range AA armament only. The Canberra was faced with a heart-stopping moment with a near miss. They only had one hull box left and the near miss reduced that to a half! |
 |
| The second Japanese wave consisted of 7 flights of 'Betty' bombers. 2 targeted the Hobart and 5 Canberra. On this occasion the Australian AA fire proved far more accurate. Hobart damaged one bomber and Canberra shot one down. As the medium bombs rained down Canberra held its breath. Even a near miss would sink her. Fortune favoured the Australians with all bombs falling wide. This signalled the end of turn 2. |

 |
| The USN Boise Steaming north leading the destroyers in line astern. It is now nighttime. |
 |
| In the foreground, the Boise sights a Japanese ship heading directly towards them from the east at a distance of 20,000 yards (100cm). |
Time for an update on what I have been painting this year so far. Starting with figures for the Trebia project:
 |
| 4 bases of Spanish Heavy Cavalry. All figures are 6mm Baccus, 10 figures to a 40mm x 30mm base. A base of Italian allied cavalry was also completed having discovered I was one base short! |

The final batch of ships before returning to figure painting is now complete.
 |
| Two Essex class carriers and the lead ship of the Bogue class escort carrier. All Davco. Back left to right: Intrepid, Bogue Front: Essex |

Continued -
The latest on the carrier progress - a quick update:
 |
| I have for the most part worked in batches of 3 ships and here is from top to bottom, Shokaku, Zuikaku and Junyo. All Navwar. |
 |
With the blog having switched to a nautical theme over recent weeks, I post here an update on naval painting, in particular aircraft carriers. I have purchased some flight deck decals from "Flight Deck Decals" (link on the right) which really are superb. They do require some trimming to fit as closely as possible the Navwar models and many are also suitable for Davco. The current naval painting bug has inspired me to crack on with aircraft carriers in particular to utilise these decals.
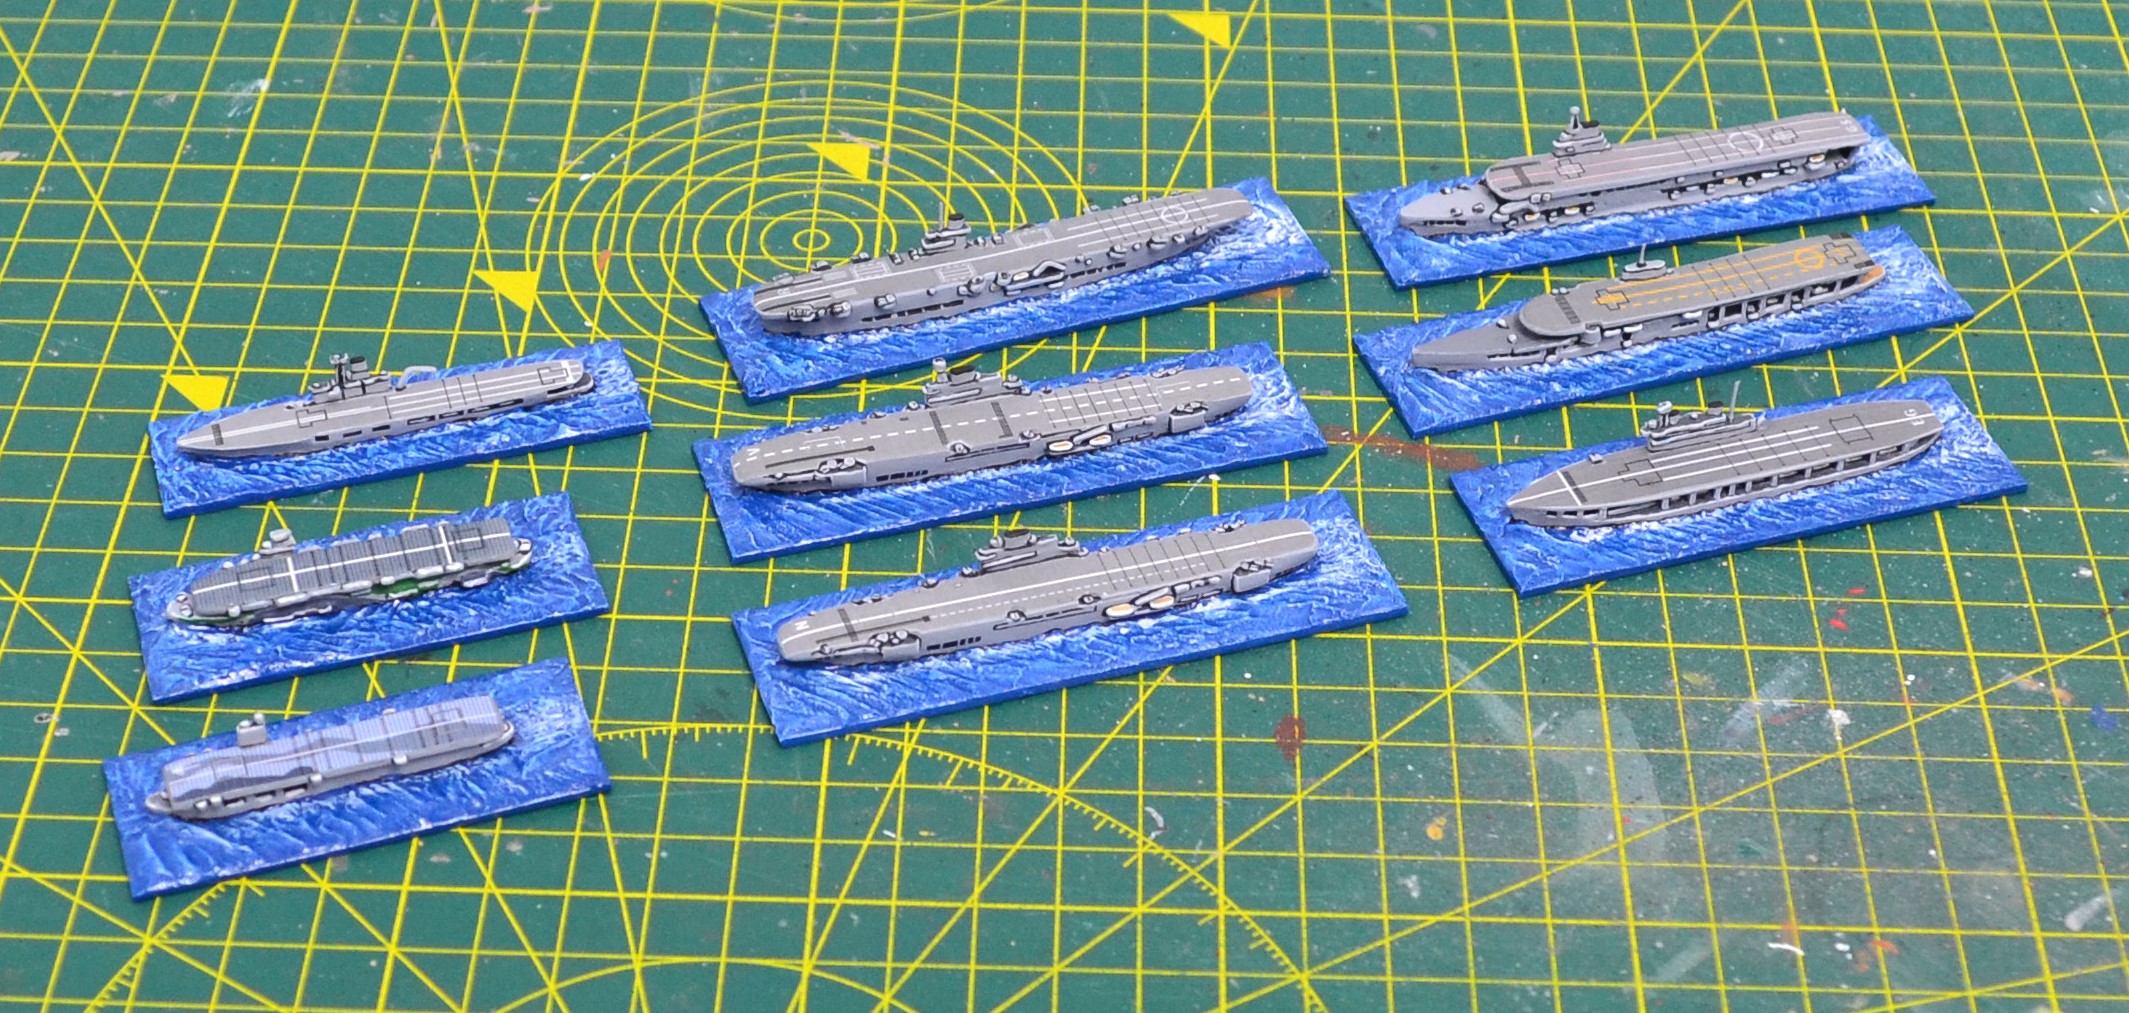 |
| Royal Navy carriers (all Navwar) from left to right: Top row; Hermes, Ark Royal, Glorious Middle row; Ameer, Victorious, Furious Bottom row: Biter; Indomitable, Eagle |
Continued -
The second Japanese patrol was also successful intercepting the USN EasGroup which is the subject of the next game.

The heavy cruiser Nachi with 4 Shiratsuyu class destroyers are on a reciprocal course with the US sweep which it sights at a distance of 23,000 yards (115cm). The US force consists of the cruisers Houston and Boise escorted by 9 Clemson class 4-stacker destroyers.
 |
| An overview at the start. |
In this phase the Japanese have sent out two patrols with the intention of intervening any allied sweeps before they interfere with any invasion or supply convoys.
The first action sees WesGroup out of Singapore intercepted by the WAF patrol:

Two Japanese Land Based Air attacks were launched. One each from the Western Attack Force and the Eastern Attack Force.
Turning first to the WAF:

 |
| The 4 British cruisers were in line astern lead by the Danae, followed by the flagship Exeter, Durban and Dragon. The cruisers were escorted by 7 destroyers. 9 flights of Nell bombers are in the first wave. One was damaged by AA fire with the remaining 8 dropping their payloads. |


Continued -
Currently reading a book covering the naval aspects of the invasion of Norway in 1940 had inspired me to continue with my naval campaign.
On reviewing my posts so far I noticed a glaring omission. They could really have benefitted from maps.
Maps have now been added with the map supplied in the scenario book used as the base. Ship movements are my additions reflecting events within the campaign.
A couple of the maps are included here providing a brief summary of movements and actions so far.
 |
| Force Z sortie during turn 0. |
 |
| Turn 1. The only contact occurred when a sweep conducted by the USN lead by the aging cruiser 'Marblehead' was intercepted by an IJN patrol. The end result was not pretty for the USN. |