Focussing on the Dutch CenGroup, their flagship has pulled out due to damage sustained in a bombing attack. The flag has been transferred to the light cruiser Java and the group has continued north with the intention of disrupting a Japanese convoy headed for the Malay peninsular.
 |
| Before they have any chance of engaging the convoy, they in turn are intercepted by the Japanese Distant Cover Group under the command of Admiral Kondo in the heavy cruiser Atago. |
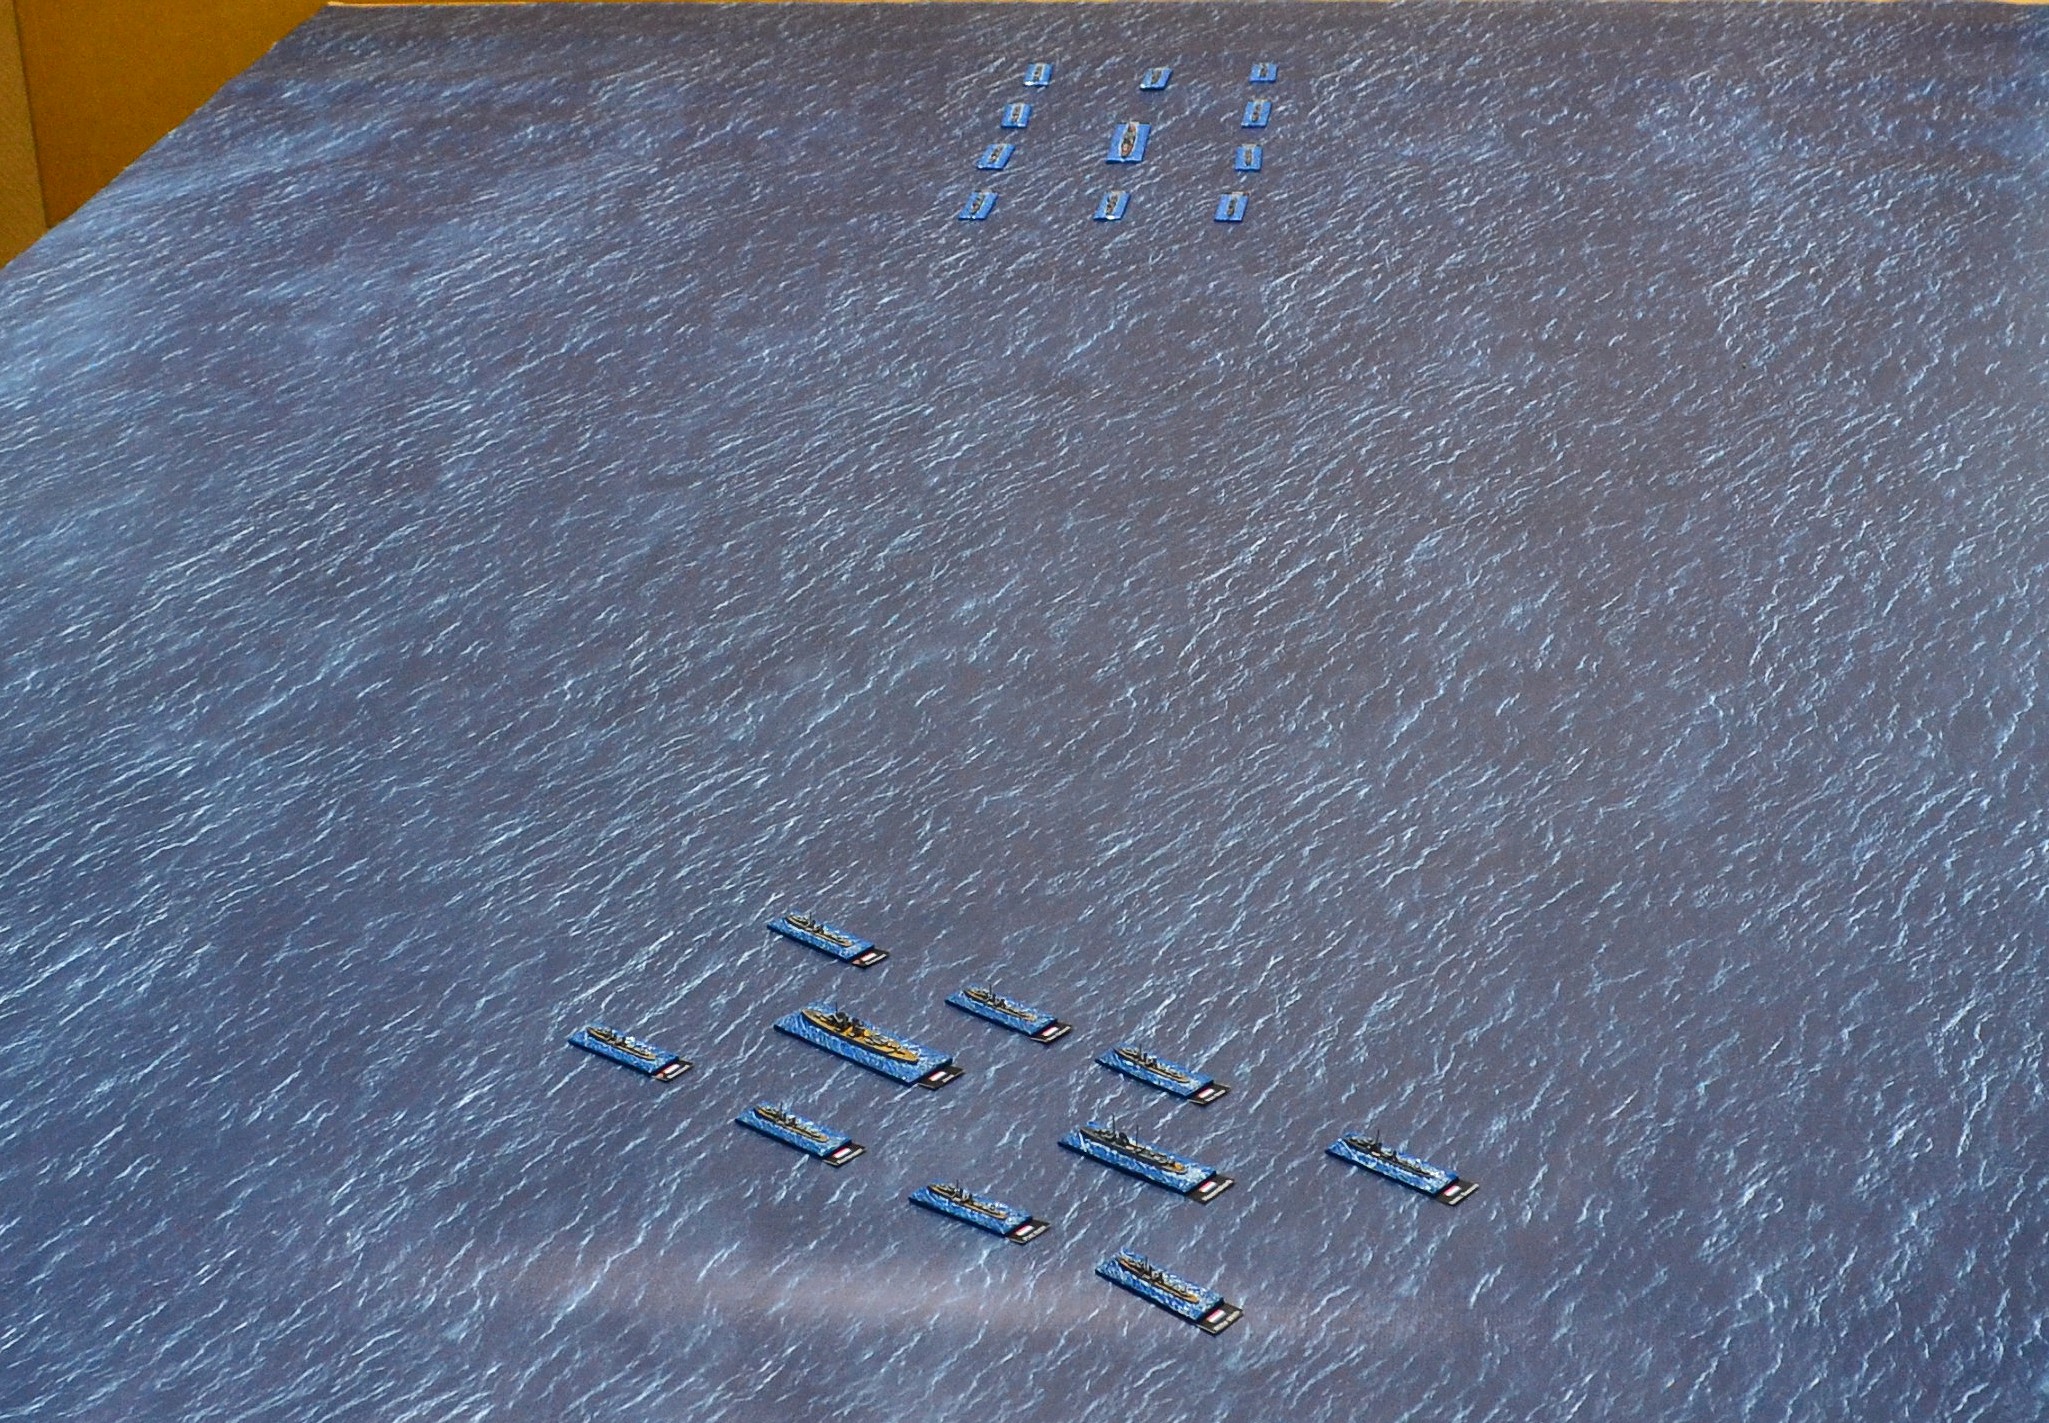 |
| Nearest the camera are the Dutch consisting of 2 light cruisers and 8 destroyers sailing north west. At the top of the photo is the Atago group consisting of 1 heavy cruiser and 10 destroyers approaching from the north. The action starts during the 0400 - 0800 watch and therefore during the dark hours at this stage. No ships have yet been spotted by either side. After 10 turns dawn will break. Neither side has the benefit of radar. |
Continued -
 |
| CenGroup with the cruisers Java and Heemskerck in the centre. |
 |
| Atago in the centre surrounded by its destroyer escort. |
 |
| Turn 1. Models replaced with counters representing vessels not yet acquired. 3 rain squalls move in further hampering visibility. |
 |
| Turn 3. The gap closes and as the Dutch clear the nearest squall, 2 of their destroyers spot 2 Japanese destroyers. The Dutch destroyers immediately open fire. Their shells plunge wide but the action has now begun. |
 |
| Turn 4. The weather improves to force 2 with light winds which sees the squalls dissipate. Destroyers on both sides are acquired and the powerful searchlights on Japanese ships illuminate 2 of the Dutch vessels. The Dutch have to rely on starshells illuminating one of the Japanese destroyers. Both side open fire and accurate shooting by the Evertsen hits the Amagiri knocking out 2 hull boxes. In reply several 5" shells strike the Evertsen knocking out both forward 4.7" turrets but more importantly, the depth charge rack is hit causing a fire. |
 |
| Turn 5. Banckert's destroyer division turns hard to starboard and immediately finds itself illuminated by several Japanese searchlights. An exchange of gunfire ensues with the lead destroyer in Banckert's division, the Witte de With, being the focus of Japanese attention. It escapes with just one hull box gone and a torpedo tube mount destroyed. The Evertsen fails to douse the fire and is hit again also knocking out a torpedo tube mount and causing a 2nd fire. The Dutch give as good as they get with the Amagiri suffering badly. It loses 2 gun turrets and an engineering hit reducing its speed. The Yugiri also suffers an engineering hit. |
Turn 6
 |
| All Dutch ships have now been acquired by the Japanese. With a better idea of Dutch movements, a Japanese destroyer division doubles back (top right of photo) followed by the Atago accompanied by 2 destroyers. |
 |
| The Yugiri empties one of its torpedo mounts towards the Banckert. Of the 3 fired one finds its mark blowing Banckert out of the water. Elsewhere both sides exchange fire with neither side gaining the gunnery upper hand. |
Turn 7
 |
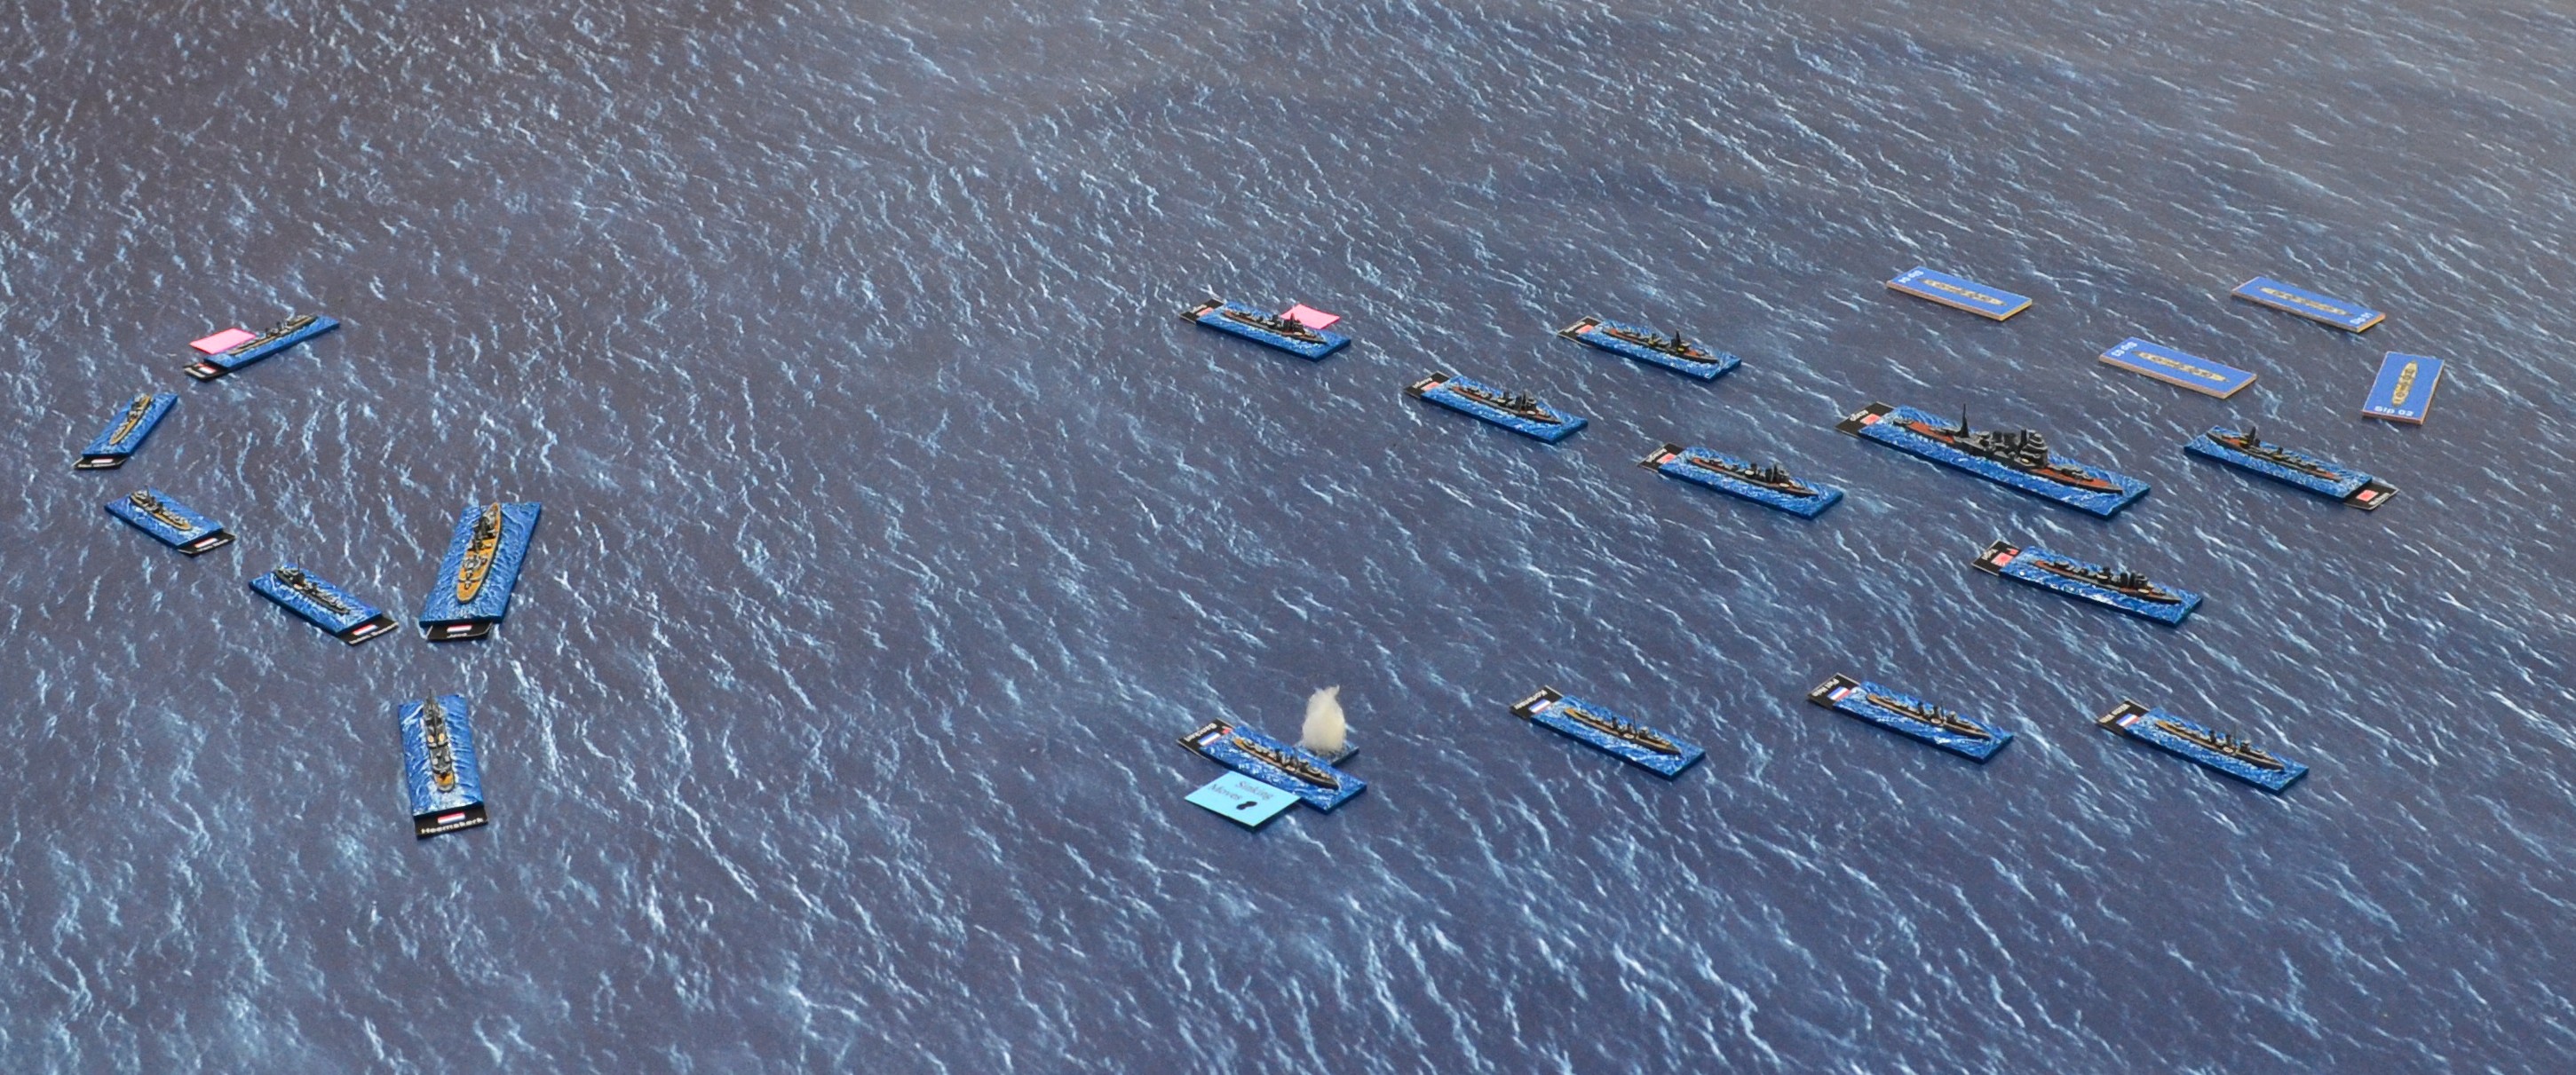
| An overview of the turn. The remaining 3 destroyers of Banckert's division reform, pouring broadsides into the nearby Japanese destroyers (bottom right). |
 |
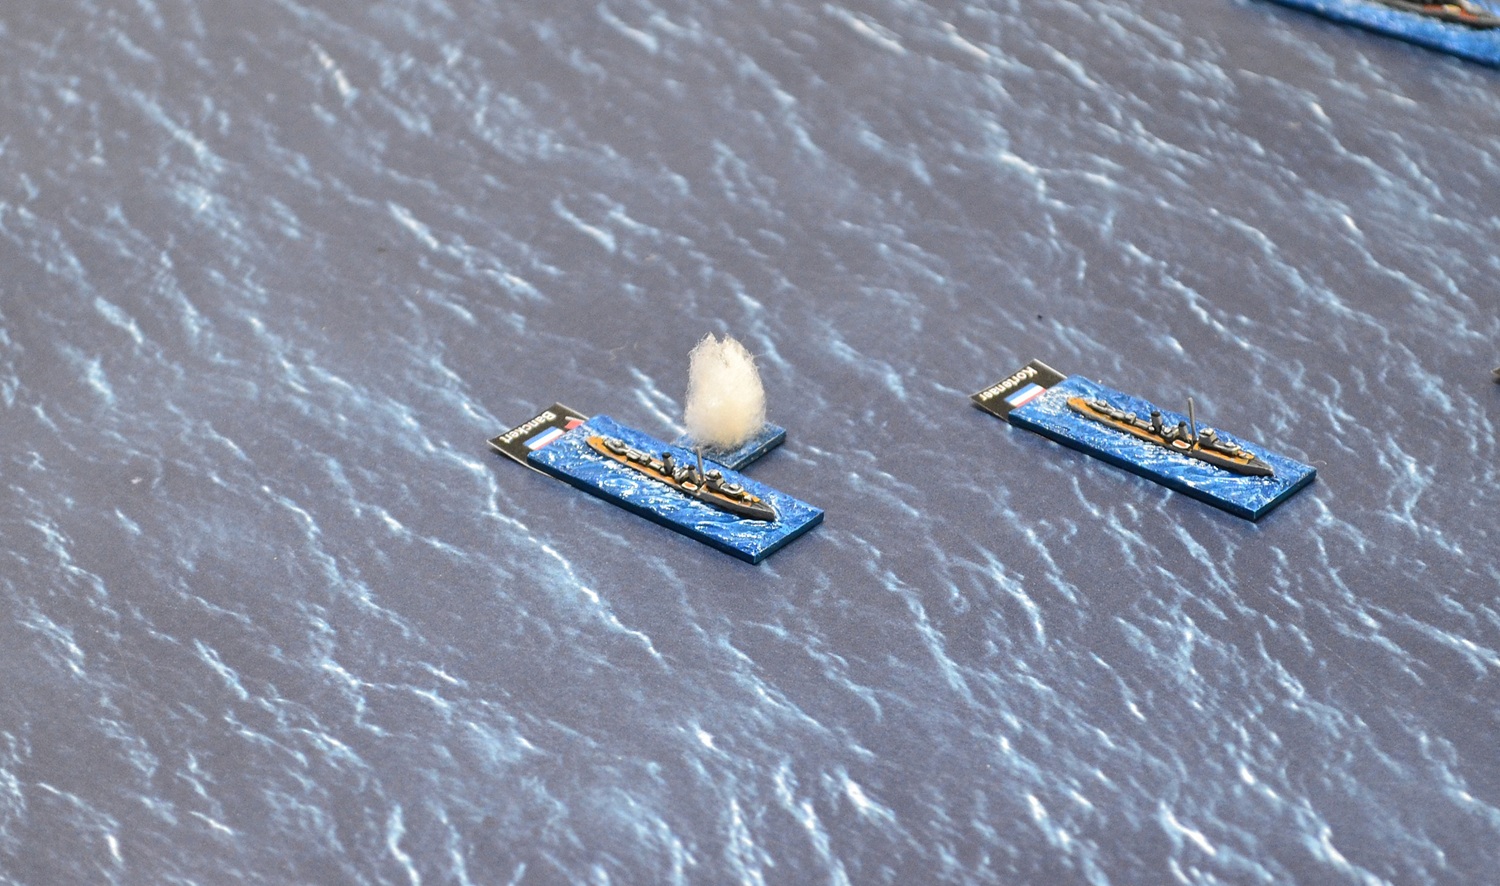
| Torpedoes were launched by both sides with most missing their targets. One salvo from Witte de With missed their primary target but continued towards the Nowake. 1 of the 3 torpedoes struck the Japanese destroyer astern breaching a bulkhead and causing flooding and a fire (middle of photo). |
 |
| A top down view of the action. The Nowake was turning hard to port following the Atago when the torpedo struck. |
 |
| The Dutch attempt to get good firing resolutions by both guns and torpedoes. |
 |
| The light cruiser Heemskerck had been commissioned in May 1940 as Holland fell to the Germans. It was though incomplete without armament and was equipped in the UK by the only naval guns available at the time, 10 x 4" guns in 5 twin turrets being designated an AA cruiser. I have a soft spot for this plucky little cruiser which in reality more resembles a large destroyer. It's 4" guns are making little impression so far when a 5" shell from the destroyer Sagiri penetrated the barbette of 'A' turret. The ship was in danger of a catastrophic explosion and only had one chance to flood the magazine extinguishing the fire. Success! The ship is saved with the loss of 'A' turret a small price to pay. |
Turn 8
 |
| An overview at the end of turn 8. The last of the Japanese ships have now been acquired (top of photo). |
 |
| Bottom right - the Witte de With now acts as division leader having watched Banckert sink beneath the waves. It leads the remaining destroyers away from the main Dutch force seeking to draw away some of the Japanese ships. A Japanese destroyer division lead by the Yugiri duly obliges confident that their superior firepower will quickly despatch the smaller Japanese vessels. All does not go quite according to plan for the Japanese. All 3 Dutch destroyers concentrate their fire on the Yugiri knocking out a torpedo tube mount. The latter though was already in trouble with bulkhead flooding which it failed to stem reducing its speed to 15 knots. The Japanese failed to score any hits on their opposite numbers. |
 |
| The Java makes a hard turn to starboard followed by the Heemskerck with the intention of engaging the Atago as soon as possible. Luck was not on its side. Using only its forward turrets, the Atago struck the Java with 3 x 8" shells. 3 hull boxes and a gun mount were destroyed reducing its speed to 9 knots and in danger of sinking. |
 |
| The sighting of the Japanese destroyers rapidly bearing down on them was something of a shock for the Dutch. On the left, the Dutch destroyer division leader, the Evertsen, successfully extinguished its fire and with 2 other destroyers began engaging the Japanese with 4.7" shell fire scoring no hits. Their priority now was acquiring torpedo solutions. |
Turn 9
 |
| Catastrophe! Reduced to 9 knots the Java was vulnerable to a torpedo strike. They found 8 headed their way from a Japanese destroyer and 2 found their mark. This was too much for the Dutch flagship causing her to sink. The loss of the Java signalled the end of any hope for the Dutch in reaching the convoy. Even in the unlikely event that they defeated the Japanese patrol, they would have been so battered it would have rendered it impossible for them to make any impression on any convoy. A decision was therefore made for all ships to break off and head for home in the hope of preserving as much as possible for future operations. |
 |
| To the south, the Witte de With leading the destroyers Piet Hein and Kortenaer were still capable of making good speed and at a steady 30 knots began to pull away from the pursuing Japanese lead by the destroyer Yugiri. All 3 Dutch destroyers concentrated their fire on the Yugiri. Remarkably accurate shooting added a second bulkhead breach reducing her speed to 10 knots and fighting for her life. |
 |
| Heemskerck (bottom left) accelerated to maximum speed and began to pull away as a lucky hit from a 5" shell caused a fire. The Evertsen lead destroyer division began launching their torpedoes at the approaching Japanese hoping to disrupt any pursuit. 2 Japanese destroyers were hit with both suffering bulkhead breaches and fires but otherwise were lucky to have survived reasonably intact. |
Turn 10
 |
| With dawn fast approaching the Witte de With division makes good progress away from the Japanese destroyers and once again displayed superb shooting from the rear turrets of the Piet Hein and Witte de With. Hits were scored on the now leading Japanese destroyer, the Amagiri. Having already sustained an engineering hit which it had yet to repair, another brought the Amagiri to a stop. Even worse for the Japanese the Yugiri failed to stem bulkhead flooding and sank. |
 |
| The Evertsen had already suffered significant damage and it was clear there would be no prospect of escape. The remaining 3 destroyers were ordered to break away with the Evertsen heroically sacrificing itself to buy more time. Only 2 of its 4 single barrel 4.7" turrets were still operational when incoming fire from 3 Japanese destroyers added to the carnage. 'X' turret was destroyed and significant hull damage reduced its speed to 11 knots. All Dutch torpedo tubes were now empty but this was not the case for the Japanese who fired several salvos towards the retreating destroyers. |
Turn 11
Dawn breaks!
 |
| Amagiri successfully repairs one of its engineering hits and gets back underway. It leads it's division (top of photo) hoping to acquire a torpedo solution on the departing Dutch destroyers but quickly realises there would be no prospects of scoring any hits given their speed. A decision was taken to conserve their torpedoes and fire off some parting shots, all of which missed. |
 |
| To the north, the Dutch destroyers along with Heemskerck lay smoke. |
 |
| Desperately trying to the flooding from 2 bulkhead breaches and incoming fire from 3 Japanese destroyers finally sealed the Evertsen's fate. Its job had been done though diverting Japanese vessels from the retreating Dutch ships. |
 |
| The Atago is the only Japanese vessel capable of overhauling the fleeing Dutch vessels at this time. Not knowing if the Dutch destroyers had any torpedoes left combined with a 4" shell from Heemskerck knocking out one of its torpedo mounts settled the matter. An interception of the convoy had been prevented and several Japanese destroyers had been badly damaged. The order was transmitted to call off any pursuit and disengage. |
 |
| An overview at the end of the game as both fleets disengage. Several ships though were still making emergency repairs in order to save their ships. For the Dutch, the Heemskerck struggle to contain a fire. It was extinguished but not before losing another hull box. For the Japanese, the principle loss was the destroyer Inazuma. They lost their battle fighting fires and a bulkhead flooding leading to the loss of the ship. |
Any hope of the Dutch intercepting a convoy was destroyed with the loss of the Java. In addition they had expended all their torpedoes. Considering they were outgunned they acquitted themselves exceptionally well. Their destroyers displayed remarkably accurate gunnery causing a great deal of damage.
For the Japanese, they struggled to take advantage of their much vaunted 'Long Lance' torpedoes and their gunnery fell below what was expected of them. Their consolation was that they achieved their role of preventing any interference with an invasion convoy but on paper they should have dealt with the Dutch easily.
This underperformance by the Japanese is reflected on the battle results:
Japanese losses:
Sunk: 2 x destroyers
Crippled: 2 x destroyers
Disabled: 3 x destroyers
(7 out of 10 destroyers unavailable for the next turn!)
Dutch losses:
Sunk: 1 x light cruiser, 2 x destroyers
Crippled: 1 x destroyer
Disabled: 1 x light cruiser
Crippled ships have to be escorted from the map and not available for the rest of the campaign.
Disabled ships will now go to drydock for repair.
This translates to the following victory points for this turn:
Japan: 8.5
Allies: 7.5
Fascinating engagement, Jon. Much enjoyed.
ReplyDeleteMany thanks for that Jonathan. Pleased you enjoyed it.
DeleteExcellent job with the AAR. Felt a lot like reading sn official
ReplyDeleteReport
Many thanks pancerni.
DeleteOne in the eye for Japanese, but even they should've been impressed by the Evertsen's sacrifice.
ReplyDeleteThanks for that Rob
DeleteGreat fun and a very good battle report. Thanks Jon
ReplyDeleteMany thanks Richard
DeleteAnother great AAR Jon and the Dutch put up a good fight for sure, even if they were lucky to avoid those deadly Japanese torpedoes!
ReplyDeleteMany thanks Steve. Yes, not what I was expecting given the odds against the Dutch.
DeleteIt certainly could have been a lot worse for the Dutch. Another excellent battle report!
ReplyDeleteMany thanks Stryker
DeleteSo impressive that you are able to handle this dispassionately, whilst giving such an exciting narrative. I am inspired by your efforts. (Being both hard of hearing and without realistic opponents, your endeavours inspire)
ReplyDeleteMany thanks for this Steve, much appreciated. Sorry to learn of your hearing loss, it can be very frustrating.
DeleteStirring action! I thought the forces evenly matched until I read your note about Heemskerck. Reading accounts of naval battles, one feels that they are attended by a good deal of luck - good and bad. Perfect for war gamers!
ReplyDeleteCheers,
Ion
Many thanks for that Ion.
Delete