The French plan of attack differed from the original in that they aimed to turn both flanks with less emphasis on the allied centre at least in the initial stages.
On the French right, the attack on the Medellin would be delayed. Ruffin would be tasked with clearing the Spanish infantry from the Segurilla hills while Merlin and Beaumont's cavalry supported by a brigade of dragoons from Maubourg's division would see off the allied cavalry. While this is underway, the grand battery on the Cerro de Cascajal along with skirmishers would clear the western slopes of the Medellin of any British forces.
A combined attack from Ruffin and Vilatte would then descend on the Medellin and hopefully overwhelm it.
On the French left, Leval will aim to capture Talavera with Liger-Belair angling to assault the Pajar redoubt and the junction between the Spanish and British troops. All being well they will rout the Spanish allowing them to turn on the British right flank. Lapisse will keep the British occupied in the centre while both flanks are rolled up.
 |
| The first turn consisted of a purely artillery barrage with both sides targeting infantry formations. |
Continued -
 |
| Skirmishers now swarmed between the lines exchanging fire. The French attempted to begin their assaults but only Grandjean's brigade of Leval's division responded! Outraged, the Corps and Divisional commanders promptly joined the slack Brigade commanders to get them moving. |
 |
| Ruffin finally responded and got his entire division moving towards the Segurilla hills. He was conscious of the presence of British cavalry on the opposite side of the valley but confident Merlin would be close at hand to deal with them. Turning in his saddle Ruffin was somewhat alarmed to see Merlin static with a gap opening between his columns and the supposedly supporting French cavalry. |
 |
| Over on the Medellin, Tilson pulled back his brigade onto the reverse slopes to protect his troops from the hail of shot from the French grand battery. Down in the valley, the heavily outnumbered British skirmishers were suffering badly from the more numerous French. |
A note here about the skirmishers. I have been experimenting over several games in creating a more abstract version of that contained within the rulebook. You will have seen in the Orbats 'SK' values which equate to the number of dice rolled to hit. The skirmishers you see in the photos purely represent the fact that skirmishers have been deployed from a brigade or battalion and do not accurately depict the number of figures deployed.
I will cover my developing skirmish rules in the conclusion.
 |
| A double '6' rolled by French skirmishers at Langwerth's brigade startled their commander's horse which bolted straight into French lines. The hapless Langwerth is presented to Joseph Bonaparte. |
 |
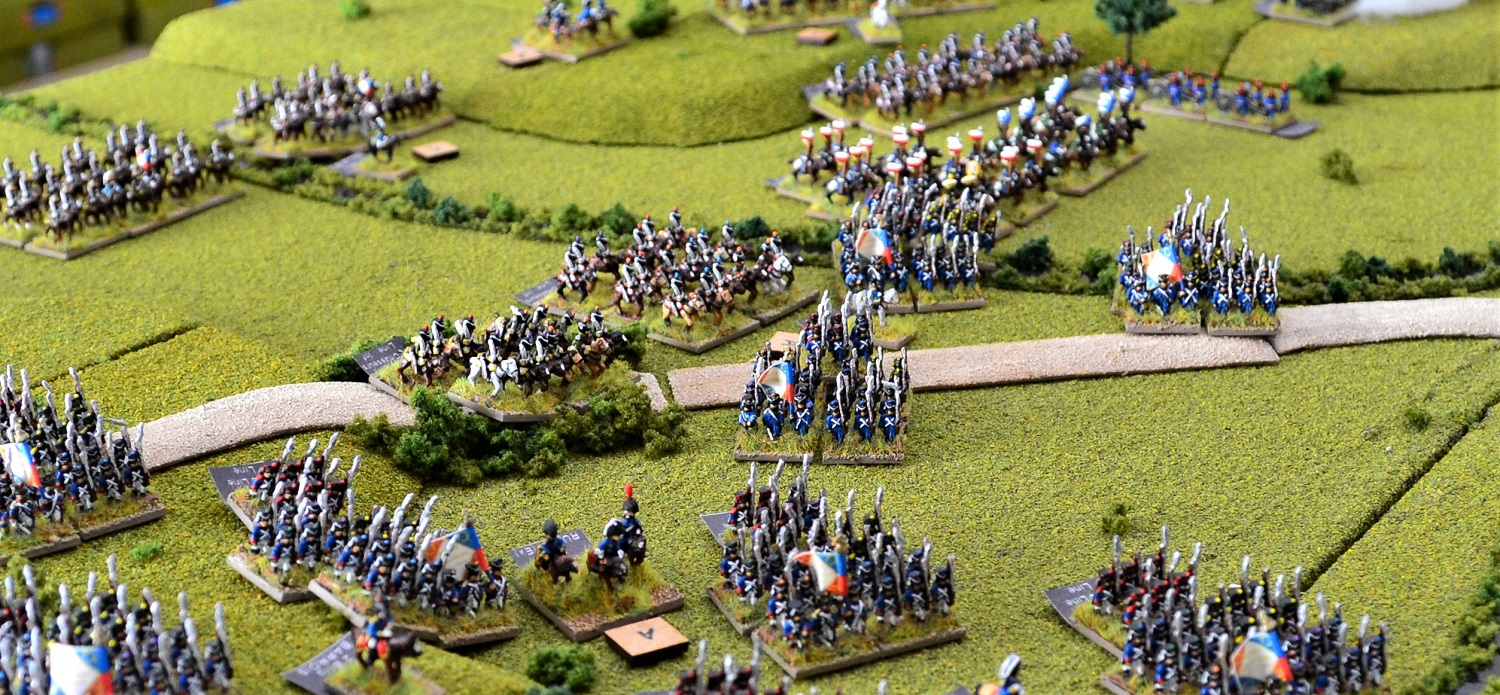
| On seeing the static French cavalry and their infantry marching tantalisingly close, Anson saw glory beckoning and ordered the advance of his two light cavalry regiments. Ruffin's division naturally formed square in response to this threat. |
 |
| There was now no holding the British and German cavalry back with both launching into a charge on the squares. Both crossed the unseen ravine unforming the 23rd Light Dragoons. The KGL Light Dragoons successfully maintained their formation as both ploughed into the French squares. Both cavalry regiments failed to make any impression on the squares with Anson receiving a serious wound. He would continue with his command but now classed as 'poor'. |
 |
| Ominously for Anson's brigade, the French cavalry on this flank sprung to life and began advancing towards them. |
 |
| Nearly all French units were now on the move having responded to the various messengers delivering orders. Here British and Spanish artillery sent cannon balls ploughing into the seemingly endless ranks of French infantry of Liger-Belair's division who advanced towards the Pajar redoubt. |
 |
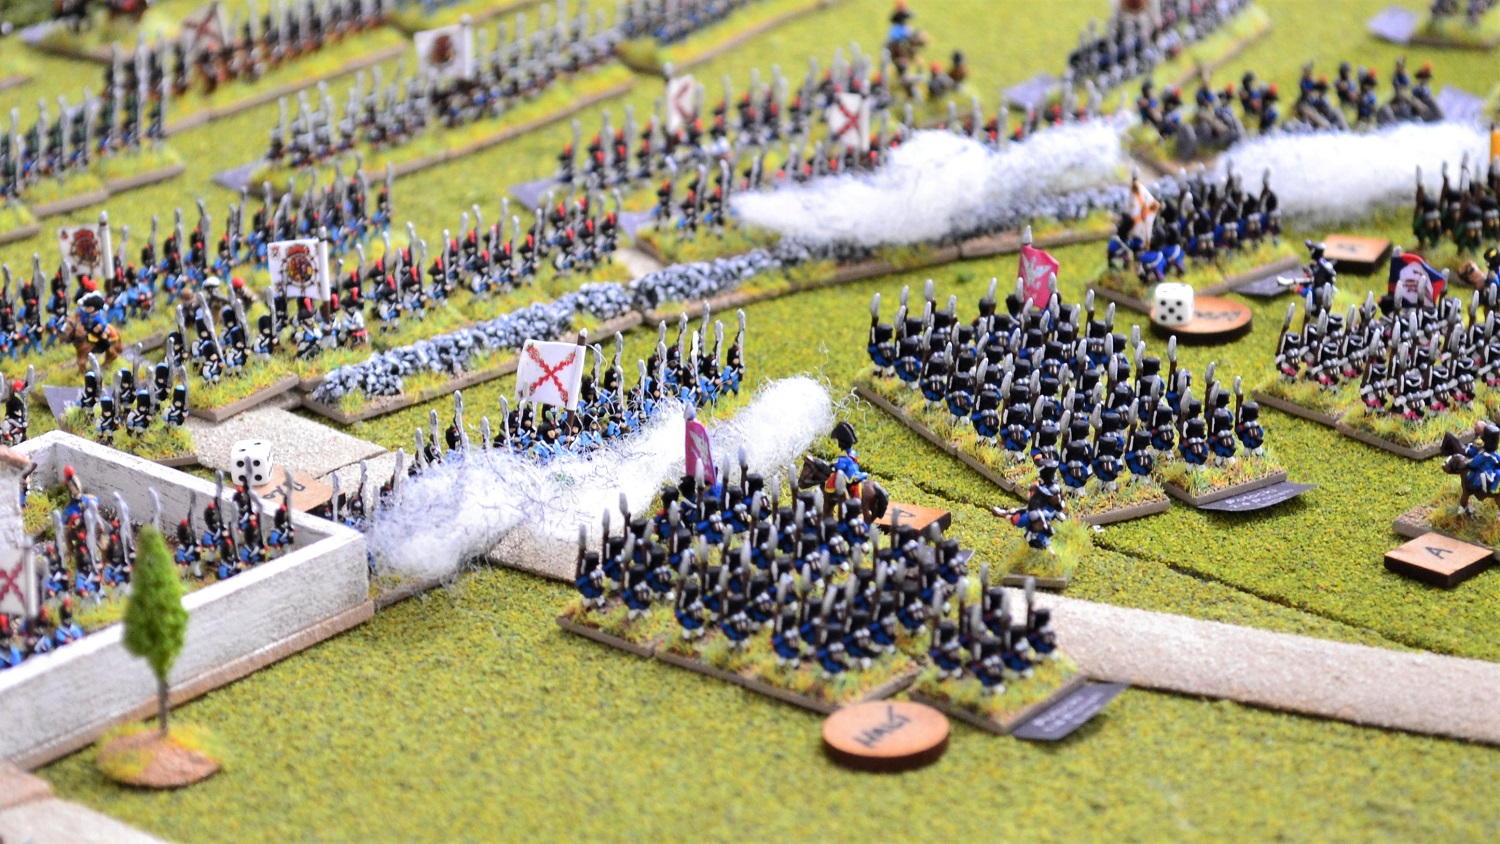
| Leval's division had made a hesitant start and as a result had become a little disjointed. Grandjean's German brigade was ahead of the rest and fancied their chances of attaining glory. They emerged from the olive groves into murderous Spanish artillery blasting canister into their ranks. The Frankfurt battalion on the right in the photo suffered particularly badly but nevertheless held its nerve. |
 |
| Several of Leval's battalions had become unformed passing through the various batteries slowing their advance. |
 |
| This left Grandjean's Germans alone at the front a little longer than planned (middle left). They redeployed into line in an effort to reduce casualties primarily from Spanish artillery, and to fire their own volleys into the Spanish troops. |
 |
| In an effort to relieve pressure on Grandjean, Milhaud launched the 1st Dragoon Brigade into a charge on the Spanish artillery and infantry. The Spanish response was far more effective than anticipated with both cavalry regiments suffering heavy casualties. Neither unit charged home and in the middle of the photo the 12th Dragoons was thrown into an embarrassing retreat. |
 |
| Liger-Belair's columns angled towards the allied line under fire from the redoubt. His own brigade aimed for the Spanish infantry on the right while Rey's brigade aimed for the redoubt and the adjacent British infantry on the left. The dense columns steadfastly marched through the hail of canister from the redoubt intent on driving the defenders from their positions as quickly as possible. |
 |
| Lapisse' division moved to engage the British centre with musket fire with Laplanne's Brigade taking the lead flushing out into a line formation screened by skirmishers. |
 |
| The British line poured volleys into the skirmishers having lost most of their own. |
 |
| On the French right, having repulsed the British cavalry charge, Ruffin's division reform into attack columns and resume their advance on Bassecourt's Spanish infantry. |
 |
Anson's light dragoons have reformed either side of Fane's dragoon guards who have advanced to counter the French cavalry threat that is materialising ahead of them.
On the Segurilla hills to the left, Bassecourt's artillery battery suffers heavy casualties from French skirmishers and promptly departs the field. |
 |
| An overview at the end of turn 7. |
 |
| The cavalry clash on the French right flank proved brutal. Merlin's brigade flung themselves at the British with mixed results. In the ensuing melees, the British saw the 4th Dragoon Guards defeated by the French Chasseurs with a reversal of fortune for the 3rd Dragoon Guards comprehensively defeating the Hanoverian Chasseurs of Beaumont's brigade. In true British cavalry tradition they launched into an uncontrolled pursuit! Both of these melees are in the middle of the photo. |
 |
| As more French cavalry regiments joined the fray, the Spanish cavalry were committed for the first time aiming to plug the gap left by the 4th Dragoon Guards (middle of photo). |
 |
| The Spanish performed surprisingly well, not only holding the line but defeating a couple of French cavalry regiments. For a brief moment the allies had the upper hand before the French dragoon brigade launched themselves at the blown horses of the Spanish and British light cavalry (middle bottom that of the infamous 23rd Light Dragoons). Although unformed by the hidden ravine, the momentum of the French cavalry proved too much for both allied regiments with the 23rd Light Dragoons, already heavily depleted, being dispersed. |
 |
| While that drama was being played out, the 3rd Dragoon Guards (middle left) had pursued some distance into the French lines. |
 |
In a brief pause in the fighting, large gaps had been left among the cavalry units on both sides although, primarily thanks to the intervention of the Dragoons, the French now had the upper hand. With half of the British cavalry eliminated and one of the two remaining regiments engaged in a reckless pursuit, it was now down to the Spanish cavalry to prevent the French from overturning the flank (bottom middle and the regiment adjacent to the building).
The French had also suffered heavily though with Merlin's brigade virtually ceasing to exist. Only the depleted Vistula Legion remained on the battlefield! |
 |
| Ruffin's division begins their assault in earnest on Bassecourt's Spanish division occupying the Sierra de Segurilla. |
 |
| The two leading French columns strike hard into the lead Spanish battalion inflicting heavy casualties leading to their dispersal. Bassecourt who valiantly stood with his troops received a light wound and retires to the rear. |
 |
| An already shaky Spanish division now saw more units turn tail and flee. A subsequent brigade (division) morale test failed causing it to break. The photo shows the situation after the division has retired losing almost half its units. Their only fortune being that the two French battalions causing their difficulties had become unformed and thus unable to pursue them. Ruffin nevertheless, urged the rest of his division on aiming to capture the heights as quickly as possible. |
 |
| The two British batteries occupying the steep slopes of the Medellin had now been destroyed by the mass batteries opposite. The isolated companies of the 60th Rifles were recalled to Donkin's brigade leaving the slopes bare of British forces. |
 |
| Observing the deteriorating situation on his left flank, Wellington orders Stewart to reposition his brigade to defend the north slope of the Medellin (middle of photo). Donkin's brigade (upper right of photo) have been ordered to reposition as a reserve on the Medellin. |
 |
| In the centre, Laplanne's brigade continued to exchange musket volleys with the British line and now reinforced by a battery of artillery firing canister. |
 |
| The French had the better of the early exchanges even causing the Guards battalion on the right to falter having inflicted heavy casualties on them. |
 |
| By the turn 10 the superior British training turned the tide with disturbingly large gaps opening up in the French line, particularly by the loss of a battalion in the middle of the photo. |
 |
| At the Pajar redoubt a French column withstood a blast of canister from a British battery before overrunning it. |
 |
| The situation worsens for the allies when a second French column gains the redoubt with the Spanish battery having evaded the charge rather than face annihilation. |
 |
| A heroic charge by the British 2/7th Line drives one of the French battalions from the redoubt. The neighbouring Spanish battalion was ordered to charge the second French occupying battalion but a siesta looked more appealing! |
 |
| On the French left flank the Spanish were proving annoyingly stubborn! The 1st Irlanda repelled a French assault (bottom left). The advancing columns of Leval's division emerging from the olive groves were taking a pounding from Spanish artillery. |
 |
| In the middle of the photo, Grandjean's brigade that had been at the forefront of the French advance, paid a heavy price for that over-confidence. Attempting to rout the brittle Spanish by repeated attack column charges lost them two of their 4 battalions breaking the brigade in the process. |
 |
| Porbeck's brigade replacing Grandjean performed little better. Rather than suicidal column charges they approached in line formation attempting to outshoot the Spanish but made little progress. |
 |
| A chink of light for the French was delivered courtesy of the two Polish battalions in Leval's division. The Spanish artillery battery that had caused so much damage was overrun by one of those battalions. Up until now the Spanish had shown remarkable resilience but their fragility finally surfaced. The destruction of the Spanish battery caused a collapse in morale throughout it's division which broke. |
 |
| Calamity however, was about to strike Liger-Bellair's division. His 1st brigade commander joined the 2/75th Line in a charge on the 1st Irlanda. The latter was having none of it and delivered a shattering volley killing the brigade commander and causing the French column to falter. |
 |
| The ripple effect of the brigade commander's death combined with several battalions failing their rally tests lead to a collapse of morale throughout Liger-Bellair's division. Both his brigades broke with the loss of 4 battalions and the photo shows the gaps caused by their absence. |
The final two photos provides an overview of the situation at the end of turn 10. Provided nothing disastrous occurs with their cavalry, the French are close to turning the British left flank. They still face the challenge of scaling the Medellin but if they succeed they could change the course of history.
The French left face a more bleak outcome with their attack for the most part repelled. A glimmer of hope has been raised by the Poles causing a Spanish division to break. The question now will they be able to capitalise on that success?
At this stage of the game it is finely balanced with both sides suffering similar losses.


Well what a spectacular looking game Jon! As always a joy to look at and hard to believe they are 6mm figures. The action is finely poised as you say and the captioned photos make it very easy to follow the battle. Looking forward to the next installment and fingers crossed for the Anglo-Spanish forces.
ReplyDeleteMany thanks Steve.
DeleteQuite the spectacle of a table. Good recount of the battle/game.
ReplyDeleteMany thanks pancerni.
DeleteWhat an amazing game! Just spectacular!
ReplyDeleteMany thanks John.
DeleteSo pleased with the Spanish performance. As a result the Allied right wing looks pretty secure when you see how many units the Spanish still have in reserve (last overview photo).
ReplyDeleteThe centre looks fairly even which should give the Allies the advantage as the defender?
But the Allied left looks in great peril with Villate's masses poised to go in once Ruffin can bring pressure to bear on the flank.
Smashing game, spectacular and your narrative really brings it to life.
Many thanks for those comments Rob. I am beginning to wonder if the French had it right first time around concentrating on the British the way the Spanish are performing!
DeleteSuperb presentation and narration, Jon. A fine standard you have established!
ReplyDeleteSuper game and table Jon! The way things are going reminds me very much of our own Talavera refight a few years back using 6mm Age of Eagles where the French succeeded in turning the British left and the Spanish on the right just melted away after some initial successes. The remaining British on the Medellin were left hopelessly outnumbered and were subsequently decimated. Very curious to see if your game will follow the same lines. Up to now it hasn’t disappointed.......
ReplyDeleteMany thanks for that Mike. Interesting to hear how your game played out and could well foretell what will happen here!
DeleteSpectacular is the word indeed, as well as stirring for the action reporting!
ReplyDeleteThe combination of Spanish, British, French and their many allied contingents makes this an especially colorful action on the tabletop, too!
Many thanks Peter. You have to admire the Spanish uniform stylists! Very colourful indeed.
DeleteEnjoyable read, and great eye candy.
ReplyDeleteJon, they have all said it; a marvellous opening to a sensational version of Talavera! The good thing about being late to this is that I can look at all the parts! :)
ReplyDeleteRegards, James
Lol. I feel that way when I binge watch TV series that I am late to!
Delete