Turn 25
 |
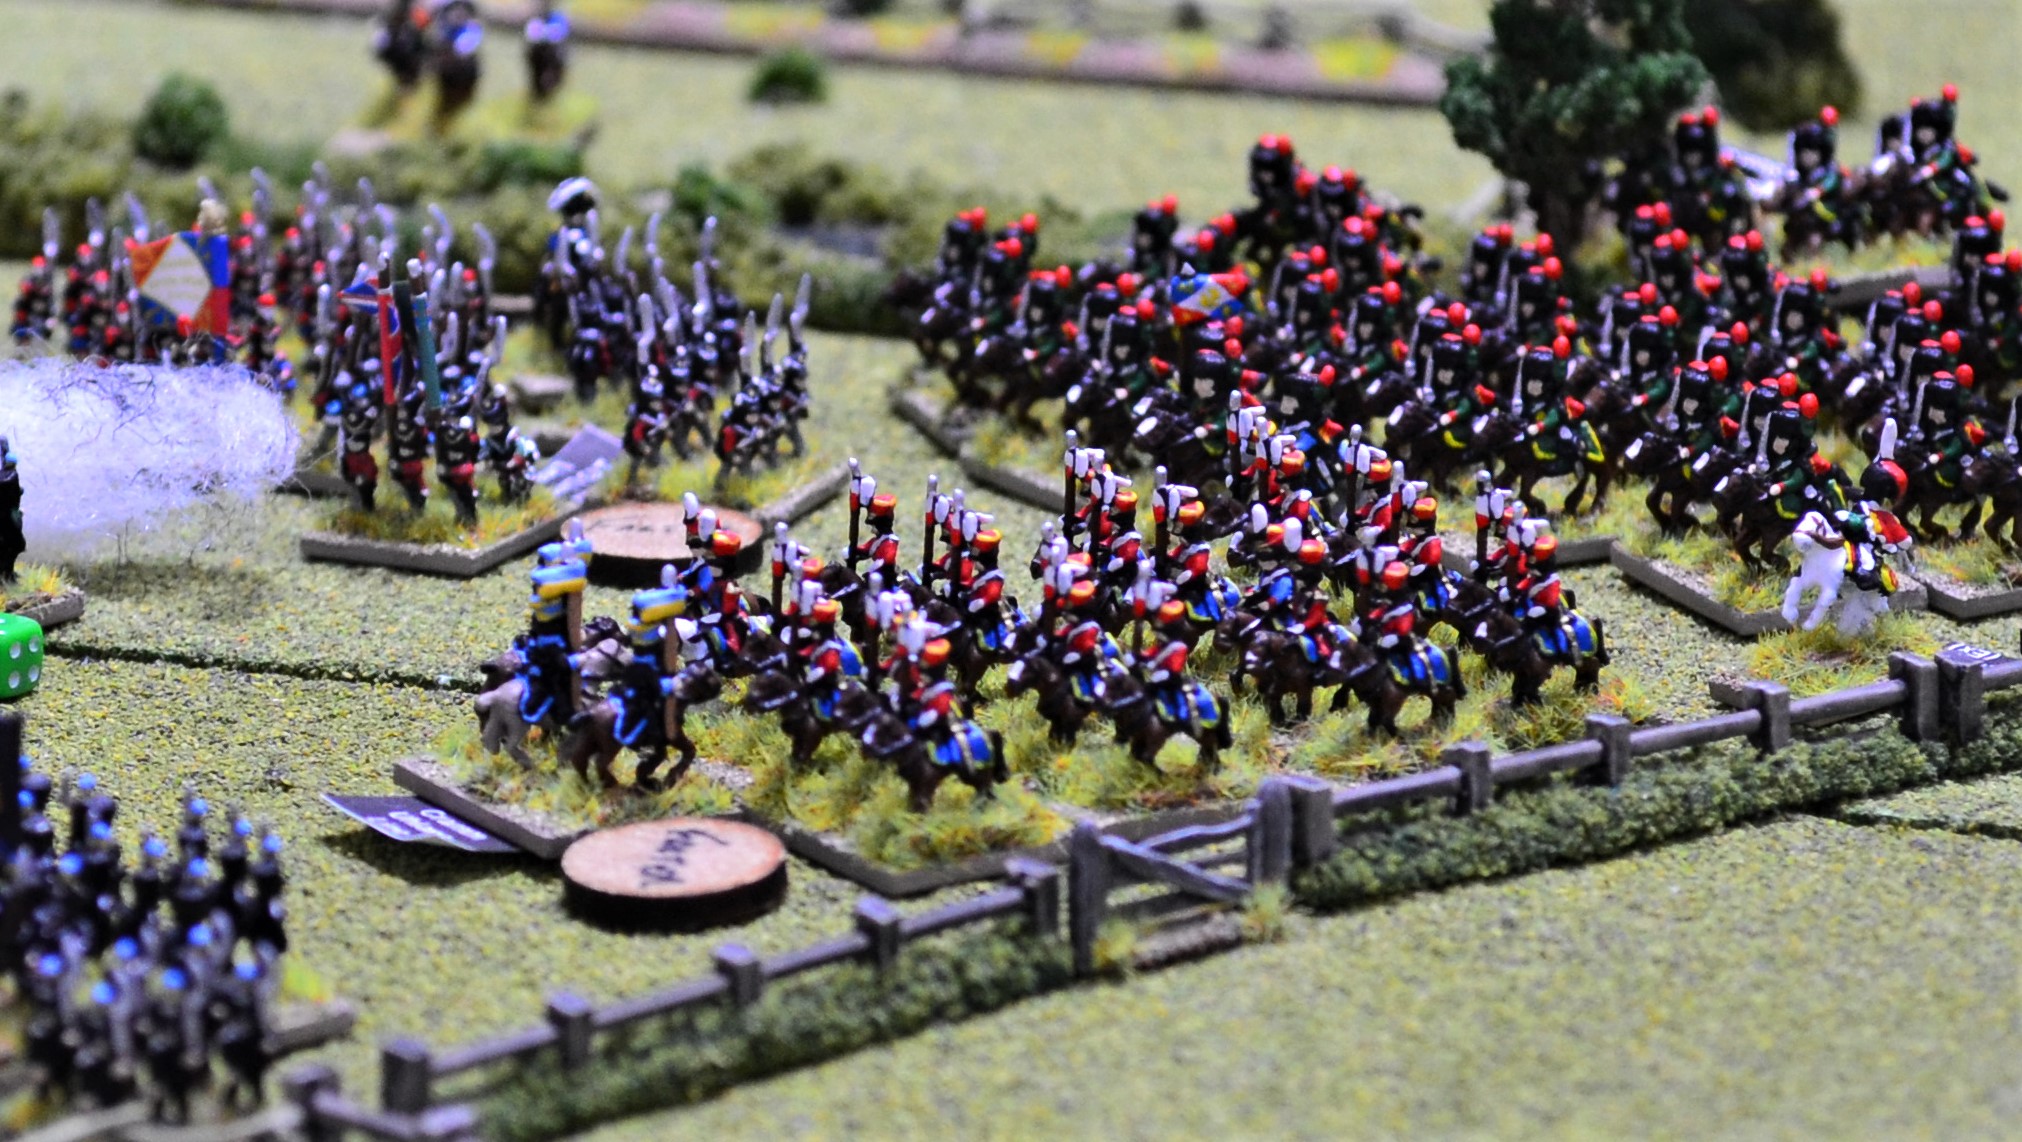
| Squares are formed as the great mass of Guard cavalry swarm over the river. The lancers temporarily halt to form up. The only allied cavalry in a position to intercept them is a lone troop of Brunswick lancers (lower middle left). |
 |
| The view from behind the allied lines. One square is caught between the cavalry and an approaching Young Guard battalion column. They open fire on both but fail to make much of an impact. The green micro-dice indicate which units will need to test morale the next turn as a result of a dispersing 33rd Line and an artillery battery. |
Continued -
 |
| General Hill countermands his previous order to Ponsonby and directs him to turn his attention towards the Guard cavalry. |
 |
| There is a brief lull on the allied left flank as French cavalry reform before their next attack. |
 |
| The Hussars of the 4th Cavalry Division are given new orders to attack the allied cavalry, but they are held up by Amiel in the lead who does not get the message and halts his troopers. |
Turn 26
 |
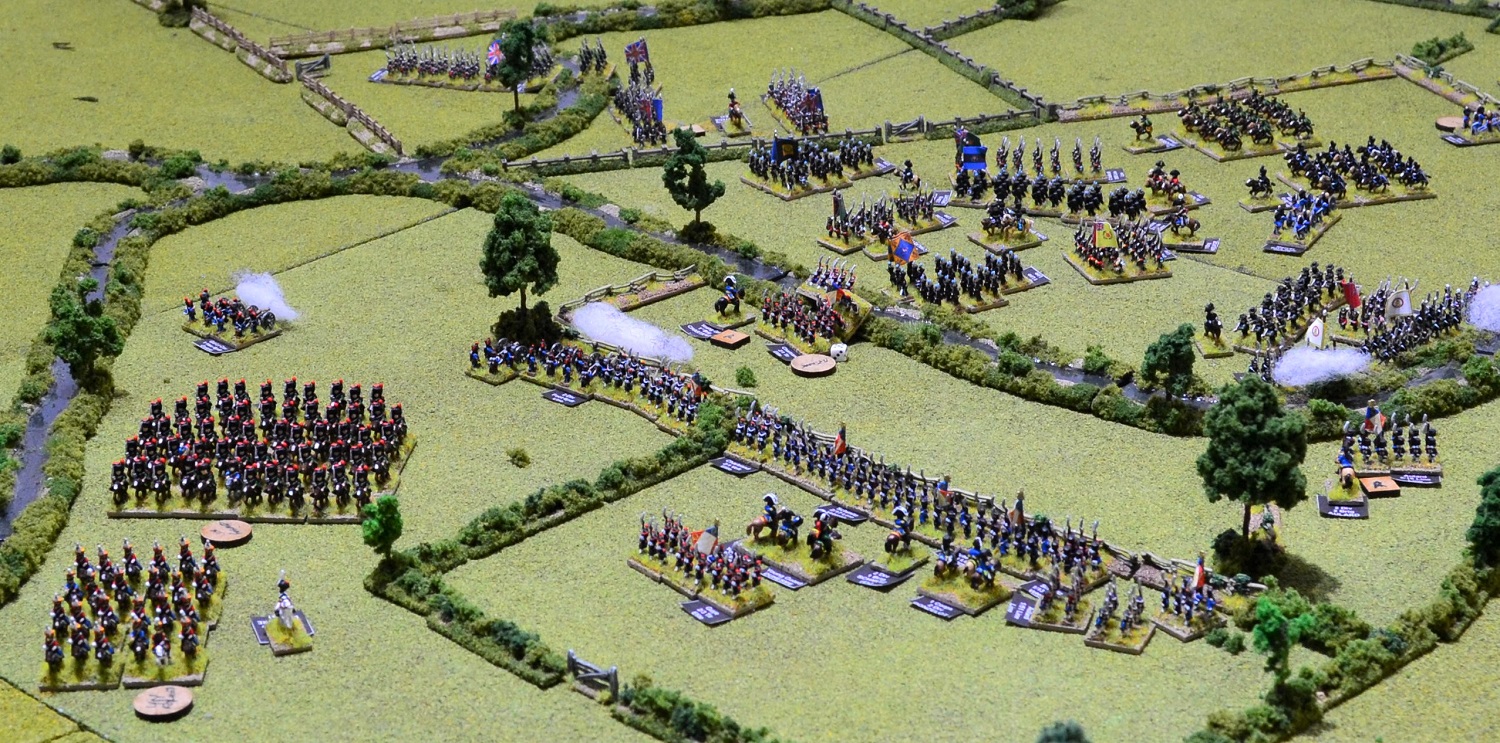
| On the allied left flank a mass of cavalry continues to build on both sides. |
 |
| The two regiments of the now deceased Merlen's brigade or ordered to charge the unformed Cuirassiers by their divisional commander Collaert. Despite both French regiments being static and unformed, the Dutch/Belgian light cavalry failed to make any headway. An ADC has arrived to replace Merlen only to find his new command being pushed back. |
 |
| To the rear of the allied left flank the survivors of D'Aubreme's Dutch and H Halkett's Hanoverian brigades move to form a reserve behind the hedge line. |
Turn 27
 |
The crunch match begins. The only hope of victory for the French was now to use their cavalry to roll over the allied flank. All brigade commanders are on attack orders and throw all regiments that are able across the river. The allies respond by launching charges across their entire front. The numbers indicate the separate melees which I will detail below:
1. The 2nd Life Guards charge the still unformed 1st Cuirassiers lead by Dubois. The British cavalry makes short work of the already worn Cuirassiers reducing them below half strength and causing them to disperse from the field.
2. Somerset himself leads the 1st Life Guards into the newly arrived 5th Hussars lead by Amiel. Again the British Guard cavalry were resoundingly successful forcing the Hussars to retreat with heavy losses. In the process, Somerset received a light wound and had to retire for treatment. Without his steadying hand the Life Guards decided to follow British cavalry tradition and pursue the defeated enemy.
3. Ghigny leading the 4th Dutch Light Dragoons and Dornberg leading the British 23rd Light Dragoons jointly charged the 10th Cuirassiers. The French cavalry put up a good fight but was overwhelmed by sheer numbers also reducing their strength below 50 % and they too would disperse. The Dutch cavalry resoundingly passed their pursuit test and maintained superb discipline. Not so the British Light Dragoons who would launch an uncontrolled charge towards the nearest enemy.
4. The 1st Dutch Carabiniers successfully reinforced the ongoing melee between the 3rd Dutch Carabiniers and the 7th Cuirassiers. The extra numbers proved just enough to tip the balance and the Cuirassiers were pushed back. |
 |
| The aftermath of the various melees with casualties removed and two Cuirassiers regiments having dispersed. |
 |
| Morale collapsed in Piat's Brigade of the 7th Division. One battalion fled the field having lost more than 50% casualties leading to a Brigade morale test which it failed. The two remaining battalions had each lost more than 35% casualties and as a result both would also flee. The loss of the brigade has lead to a number of morale checks as indicated by the green micro dice which will be tested in the next turn. |
 |
| All orders have now got through to retire to the fence line. In the upper middle of the photo, Chartrand begins to pull his lone battalion back. |
 |
| The allies now reform with the intention of re-establishing their defensive line along the river. |
Turn 29
 |
| More bad news for the 7th Division. With the routing of the 2nd Brigade, Villiers' 1st Brigade saw a similar collapse of morale with the loss of the 2/11th Light Battalion who routed at the sight of their mates fleeing past them. The subsequent brigade morale test failed and they will break to the rear in the next turn. The 7th Division is now reduced to just 2 shaky infantry battalions. |
 |
| It was abundantly clear to Grouchy that there was now no prospect of victory, especially given the imminent arrival of nightfall. He therefore orders all units to retire back across the river. |
 |
| In an impersonation of the "Grand Old Duke of York" the Union brigade are ordered to about face again and to move to the allied left flank. |
Turn 30
 |
| The pursuing 6th Cuirassiers from the last turn lost contact with the 23rd Light Dragoons and therefore broke into an uncontrolled charge towards the nearest target being the 1st Dutch Carabiniers. Trip lead the counter-charge which proved to be a historic win for the Dutch conscripts making the French cavalry pay for their impetuosity. The Cuirassiers were comprehensively routed! |
 |
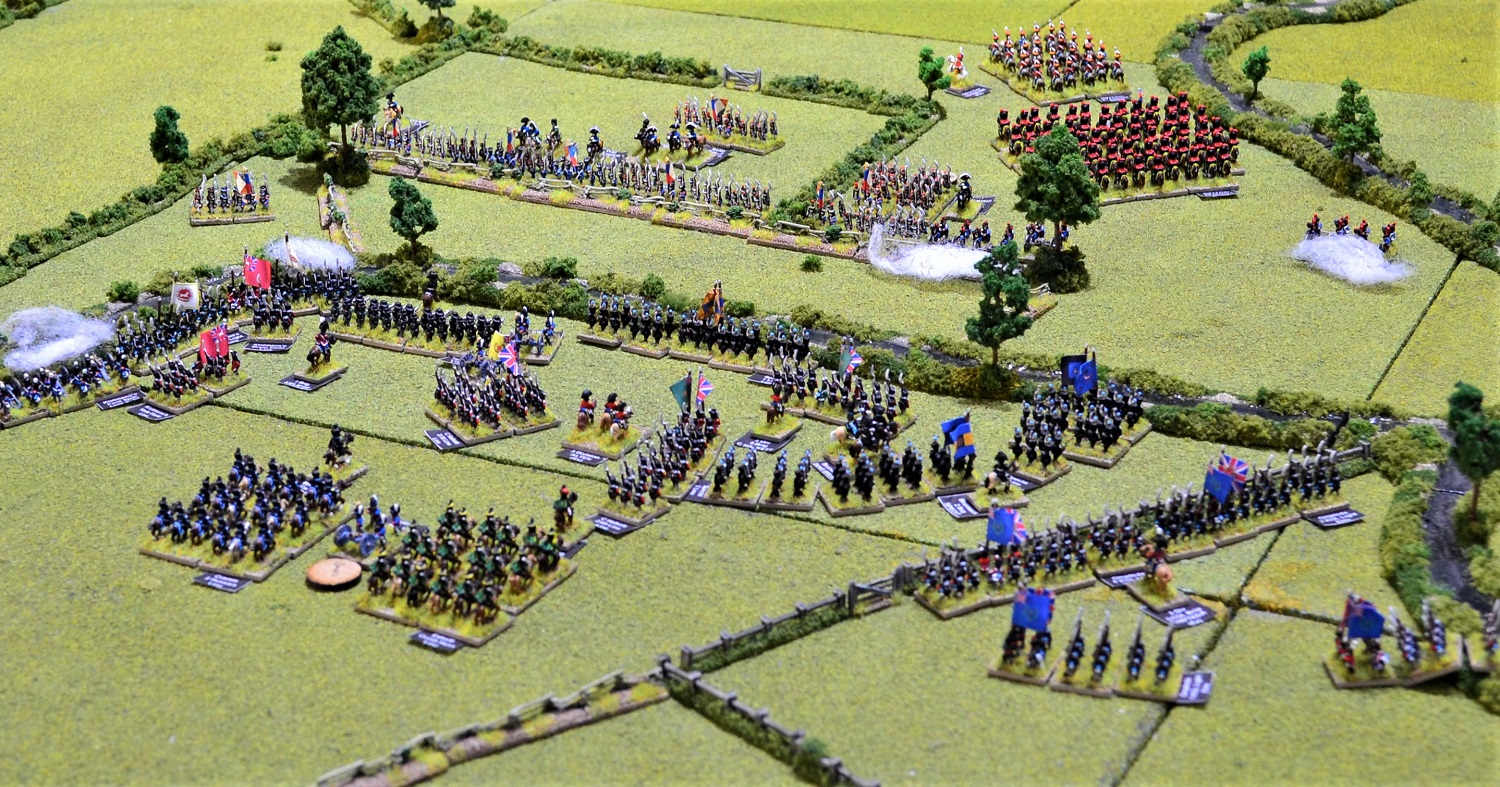
| An overview of the allied left flank. |
 |
| With the French having broken contact the allies on their right flank continue to reposition along the line of the river. |
Turn 31
 |
| A final blow to the French came when the 6th Cuirassiers failed to rally from rout and fled the field. A handful of casualties were caused by a final round of artillery fire from both sides and with only one turn left before nightfall I concluded the game here. |
A selection of photos showing the final positions of units at the end of turn 31:
Grouchy's gamble failed and Hill will be pleased at the performance of his largely inexperienced force. It was always going to be a tall order successfully forcing a river crossing without more resources. That said it did momentarily come close as the Cuirassiers began to make some headway. The allies though did not give them enough time to organise a coordinated well-ordered attack, throwing in their own cavalry units when most of them were still unformed from the river crossing.
On the opposite flank the Guard light cavalry also caused the allies a brief panic as they surged into their position. Both flanks though suffered from the same problem, a lack of supporting infantry. They had already suffered heavy losses in the initial musketry exchanges. Losses they could ill-afford.
For the allies, the Dutch/Belgian cavalry outperformed to the pleasant surprise of Hill. He was in the process of reinforcing that flank with the Union brigade convinced they would be needed. The Dutch cavalry though played an important role in frustrating the French cavalry attacks.
Grouchy's Army of the West has suffered a battering as reflected in the casualty returns:
French: 342, recovered 90, overall loss 252.
Allies: 258, recovered 95, overall loss 163.
Even worse for the French their best troops took some of the largest losses. Most notably the Young Guard and the Cuirassiers regiments.
On the back of Napoleon's defeat against the Prussians and Soult's Army of the South defeat against the Anglo-Portuguese, the long run of French victories have come to an end. All 3 armies have crucial decisions as to how they can turn this around.
For Grouchy there is now no possibility of preventing the continuing arrival of British reinforcements for some time at least.
NEXT: Map Moves


Fantastic game report and wonderful photos of how a 6mm game should look.
ReplyDeleteMany thanks Kieran.
DeleteAnother cracking AAR there Jon. After the last instalment I thought the French might just force the crossing on the Allied left, but quick responses to disrupt the French cavalry stopped this in its tracks more or less. As you say the Dutch/Belgian cavalry did sterling work, which is good to see.
ReplyDeleteThe French certainly did take some heavy losses and after 3 defeats in a row, I'm looking forward to seeing what map moves they make and how and if they can get reinforcements to bolster their numbers. Will the Allies go onto the offensive or wait and build up numbers first? Lots to look forward too.
Needless to say your game as always a joy to behold:).
Many thanks for that Steve. It's suddenly turned rather ugly for the French! They really needed comprehensively win in one of those theatres releasing forces to reinforce the other two.
DeleteI was expecting better from the Guard cavalry - the bulletin reporting this victory is going to require some creative crafting!
ReplyDeleteBit of a shambles all round for the French Guard. They will have to go some way to redeem themselves!
DeleteLooks like the French have victored themselves to death in this campaign, to borrow a phrase. Their regiments are just too weak numerically after cumulative losses and too easy for the British and Prussians to break in heavy combat. Napoleon needs a series of absolute slam dunk defensive wins with hugely imbalanced casualty rates in his favour in order to avoid an 1814-style scenario.
ReplyDeleteMany thanks for your comments Dave. I believe you have summarised the plight of the French well.
Delete