This was a battle I fought solo a couple of years ago and is just about the last one to add that is relevant to current projects that was played prior to the creation of the blog. It will not be as detailed as my current games as I am having to recall what happened based on brief notes and photos.
This scenario is taken from the 'Guns at Gettysburg Scenarios 4. Stonewall. The Battles of General T.J. Jackson, CSA'. Scenario 2:
BACKGROUND
In the spring of 1862, General Banks commanding the Union troops in the Shenandoah Valley wished to remove the threat of Confederate troops in the lower valley before General McClellan began the Union advance on Richmond. To this end he sent General Shields against Jackson's Confederates near Winchester.
After holding his first (and avowed last) council of war, Jackson withdrew his forces from Winchester. Shields followed and reported that the Rebels had retreated to Strasburg. Banks then began to divert his command to confront Johnston.
Ashby, who commanded Jackson's cavalry, then advanced towards Winchester and encountered the Federal outposts near Kernstown where General Shields was wounded and retired to his HQ at Winchester. Ashby reported that no more than 4 regiments defended Winchester, and Jackson moved to attack. Shields was convinced that the Confederates were no nearer than Strasburg and suggested that Kimball, who now commanded Shields' division move to attack. Kimball was not convinced. Ashby along with 4 companies of infantry skirmishers and Chew's horse artillery had put up a bold front during the morning. He deployed his own brigade with 3 batteries on Pritchard's Hill and then sent for reinforcements as Jackson's main force came up.
Continued -
KERNSTOWN
23rd March 1862
Rules - Guns at Gettysburg
Scale - 6mm (Baccus figures)
Table size - 4'6" x 3'0"
ORBATS:


A note about unit sizes. Guns at Gettysburg were primarily aimed at larger scales with 4 figures to a base. Mine are on 6 figures to a base and therefore 50% has been added to the numbers for each unit contained in the scenario book. Artillery is unchanged.
The command system is a sightly reworked version of that used in my Napoleonics. Skirmishers were omitted for this battle but I am seeking to introduce them into future battles.
VICTORY CONDITIONS
- Union: The Union troops must hold the Pritchard's Hill area B-C-D and have possession of the stone wall X-Y-Z at the end of the game.
- Confederate: The Confederates must have possession of either Sandy Ridge from points A-B; or of the Pritchard's Hill area, points B-C, by the end of the game. The game ends on Turn 12 after which an extra D3 night turns can be added (max visibility as if in heavy woods).
DEPLOYMENT:

 |
| Carroll's brigade lines Pritchard's Hill |
 |
| 1st Ohio Battery |
 |
| Fulkerson's brigade advances towards Pritchard's Hill. |
 |
| Garnett's brigade enters (bottom). |
 |
| Part of Carroll's brigade begins to redeploy. |
 |
| Sullivan's Brigade moves to support Carroll. |
 |
| Sullivan's brigade |
 |
| Garnett's brigade makes good progress towards Glass' House. |
 |
| Jones' artillery batteries arrive. |
 |
| Garnett approaches Glass' House. |
 |
| Confederate artillery deploys to cover arriving reinforcements. |
 |
| Overview of current situation. |
 |
| Tyler's brigade arrives along the Cedar Creek Grade. |
 |
| Carroll and Sullivan's brigades manoeuvre to counter the confederates move towards Glass' house. |
 |
| Garnett commences to take up position around Glass' house. |
 |
| Burks' brigade advances in support of Garnett, |
 |
| Burks brigade in the foreground with Garnett in the distance. |

Fulkerson's brigade had engaged in a brief firefight with the 67th Ohio, the latter being supported by artillery. Having come off worst, Fulkerson falls back on the fence line to form up with Jones' artillery. He will now aim to defend the Confederate right flank.
 |
| 67th Ohio firmly in place on Pritchard's Hill with the 84th Pennsylvania to the right with no intention of moving. |
 |
| Union troops deploying across Sandy Ridge. |
 |
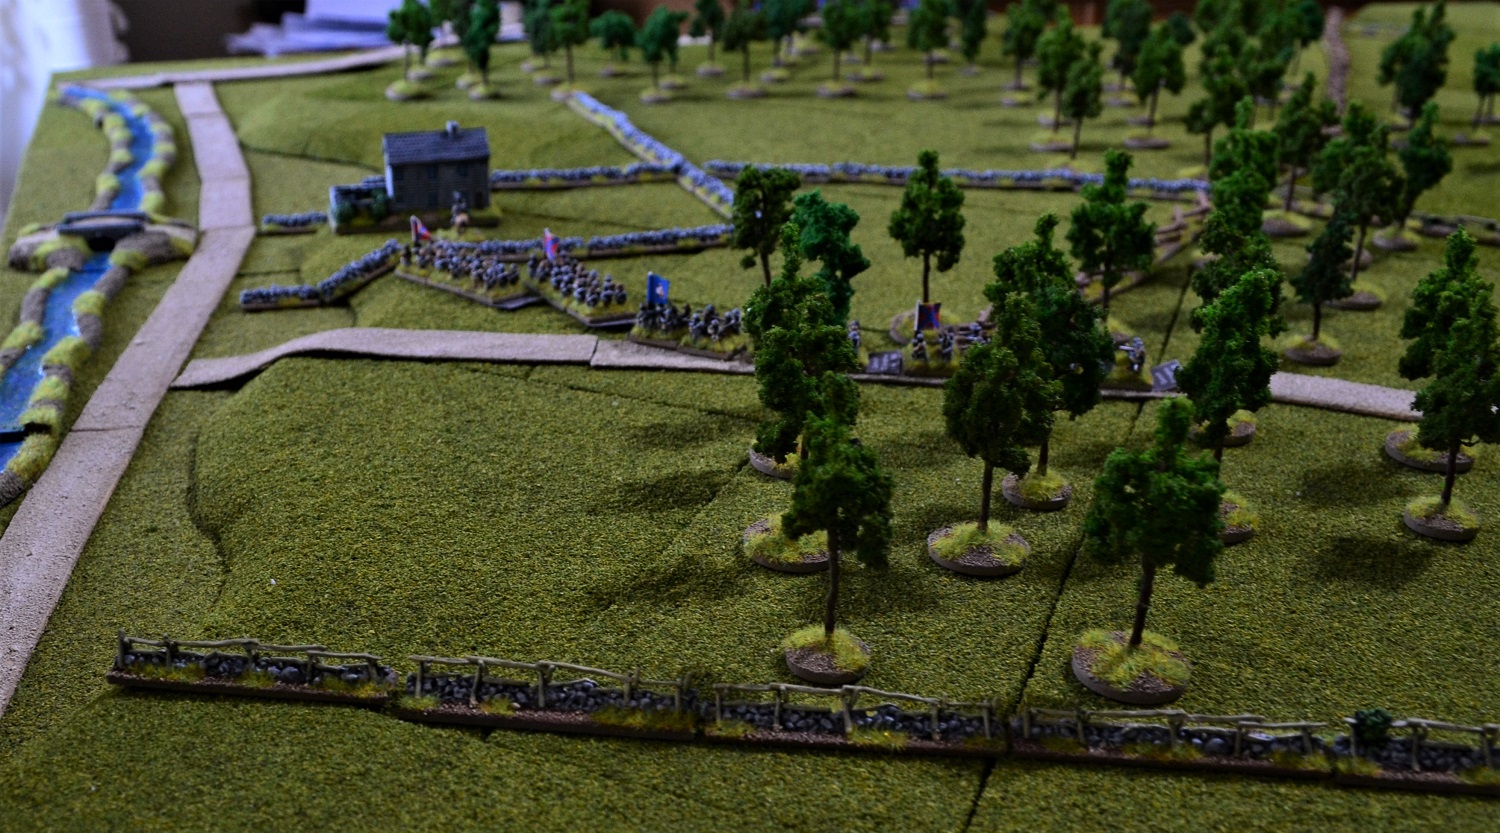
| The Confederates in the distance preparing a defensive line. |
 |
| 1st Ohio artillery battery repositions to support Carroll and Sullivan. |
 |
| Tyler's brigade moves off Cedar Creek Grade as it prepares to assault the rebel positions around Glass' house. |
 |
| Garnett's brigade now in position with Burks' brigade approaching to deploy on their right. |
 |
| The 8th Ohio of Carroll's brigade slowly emerges from the wood on Sandy Ridge. |
 |
| Brodhead's cavalry brigade arrives. |
 |
| The thin grey line looking towards Sandy Ridge is faced with much larger Union forces approaching them. |
 |
| Fulkerson's brigade fans out between the artillery batteries. |
 |
| Burks' brigade has yet to take up its final positions as the Union troops approach. |
 |
| A bird's eye view as firefights break out. |

Bottom middle of the photo is Waters' artillery battery which has run low on ammo as it vainly attempts to support the 1st Virginia battalion in a one-sided firefight with the advancing 8th Ohio.

Tyler's brigade advancing in large columns run into devastating fire from behind the stone walls of Glass' house. They return fire but lose far more casualties with several columns faltering in their advance.

To Tyler's left, Sullivan's brigade advance in line towards Burks' brigade who open fire from behind the stone walls.

Tyler's brigade make their charge towards Glass' house but morale collapses as they are scythed down from Rebel fire.

Sullivan is also struggling with one battalion falling back. The 13th Indiana though forces its way through the hail of fire.

The view of the maelstrom from Fulkerson's brigade. A battalion has been detached from Garnett's brigade to help shore up the centre (middle right of photo).

Tyler's brigade has failed miserably to make contact with Garnett's rebels. His brigade has fallen back in disarray (bottom right). To his left, Sullivan's brigade has only performed marginally better. One battalion, through a combination of fire and move, has managed to get within striking distance of Burks' brigade (upper middle).

While all the drama was being played out on Sandy Ridge, the 1st Ohio artillery (bottom left) had entered into counter battery fire with Jones' Confederate batteries. At the same time the Union troops on Pritchard Hill advance to attack Fulkerson's weakened brigade. The Union troops piled in throwing back Fulkerson with heavy losses (upper left). The Confederate right flank had collapsed and the centre looked precarious. Garnett's 5th Virginia was thrown in to stabilise the centre (upper middle).

From a different angle, the 5th Virginia (middle right) faces a daunting task.

The 1st Ohio artillery limbers up to advance into the gap left by Fulkerson supported by the Union cavalry brigade.

Fulkerson rallies what is left of his brigade together with the artillery to form a new defensive line (middle left). In the foreground the 64th Ohio and smaller 84th Pennsylvania form up against the fence line.

In the centre, the 5th Virginia having formed line, now exchange fire with Carroll's brigade.

Once again the Union forces struggle to break through Garnett's and Burks' brigades as a furious firefight breaks out.

The 1st Ohio artillery and Union cavalry begin their advance.

Tyler only manages to rally 3 of his battalions who form line ready for another attempt on Garnett.

With Sullivan's attack utterly failed it was now down to Tyler to capture the stone wall and Glass' house. Tyler leads his 3 battalions from the front and once again they were met with furious fire from the Confederates.

Tyler's brigade is comprehensively repulsed leaving him dazed and alone! What's worse, Burks' brigade now advances to his flank to ensure there is only one way for him to go.

The Union centre and left which had looked so dominant, was now under pressure from Confederate reinforcements being freed up by their defeat of Tyler and Sullivan.

The final shots of the battle as night falls and the game ends.
So to recap on victory conditions:
- Union: The Union troops must hold the Pritchard's Hill area B-C-D and have possession of the stone wall X-Y-Z at the end of the game.
Yes to Pritchards Hill but no to the stone wall.
- Confederate: The Confederates must have possession of either Sandy Ridge from points A-B; or of the Pritchard's Hill area, points B-C, by the end of the game.
No to both.
Therefore a narrow Union victory. Although they saw off Union attacks, the Confederates should have been much more aggressive in their own actions to achieve victory. They were overawed by the sheer size of the Union force ranging against them concentrating too much on defence.
The next battle in my ACW project will be Big Bethel taken from the Regimental Fire & Fury scenario book but again using GaG rules. I hope to play this early in the new year. All figures and terrain are done so good to go!
The next battle in my ACW project will be Big Bethel taken from the Regimental Fire & Fury scenario book but again using GaG rules. I hope to play this early in the new year. All figures and terrain are done so good to go!
Really nice sized action and a good scenario for bench marking other sets of rules.
ReplyDeleteThanks Norm. Yes should easily translate to other rules.
DeleteThat's a nice set up you have there and the figures look really colourful. Is it commercial terrain or did you make it yourself?
ReplyDeleteThanks Jim. The baseboards are commercial but I made the modular hill sections.
DeleteGripping AAR and exquisitely presented table. Thanks for sharing Jon!
ReplyDeleteMany thanks Mike
DeleteA fine looking action and an excellent narrative... as usual!
ReplyDelete