In preparation for Rorkes Drift (followed by Isandlwana) I have been on the look out for suitable rules. Until recently the front runner has been The Sword and the Flame which I used in days gone by for my 15mm Sudan collection.
Recently though, two more have materialised that have caught my eye. One is a Pony Wars conversion but I am holding on that until I become more familiar with them.
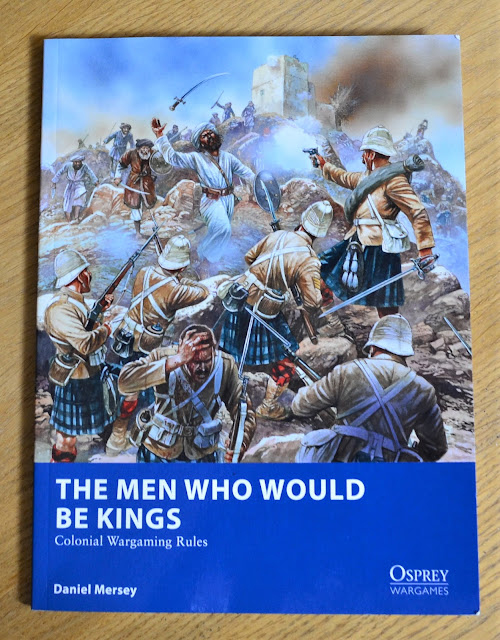
The second is The Men Who Would Be Kings.
Inspiration for this is down to Little Wars TV who used them for a 6mm Isandlwana game. This piqued my interest being a skirmish game written for larger scales and how it could be adapted for large battle small scale actions. If this worked I could see all sorts of possibilities in other periods, in particular Ancients which my own rules are really only intended as a stop-gap until I find something I like.
There are actually very few changes, in fact really only one - distances. I have opted to simply convert from inches to centimetres as I have done in other rulesets.
Continued -
I decided to use the rules on a test battle. There is a section in the book designed for solo play but for this game I am keeping it very basic just to see how the core rules perform.
I have almost literally thrown a few terrain pieces down on a playing area of 3'9" x 3' creating a valley. Some of these rarely get to see the light of day so good to have an opportunity to use them. This particularly applies to the large rocky piece on the right that has never been used since being purchased on impulse over 20 years ago! All figures are 6mm Baccus.
The British force represents a 60 figure company of regular infantry sent out to scout an area. Accompanying them is an NNC Lieutenant with 4 European NNC NCO's. Also a Commissariat officer and one of his privates.
The Zulus are divided into 20 figure units (4 bases) and 12 figure rifle armed units.
 |
| The British are taking a break when over 1,000 Zulus rudely appear on the horizon! They hurriedly form a square and await the onslaught. Each side of the square is a unit (1 section) lead by NCO's with the commanding officer in the centre. If a section leader is killed he can personally take over command of that unit. |
 |
| The NNC and a section of regulars are exploring a track through a rocky pass up a small mountain blissfully unaware of the presence of Zulus. These are split into two units. |
 |
| The Commissariat with an escort of 2 regulars are off examining rock formations! They form a single unit. |
 |
| The Zulus swarm towards the British square on the first turn. Most pass their leadership tests allowing them to move at the double. The variable move distances have broken up many of the formations. |
 |
| The troops on the mountain are now aware of the Zulus. Realising they have no chance of making it back to the company they decide they have a better chance of survival in defending the narrow pass. I have made this terrain impassable other than up the track. |
 |
| The small unit on the mountainside know they cannot outrun the Zulus so take up position behind rocks and hope for the best. |
 |
| A frightening sight for the British square as Zulus descend on them from all directions. An early success for them though as they open fire at long range decimating a unit of musket armed Zulus, the survivors of which fled the battlefield. |
 |
| Opening fire at long range the Martini-Henry rifles began taking their toll on the Zulu warriors. |
 |
| With loose rocks lying around, the small British force on the mountain track hurriedly construct a makeshift stone wall. |
 |
| The small Commissary party are discoverd! |
 |
| As the main force of Zulus approach the square, a group of warriors armed with rag-tag muskets open fire successfully downing 2 British regulars. |
 |
| Firing from behind the rocks the British kill one of the Zulus who fail to attack. Their leader attempts to calm their nerves urging them on to sweep away this paltry force. |
 |
| During turn 4 British firepower accounted for significant Zulu casualties but did not prevent two units from attacking the square. |
 |
| The attacking Zulus inflicted heavy losses on one side of the square in particular reducing it to just 3 figures who are now pinned. The second Zulu attack was beaten off. |
 |
| Over on the mountainside a second Zulu unit had appeared with the first pinned down by fire from behind the rocks. |
 |
| Its turn 5 and the thin red line gets thinner. |
 |
| The Commissary's luck runs out and the Zulus charge home. Desperate fighting among the rocks sees the small band of British beat off the attack losing one of their number in the process. |
 |
| Turn 6 and the Zulus once again pile into the diminishing square. |
 |
| The end is nigh! |
 |
| Having repulsed one Zulu unit a fresh one takes its place. They take a casualty from rifle fire and .... |
 |
| The Zulus kill two more defenders for the loss of only one leaving just the Commissary in a last defiant stand. |
 |
| Turn 7 and the British hurriedly reform their small square. |
 |
| They took a good number of Zulus with them but the square is finally wiped out. |
 |
| The Commissary takes a Zulu with him as he finally succumbs. |
 |
| The last of the British prepare to meet the first of the Zulus heading up the mountain trail. |
 |
| An overview at the end of turn 7. |
 |
| Although I have not used ammo supplies so far in this game I decided it would be appropriate to do so for the last of the British. They were given 6 rounds of ammo and then they would have to fight it out! |
 |
| A unit of unmarried Zulus succeeded an 'At the Double' activation allowing them to contact the British before they could open fire. |
 |
| The British repulsed the attack losing 3 of their number. |
 |
| The Zulus were not so lucky thereafter with successive waves collapsing under the lethality of the Martini-Henry at close range. |
 |
| The British finally ran out of ammo and were attacked by a unit of married Zulus. |
 |
| The British would die nobly having held the makeshift wall throughout. Now reduced to 3 figures following their defeat of the married Zulus they could no longer gain the 'close order' benefit and would have to face a fresh unit of the unmarried variety. The end came quickly although they succeeded in taking a few more Zulus with them. |
Including units that fled the field the Zulus lost 335 figures, or almost a third of their number. The British lost all of its 67.
On the face of it a significant loss for the Zulus but it must be remembered that here the British were outnumbered 15:1 whereas at Rorkes Drift it will be almost 40:1. The rules were designed for a few units a side with the average force fielded leaving the British outnumbered around 2:1 to give a balanced action.
Although I have yet to finally decide on any rule changes to give the British a fighting chance, a few have come to mind. Examples:
When attacking only those figures in base to base contact will count in melee when the British are in Close Order. If not in close order the Zulus can include 2 figures for every one British.
Possibly introducing saving throws for the British although I may limit that to personalities.
Zulu unit sizes increased from 20 (4 bases) to 30 (6 bases).
Introducing Discipline penalties for Zulu losses. e.g. Loss of 2 bases = -1, 4 bases = -2. This will make it increasingly problematic when attempting to rally pinned markers.
There will be other changes such as dealing with fighting within buildings. Overall though I was quite impressed with the rules and I can see it would be easy to make whatever changes you feel necessary to add flavour to your own game.
I am tempted to try out the "Playing against Mr Babbage" section of the rules which is designed for solo play. One for the future.


Great looking game and engaging action, Jon!
ReplyDeleteMany thanks Jonathan
DeleteLots of action with the three British groups and a splendid tabletop and troops.
ReplyDeleteMany thanks Peter
DeleteJon, as always a wonderful looking table, showing the scale off to its best ….. worth the wait I bet.
ReplyDeleteMany thanks Norm
DeleteGood morning Jon
ReplyDeleteHow long did the encounter last and a great layout as usual.
Regards Peter
Difficult to tell precisely Peter but would guess probably around 90 mins playing time. It could easily be done in less than 60 mins with familiarity of the rules and movement trays.
DeleteThat's a great looking game and quite a spectacle seeing the masses of Zulus approaching the British square. I must say I'm a fan of Dan's rules, but have yet to use these on the table, despite having them for a good few years. I have plans though...
ReplyDeleteMany thanks Steve. Dan has some interesting mechanisms in there and the leadership traits, which I did not use for this game, add flavour.
DeleteGreat looking game which lends itself well to 6mm. Top stuff sir!
ReplyDeleteMany thanks, your comment is much appreciated.
DeleteI thought that played out OK. Reducing melees to figures in contact and defending an obstacle should give the defenders of Rorkes Drift a chance. As for Pony Wars - its main strength is creating a good fun multi-player game - the combat mechanics are meant to represent Hollywood rather than history so if you want Zulu War refights I'd stick with other rules.
ReplyDeleteMany thanks for your views Rob. Will bear that in mind.
DeleteThe British managed a 5:1 kill ratio.. pretty impressive. yes, I think some kind of morale modifiers are needed on the Zulu side.
ReplyDeleteThese rules have generally been well received. Not my period yet, although I have a fair amount of unpainted lead for Darkest Afrika and Congo type games.
The rules do seem to be gaining a fair amount of traction among colonial gamers.
DeleteIn the past I had amassed a good collection of 28mm Darkest Africa imagining all kinds of possibilities for fun games. Sadly the project was never completed before I rotated to smaller scales.
A fine first outing for these figures. Such impressive forces!
ReplyDeleteI'm impressed at you adapting what I understand are skirmish rules for such a big game.
Regards, James
Many thanks James.
Delete