 |
| The situation at the end of turn 12. |
Turns 13 - 16
British Left
 |
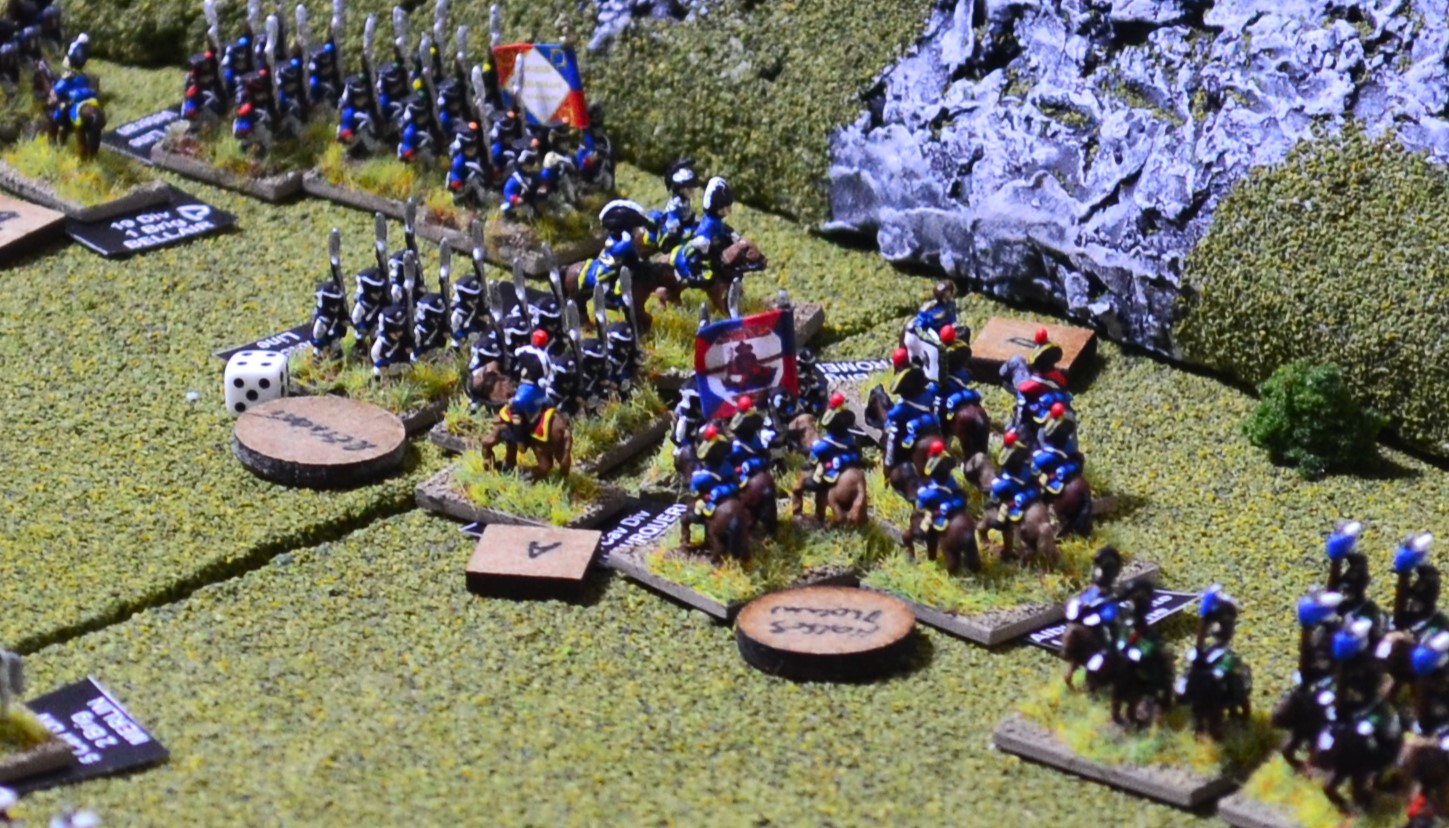
Vallin's cavalry brigade has been moved forward to strengthen Toussaint's infantry brigade ready to counter the advance of the British 5th Division.
|
Continued -
 |
| The 1/79th Highlanders somewhat recklessly charged 2 French battalion columns. Shrugging off a casualty on the way in, the Highlanders piled into the French battalions. French numbers prevailed and held the Highlanders to a draw. |
 |
| The situation at the end of turn 15. |
 |
| The Highlanders do their stuff and successfully overturn the two French battalions pushing both back. On the right of the photo, the French 6th Hussars charge the 1/95th hoping and failing to catch them before a square is formed. They fail to break the square and are pushed back. |
 |
Vinot ordered his Dragoon brigade to charge the British battalions still in line ahead of them. Lower middle is the aftermath of the charge by the 16th Dragoons who piled into the unformed 79th Highlanders. The recklessness of the Highlanders proved their undoing with most slaughtered by the French cavalry and the survivors dispersed from the field.
On the left the 6th Dragoons lead by Vinot charged the 32nd Line who promptly routed. They continued their charge towards the 42nd Highlanders who halted them with a shattering volley, lightly wounding Vinot in the process. |
Portuguese
 |
Collins's independent brigade launched their charge against Deprez' brigade with all three battalions in column formation. It was not entirely successful! The right flanking column, that of the 1/11th Line retreated after receiving casualties and failed to rally. The photo was taken after it had departed the field. In the centre the 2/9th Line also failed to charge home and halted. This allowed them to fire a volley from its leading units which at least, achieved a result with 2 casualties inflicted.
Only on the left (right of photo) did the Portuguese have a measure of success. The 2/11th Line struck the 2/69th Line and despite heavily outnumbering the French, the 11th only managed a draw with the melee continuing in the next turn.
A minor benefit for the Portuguese was the stalling of Deprez' brigade attempts to retire as they risk being outflanked elsewhere. With 3 of the 4 battalions involved in charges they would have to wait until the next turn at the earliest before they could pull back. |
 |
| The Portuguese right were having more success now clearing the French from their initial defensive line to the 2nd defending a wall. |
 |
| The 2 surviving battalions of Collins' brigade now made good progress. The 2/11th Line on the left (middle of photo) broke the French 2/69th Line on the second attempt forcing them to retreat. Collins leading the 2/9th Line on the right caused their opponents to rout before contact. |
 |
| The 2nd and 6th Cacadores captured the French position defended by Schoeffer's brigade. 2 French battalions opposing the 6th (left of photo) routed before contact. The 3/63rd Line on the right withstood the charge of the 2nd but failed to hold them and were pushed back. |
 |
| The Portuguese are on the verge of a decisive breakthrough by the end of turn 15. |
 |
| In an effort to stall the Portuguese advance, the French 14th Dragoons (bottom left) prepared to launch a charge against the 6th Cacadores but comes under immediate fire losing 3 of their number. |
 |
On the left, the 14th Dragoons recovered from the high casualties sustained by a blast of musketry, charged the 6th Cacadores who did not have time to form a square. The Dragoons forced them to retreat inflicting heavy losses. Such was their excitement they will pursue the Portuguese battalion in the next turn.
On the right, Ahsworth's brigade close on the French artillery. |
British Right
 |
| The KGL brigade have now fully reformed and pulled back beyond canister range allowing the artillery battery to unlimber (middle left). |
 |
| A charge by the 29th Line is held by the French 1/84th Line with the melee continuing into the next turn (lower middle). The 43rd Light (upper middle) failed in its charge and will retreat. It has suffered near 50% casualties fraying the nerves of the men! |
 |
| Adams' elite brigade on left of photo had a successful turn 14. On their left, the 71st Light battalion charged and utterly destroyed the 1/96th Line whose survivors fled the field. On their right, the 2 battalions of the 95th Rifles charged 2 battalions of Rome's brigade, routing one and pushing back another. |
 |
| Fane's brigade on the 2nd Division right flank were finding it more of a struggle but now had a breakthrough with the 29th Line finally overcoming the French 1/84th Line forcing them to retreat. |
 |
| A view of the collapsing French infantry opposing Adam's brigade and the Portuguese. A total of 7 battalions, mainly from Rome's and Schoeffer's brigades, fled the field failing morale checks. |
 |
| The British 2nd Division is making similar progress to their Portuguese neighbours. |
 |
Burthe's Dragoon brigade attempts to turn the British tide with, on the left, the 5th Dragoons charging the 3/95th Rifles defending a stone wall, and on the right, the 13th Dragoons charging the 71st Light battalion in column formation.
Both dragoon regiments were defeated with that of the 5th Dragoons being remarkable in that they should have easily overrun the Rifles but were comprehensively outfought and forced to retreat. |
 |
The retreating dragoon regiments have surrendered a considerable amount of space to the British who now take advantage occupying it.
On the left, the two French batteries that had caused significant damage are ordered to limber up and retire. |
 |
| More and more French brigades are ordered to retire and as they do so they come under fire from the 29th Line and 60th Rifles suffering heavy casualties. |
Spanish Left
 |
| With most French battalions having vacated their initial defensive line, there is one that has heroically seen off several attacks and is still in good shape. The 1/10th Line of Bony's brigade steadily falls back maintaining its line. formation (middle left). |
With the events on the Spanish right and centre converging, I have now brought them together under 'Spanish Right'.
 |
| As the French 1/10th line pulled back they were caught by the 1st Malaga and 1st Jaen battalions. This time their luck ran out and the French battalion are forced to retreat losing 5 of their number. |
 |
| An overview of the Spanish left flank at the end of turn 15. |
 |
| The Spanish 4th Division are halted by canister fire and musketry from an infantry battalion, with one battalion (middle left) being forced to retreat. |
 |
| The French 1st Lancers failed to break a Spanish square from the 4th Division. |
 |
| The Spanish move the 1st Cavalry Division forward to put pressure on the retiring French and engage their cavalry whenever possible. |
Spanish Right
 |
At the top right of the photo, the Spanish 5th Division continue to try and breakout. The 1st Real Armada charged the 1/65th Line who held them to a draw.
Bottom left is a charge by the Spanish 1st Hussars on the unformed Vistula Legion. The Spanish conscripts were comprehensively defeated forcing them to retreat. |
 |
| The view across the French left at the end of turn 13. |
 |
| Bassecourt with the 1st Armada comprehensively defeated the 1/65th Line in the 2nd round of melee rolling a double '6'. Penne suffered a light wound and withdrew to visit the medics. The French battalion lost their Eagle along with 4 casualties and were routed. |
 |
| As elsewhere on the battlefield, it is not looking good for the French forces opposing the Spanish right. |
 |
| Another victory for the Vistula Legion as they counter-charge the Spanish 2nd Hussars pushing them back. The former suffers from "Blown Horses" and will have to pull back in the next turn. |
 |
| The 2nd Lancers charge into the 1st Armada column and luck continues to elude the French as their cavalry are forced to retreat. |
 |
| The is a pause on the French left as both sides recover and reorganise. It is now obvious to the Lobau that there is no realistic chance of holding the Spanish, and as with the 4th Corps on the right, he begins to pull his infantry out screened by cavalry. |
There is absolutely no prospect of the French winning this battle and they have therefore ordered all infantry units to withdraw. The one ace up their sleeve is their still intact cavalry who will be used to screen the infantry.
The following turns involve the French attempting to extricate themselves.
Turn 17
British Left
 |
| The 8th Chasseurs (middle of photo) attempted a charge at the 42nd Highlanders but faltered mid-charge in the face of a steady volley. This will probably be the last offensive action by the cavalry on this flank as they are ordered to pull back. |
Portuguese
 |
| The 14th Dragoons in an uncontrolled pursuit barrel into Ashworth's 2/18th Line infantry who have been unformed by the retreating 6th Cacadores. The Portuguese battalion were fortunate not to have been cut to pieces and only suffer a push back with minimal casualties. For the dragoons their horses are now blown and will have to withdraw in the next turn. |
 |
| The overall situation in the Portuguese sector. A French battalion has occupied the farm in the hope of delaying the Portuguese. |
British Right
 |
| The 2nd Division advance into vacated space but the mass of French cavalry could prove a stumbling block. |
 |
Fane's brigade (under the command of an ADC) partially successfully clears the French from their sector. On the left, the 60th Rifles has comprehensively defeated the 1/11th Line of Bellair's brigade inflicting heavy casualties causing them to rout.
On the right, the 29th Line are not so successful and falter in their charge. |
Spanish Left
 |
| The situation for the French 19th Division (top left) is looking increasingly precarious. They are in danger of having their line of retreat off to the right cut off. |
Spanish Right
 |
| The French cavalry form up to screen the infantry. I slight setback occurs with their single supporting artillery battery running low on ammo. |
Turn 18
The French are successfully disengaging in the Anglo/Portuguese sectors with the action now confined to the Spanish flank. I will cover those actions before covering overviews of the battlefield.
 |
The Spanish 2nd Cavalry Division commander, Alburquerque, leads a charge by two regiments at the French cavalry. On the right, Alburquerque joins the Linea Infante in a charge on the 11th Chasseurs valiantly defeating them. The French cavalry are forced to retreat and the Spanish have the bonus of maintaining 'superb discipline'.
On the left, the Carabiners Reales charge the Westphalia Lancers but falter in mid-charge and are caught by the German cavalry in a counter-charge. The Spanish perform creditably and are only pushed back (they rolled a double '6'!) inflicting 3 casualties on the Lancers. |
 |
| The retreating French infantry swarm around a rallying Lancer regiment as they hurry to put some distance between them and the Spanish. |
 |
On the Spanish left they make attempts to destroy the French 19th Division as they try to escape. Two Spanish infantry battalions attempt to make charges but are seen off by steady musket volleys from the French (lower middle of photo).
Success for the Spanish arrived with the charge of the Rey Regiment personally lead by Henestrosa (upper middle of photo). They charged the 1/10th Line that had been a thorn in the side of the Spanish since the battle began. This proved too much for the battered 10th, and not having time to form square they routed through the 1/5th Line to their rear. This left the now unformed 5th exposed to the Spanish charge. The result was devastating with the 5th wiped out to a man. Their blood was now up and the Rey Regt would be launching an uncontrolled charge in the next turn. |
 |
| An overview of the Spanish flank at the end of turn 18. The French cavalry screen is so far facilitating the withdrawal of the surviving battalions of the 20th, 21st and 22nd Divisions but the situation continues to be perilous for the 19th (top left). |
 |
| On the Anglo-Portuguese front, apart from Fane's brigade pressing the flank of the French 19th Division (far right), most units are now disengaged. Several of the brigade commanders are still under assault orders and they will be instructed to halt their advance in the next turn before they potentially get into difficulties with the French cavalry. |
 |
| On the British left flank, the 42nd Highlanders continue to pour musketry volleys into a reforming French cavalry regiment but otherwise all French units have successfully disengaged. |
Turn 19
The French continue to disengage across the Anglo-Portuguese front. Wellington puts out instructions to all brigades to change to hold orders in that sector but some brigade commanders do not get the message and continue on attack orders. The result being that several battalions continue to forge ahead risking isolation.
 |
On the Spanish left flank, the French 1/27th Line are comprehensively defeated in melee to the 29th Line and 60th Rifles. With nowhere to run they surrender to those British units (middle left of photo).
In the middle of the photo, the Rey cavalry regiment completed its uncontrolled charge into the retreating 2/84th Line wiping them out. |
 |
| On the Spanish right, Alburquerque leading the Linea Infante cavalry regiment went slightly mental! They charge the flank of an unformed infantry battalion who immediately rout leaving the exposed flank of the 2nd Lancers. They also rout before contact is made leaving the way clear for the Spanish regiment to charge into the French line of retreat. They hit the unformed 1/2nd Dutch Line butchering almost half their number with the survivors retreating. With French are lucky that the Infante now have blown horses! |
Turn 20
 |
| The British 6th Cavalry Brigade move to the front on the British left with the intention of engaging the French rearguard. |
 |
| Along the Anglo/Portuguese front all brigades are now on hold orders. There is little point in attempting to overturn the French cavalry at this stage, especially when the allies are outnumbered in mounted troops. |
 |
| All the action is now confined to the Spanish front. Many of the French battalions from the 19th Division have routed, retreated or dispersed. Only the 2/10th Line accompanied by Bony remains. The depleted battalion is caught in line formation by a charge of the Cazadores Espana regiment (upper middle of photo). A heroic defence by the French battalion pushes the Spanish cavalry back. |
 |
| On the Spanish right, the Dragoons de Pavia regiment (yellow uniforms) and the 2nd Hussars charge the Vistula Legion who counter-charges. Both Spanish regiments lose their nerve and are caught at the halt by the charging Vistula Legion. The Spanish are defeated and pushed back. |
Turn 21
 |
| The final action of the day involved Bony attempting to extricate the 2/10th Line. The Cazadores Madrid charged the unformed French battalion who decided they had had enough. They routed but were caught by the Spanish. Half of them were put to the sword and now completely cut off, the survivors, including Bony, surrendered. |
 |
| The final position on the British left flank. Tempting though it is for the British cavalry to have a go, caution prevailed. They will save their resources for another day. |
 |
| There is a similar situation on the Anglo/Portuguese front with the allies calculating that they do not have sufficient cavalry strength to give them confidence of overturning their counter-parts. |
 |
| The unexpected situation on the Spanish front. Far from just pinning the 6th Corps, the Spanish exceeded all expectation and delivered a decisive victory. The remaining French cavalry are under orders for a full retreat. Rather than push their luck, the Spanish are content to let them leave the field unmolested satisfied on a job well done. |
Although Wellington was reasonably confident of victory, he could not have anticipated what occurred on his right flank. That occupied by the Spanish. The vast majority of their units were 2nd line or conscripts and no match for the French on paper. In previous games, when one or two Spanish units have routed it has quickly developed into a mass exodus by their parent divisions followed by their entire army. The dice Gods were on their side in this game!
With their defeats elsewhere, this was particularly unwelcome news for Napoleon. Having accomplished consistent early victories there has now been a decisive turn of fortune. All 3 French armies could not quite finish the job and are now paying the price with all retreating from victorious allies. Soult will not be easily forgiven for allowing an invasion of France!
Both sides lost precisely 395 figures each! However the numbers returning weighed heavily against France being the loser and vacating the battlefield. They only recovered 39 leaving an overall loss of 356. The allies recovered 136 for a total loss of 259. The allies will also benefit from several morale upgrades.
I will cover the map movements in the next campaign update.


Another great AAR to cover the end of the game and the Dice Gods were certainly with the Allies and particularly the Spanish! As always looking forward to seeing how this all translates to the map and what position they will all be in, but especially the French after a string of defeats.
ReplyDeleteMany thanks Steve
DeleteWhat a cracker! I was surprised to hear both sides lost the same number of figures (did that include prisoners?) as it read like a litany of disaster for the French. But with units surrendering on the field and eagles being taken Boney will be hopping mad! Maybe this will stir him into action with his Guard?
ReplyDeleteI was surprised too Rob. Yes it did include captured. That said most of the allied losses were in the earlier turns when they were suffering from canister fire and musketry as they moved to contact.
DeleteA great BATREP! Thank you for sharing. There was a lot of great photos too!
ReplyDeleteMany thanks John.
DeleteGood evening Jon, a fantastic show as usual, and the Spanish dealing some decisive blows.
ReplyDeleteMany thanks Peter.
Delete