Turn 9
 |
| B and C companies of the E Yorks assist D company (bottom left) in clearing the woods of German infantry. D company though come under heavy fire from the woods opposite losing a platoon with the remainder suppressed. |
 |
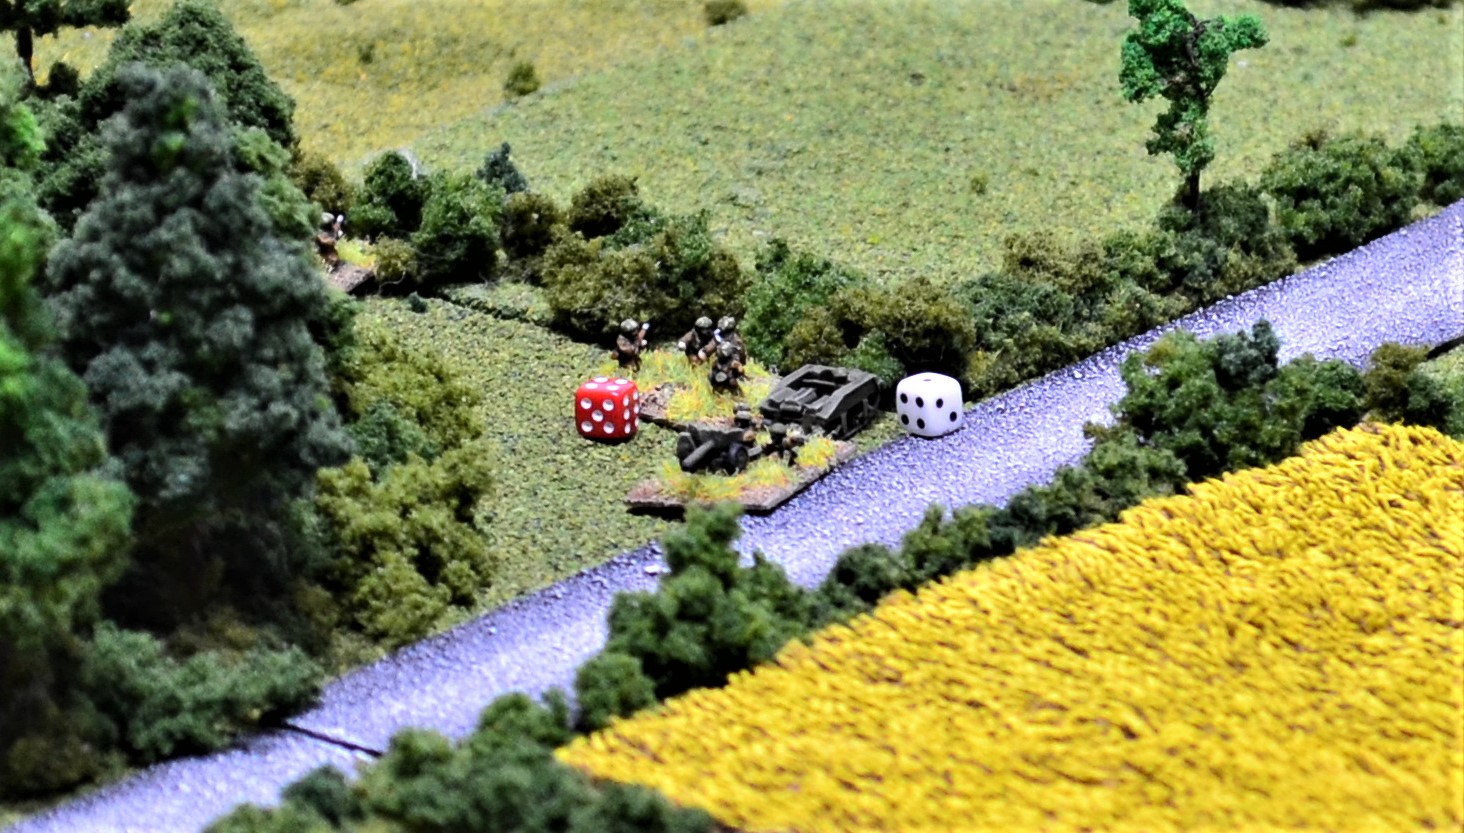
| The E Yorks 6pdr hurriedly moves off the road seeking cover as it comes under fire from the German 150mm infantry gun scoring a hit on the Lloyd Carrier. |
Continued -
 |
| In the centre, the Green Howards come under heavy fire from German infantry and MG42's lining the orchard boundary. A company in particular, located in the corn field, suffer a heavy mauling. |
 |
| D company of the Green Howards with C company in the field opposite move up to Cristot to reinforce the Durham Light Infantry who are struggling to capture the village. |
 |
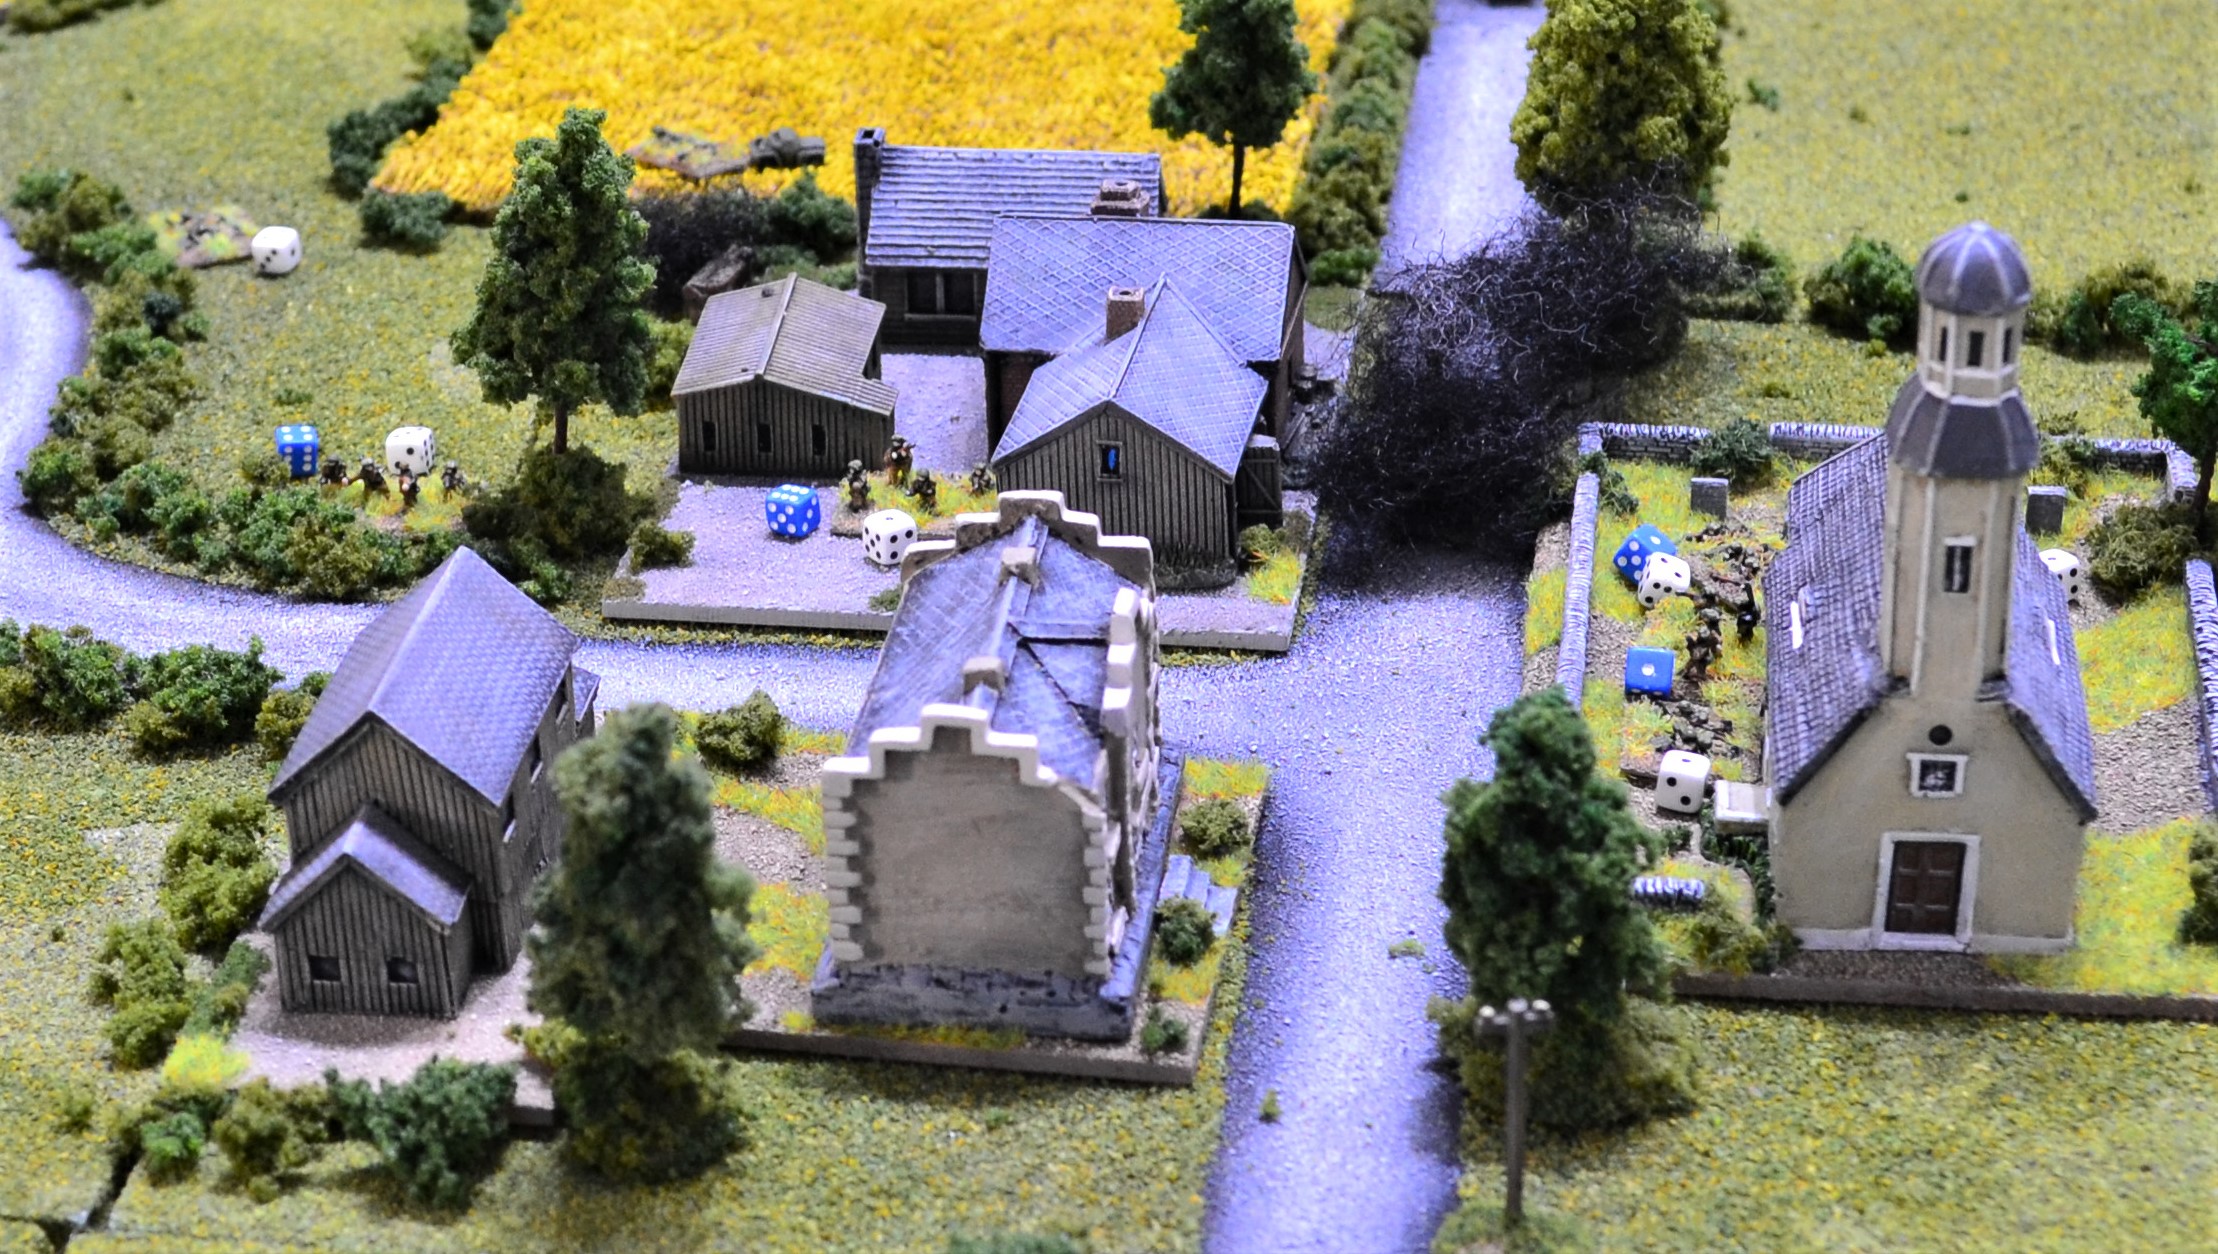
| In Cristot, the Durham Light Infantry have captured the 3 buildings on the left with the Germans still holding the church and 2 buildings on the right. Both sides exchange fire between the buildings with inconclusive results. A piat platoon does sterling work in the church yard destroying a German platoon. |
 |
| Concentrated fire from off-table 25pdrs succeed in knocking out another PzIV. Unfortunately for the British though, a German Panzerfaust lurking behind the church yard wall finished off the last Sherman (top left). |
Turn 10
 |
| This turn proved disastrous for the E Yorks battalion. A hail of fire from the woods opposite and from Brouay inflicted heavy casualties on B and C companies causing both to fall back into the woods. The 2" mortar section only just survived and also fell back. |
 |
| D company was wiped out but some good news for the E Yorks was some fine shooting by the 6pdr. It succeeded in knocking out the 150mm infantry gun and inflicted casualties on the German infantry in the orchard before becoming suppressed by counter fire from that same infantry. |
 |
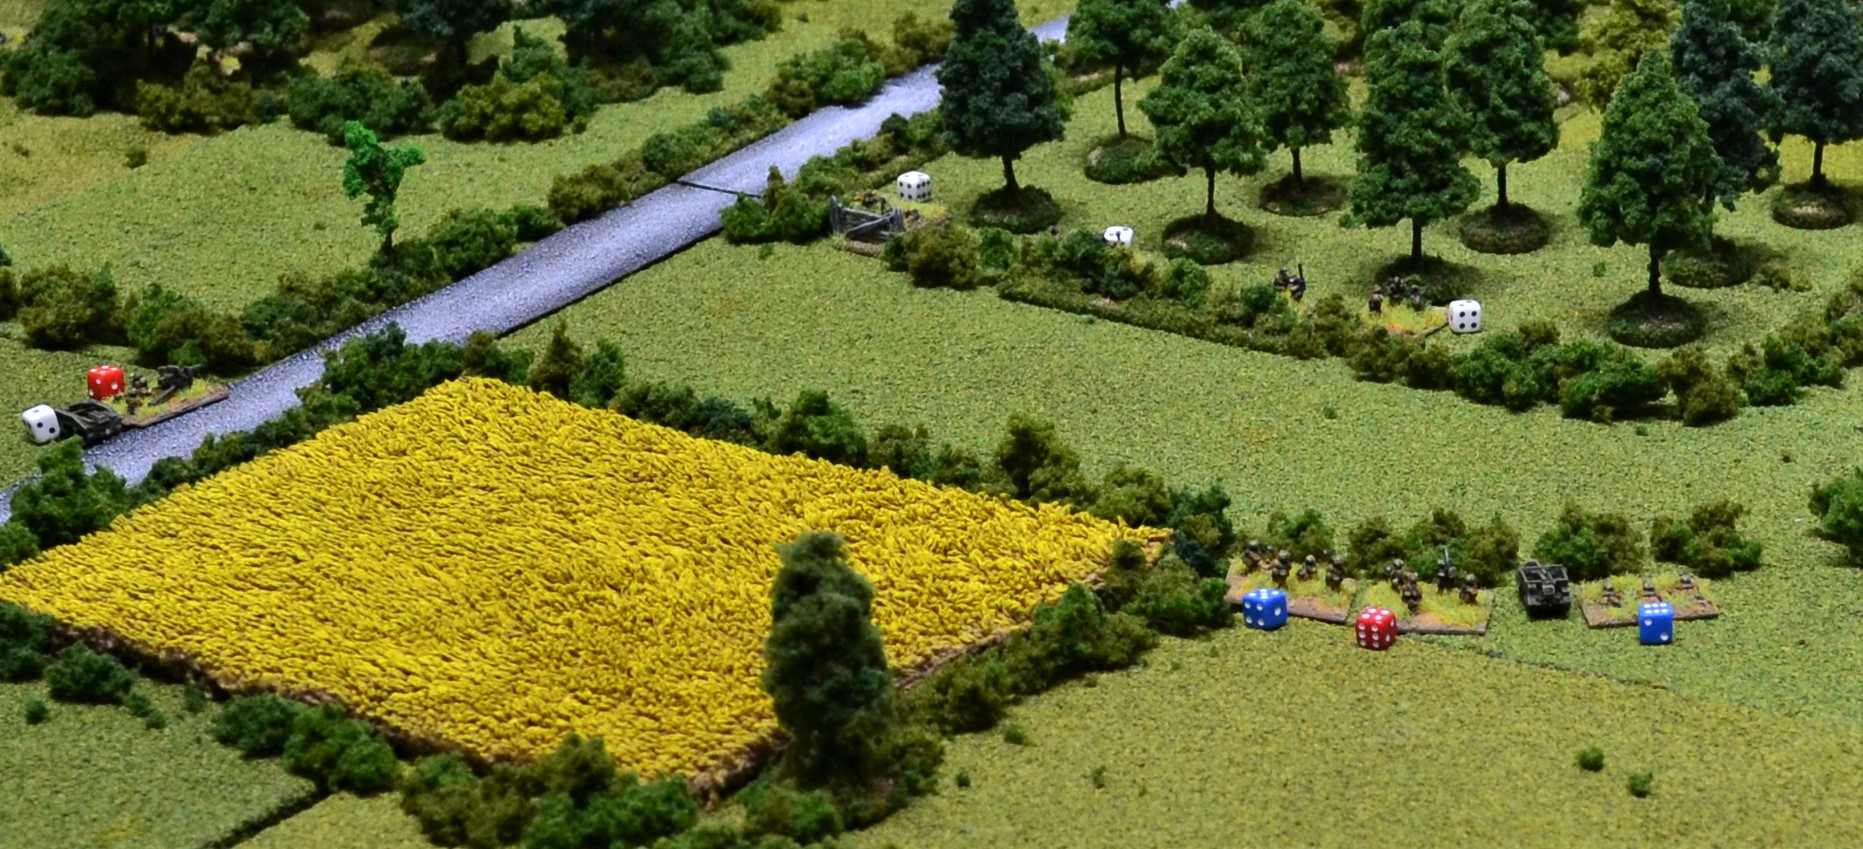
| To the north of Cristot the British are getting into increasing difficulty from highly accurate fire from the German infantry holding the orchard. 'A' company of the Green Howards that had been exchanging fire from the cornfield to the left have been wiped out. 2 platoons from 'B' company and a recce platoon are all that are left to oppose the Germans in this sector (middle of photo). |
 |
'C' and 'D' companies of the Green Howards are tasked with capturing Cristot releasing the surviving units from the Durham LI to concentrate on Hill 102. Those latter units have succeeded in clearing the church yard and continue to exchange fire with Germans occupying buildings opposite.
A significant blunder was made by the Durham LI's 6pdr who attempted to deploy among the buildings to target a nearby Panther. It drew concentrated fire from the buildings and also the Panther that was its target. It was comprehensively destroyed before it had the chance to open fire. |
 |
| 'D' Company of the Durham LI struggle to maintain pressure on the SS Recce battalion occupying Hill 102 with two of its platoons suffering heavy casualties and becoming suppressed. 'C' company occupying Les Haut Veuts (off camera to the left) added its fire but at long range had minimal impact. |
 |
| The surviving PzIV and a Panther has been pulled back from Cristot for fear of being targeted by Piats. |
 |
| Sensing renewed impetus is required, the British CO moves forward to take more direct command of his brigade. |
 |
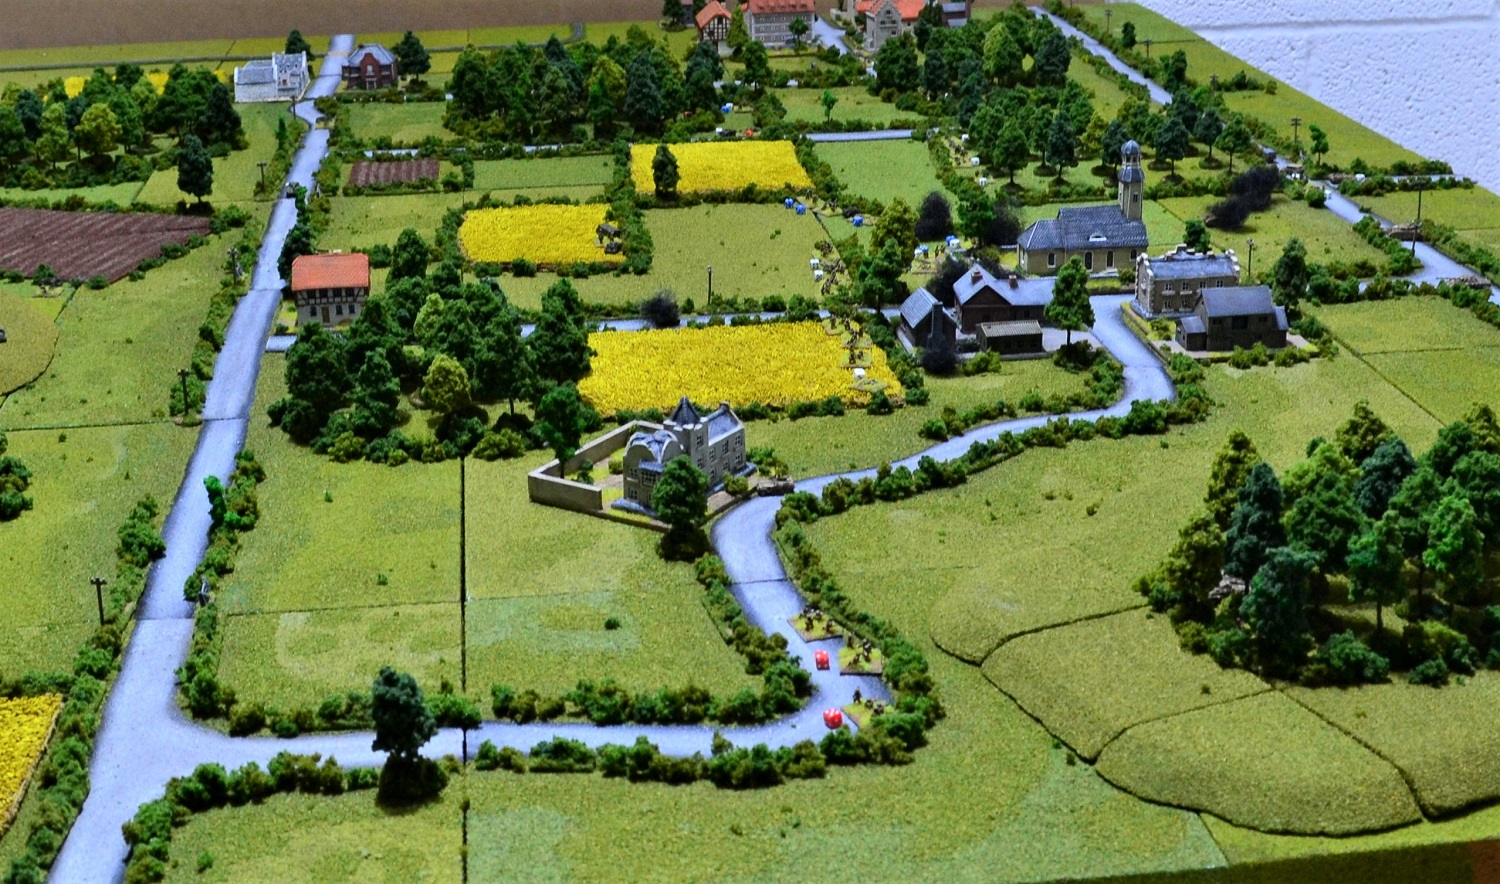
An overview at the end of turn 10. The E Yorks attack on Brouay (top of photo) has completely stalled and has suffered such significant casualties that it is unlikely that it will now be able to mount an effective assault.
Heavy weather is being made of capturing Cristot and much will be resting on the Green Howard reinforcements.
No attempt has yet been made on Hill 102 other than exchanging fire.
At this stage in the game it is looking pretty bleak for the British who are in need of devine intervention to make a breakthrough.
|
Turn 11
 |
| 'B' Company the Green Howards had their morale raised by an accurate bombardment from the off-table 25pdrs on the orchard that destroyed an MG42 team and inflicted casualties on the other rifle platoons. |
 |
| 'C' Company the Green Howards along with units of Durham LI stormed the church eliminating the German defenders. Their attention was now turned on the last two buildings in German hands. |
 |
| 'C' Company of the Durham LI move out of Les Haut Veuts and take cover behind the bocage losing a platoon to fire from Hill 102. Both 'C' and 'D' companies prepare to attack the hill. |
 |
| One of the Panthers has moved to bolster the defences of Hill 102. |
Turn12
 |
| An empty space is now left where the E Yorks 6pdr had been destroyed by fire from the orchard. The survivors of the E Yorks had moved deeper into the safety of the woods having given up on any prospect of capturing Brouay. They adopted a defensive posture protecting the British flank with only their Vickers MG team engaging the Germans. |
 |
| 'D' Company of the Green Howards has now moved up into Cristot adding their firepower to that from the church towards the German occupiers of the 2 buildings at the bottom left of the photo. Despite being heavily outgunned, the Germans stubbornly held on. |
 |
| 'C' and 'D' companies of the Durham LI spend another turn firing on the occupants of Hill 102 and combined with a barage from the 25pdrs successfully knock out a recce platoon. |
 |
The surviving Achilles is busy repositioning aiming to counter the threat from German armour.
The British are now just one unit away from reaching their breakpoint but the Germans are not far behind. |
Turn 13
 |
| Although the Germans defending the orchard inflicted a great deal of damage on the British, 'B' Company of the Green Howards had their revenge severely depleting the SS troops. This is the last German platoon along with the battalion HQ still holding out. |
 |
In Cristot, combined fire from several units of the Green Howards poured fire into the building at the bottom left finally destroying the German occupiers. The platoon in the middle of the photo quickly occupied it only to come under highly effective fire from the German platoon occupying the last building in Cristot. They fell back under withering fire to where they started in the church grounds.
'D' company of the Green Howards returned fire on the last of the Germans and succeeded in knocking them out. Cristot had been captured! |
 |
'C' and 'D' companies of the Durham Light Infantry charge towards Hill 102 having knocked out the last of the German defending infantry. An artillery barrage had also knocked out one of the armoured cars just leaving one armoured car and a Panther defending the hill. As the British infantry approached the woods anticipating victory, they received the order to withdraw!
The British had passed their breakpoint by one. All the CO had to do was roll a 9 or less and they could have continued. He rolled '11'! Game over. |
 |
| The Achilles had traversed the length of the battlefield and arrived to begin engaging the German armour only to receive the order to "stand down"! |
This proved to be a very close game in the end. The Germans were just one unit away from having to take their own break test and there is no doubt the British would have captured Hill 102 after another couple of turns resulting in victory for them.
So, a narrow victory for the Germans.
Early on in the game I was concerned that I should have made several Germans veterans or even just trained rather than elite. For the British I could have made the Green Howards veterans. It really did appear to be a no-hoper for the British with the Germans shooting them up rather easily. The British had also suffered from poor dice rolls with the off-table 25pdrs silent for several turns. As it turned out the British turned the tide with only the assault on Brouay being an absolute failure.
You may recall that at the beginning of the game I trialled halving the hits (with all hits counting towards suppression) enabling units to survive a little longer given that hits would not be removed at the end of the turn. There were two minor problems. The first being that time proved to be rather limited to play the game and had I continued using this method, goodness knows when it would be concluded. The second being the clutter of additional micro-dice on the tabletop. After 2 or 3 turns I reverted to the normal method of simply leaving hits on thus speeding up the game.
I have not given up on the halving of hits and will revisit this in a future game. I will also be looking at alternatives for recording hits. The most likely route being to label the figures and vehicles and work off a roster.
An enjoyable, and in the end a very close game. It was sheer bad luck that prevented the British from capturing their second objective (some rather Anglo-Saxon expletives burst forth when I rolled that final '11').


Another cracking AAR and so close yet so far for the British! It really did feel a tense battle due to the narrative and photos that kept one right in the action. Interesting to read your thoughts on halving hits: personally I'm happy for my game sto leave them on, mainly due to time pressures. An idea that is worth exploring though.
ReplyDeleteMany thanks Steve. Halving hits is probably better for smaller actions or where there are no time constraints. Before I try it again though I will have a look at labelling the figures and working hits off a roster.
DeleteSo the artillery nearly turned it when they finally deigned to join in. Hopefully the AAR will highlight the failings in the infantry-artillery cooperation as an LI. Super game - thanks.
ReplyDeleteMany thanks for that Rob.
DeleteAnother great AAR Jon. The tables look so good with the hedges, woods and orchards. Lots of inspiration for me. Thanks
ReplyDeleteRichard
Many thanks Richard. Always good to know that it may give you some ideas.
DeleteWhat a great fight, Jon, and I'm with you, albeit they were Yankee expletive bursts when the break test was failed. Lots of fun, thanks for posting, and looking forward to more.
ReplyDeleteV/R,
Jack
Many thanks Jack.
DeleteGreat stuff again, love the scenery. What size bases were you using for your infantry?
ReplyDeleteMany thanks Paul. Infantry platoons are 20mm frontage x 15mm. Support weapons 15mm x 15mm.
Delete