Turn 11
 |
| The Imperial Guard marches relentlessly on, their progress slowed as they enter broken terrain (half speed). Although the Prussian cavalry are light in numbers they are sufficient to prevent the French deploying their skirmishers. |
 |
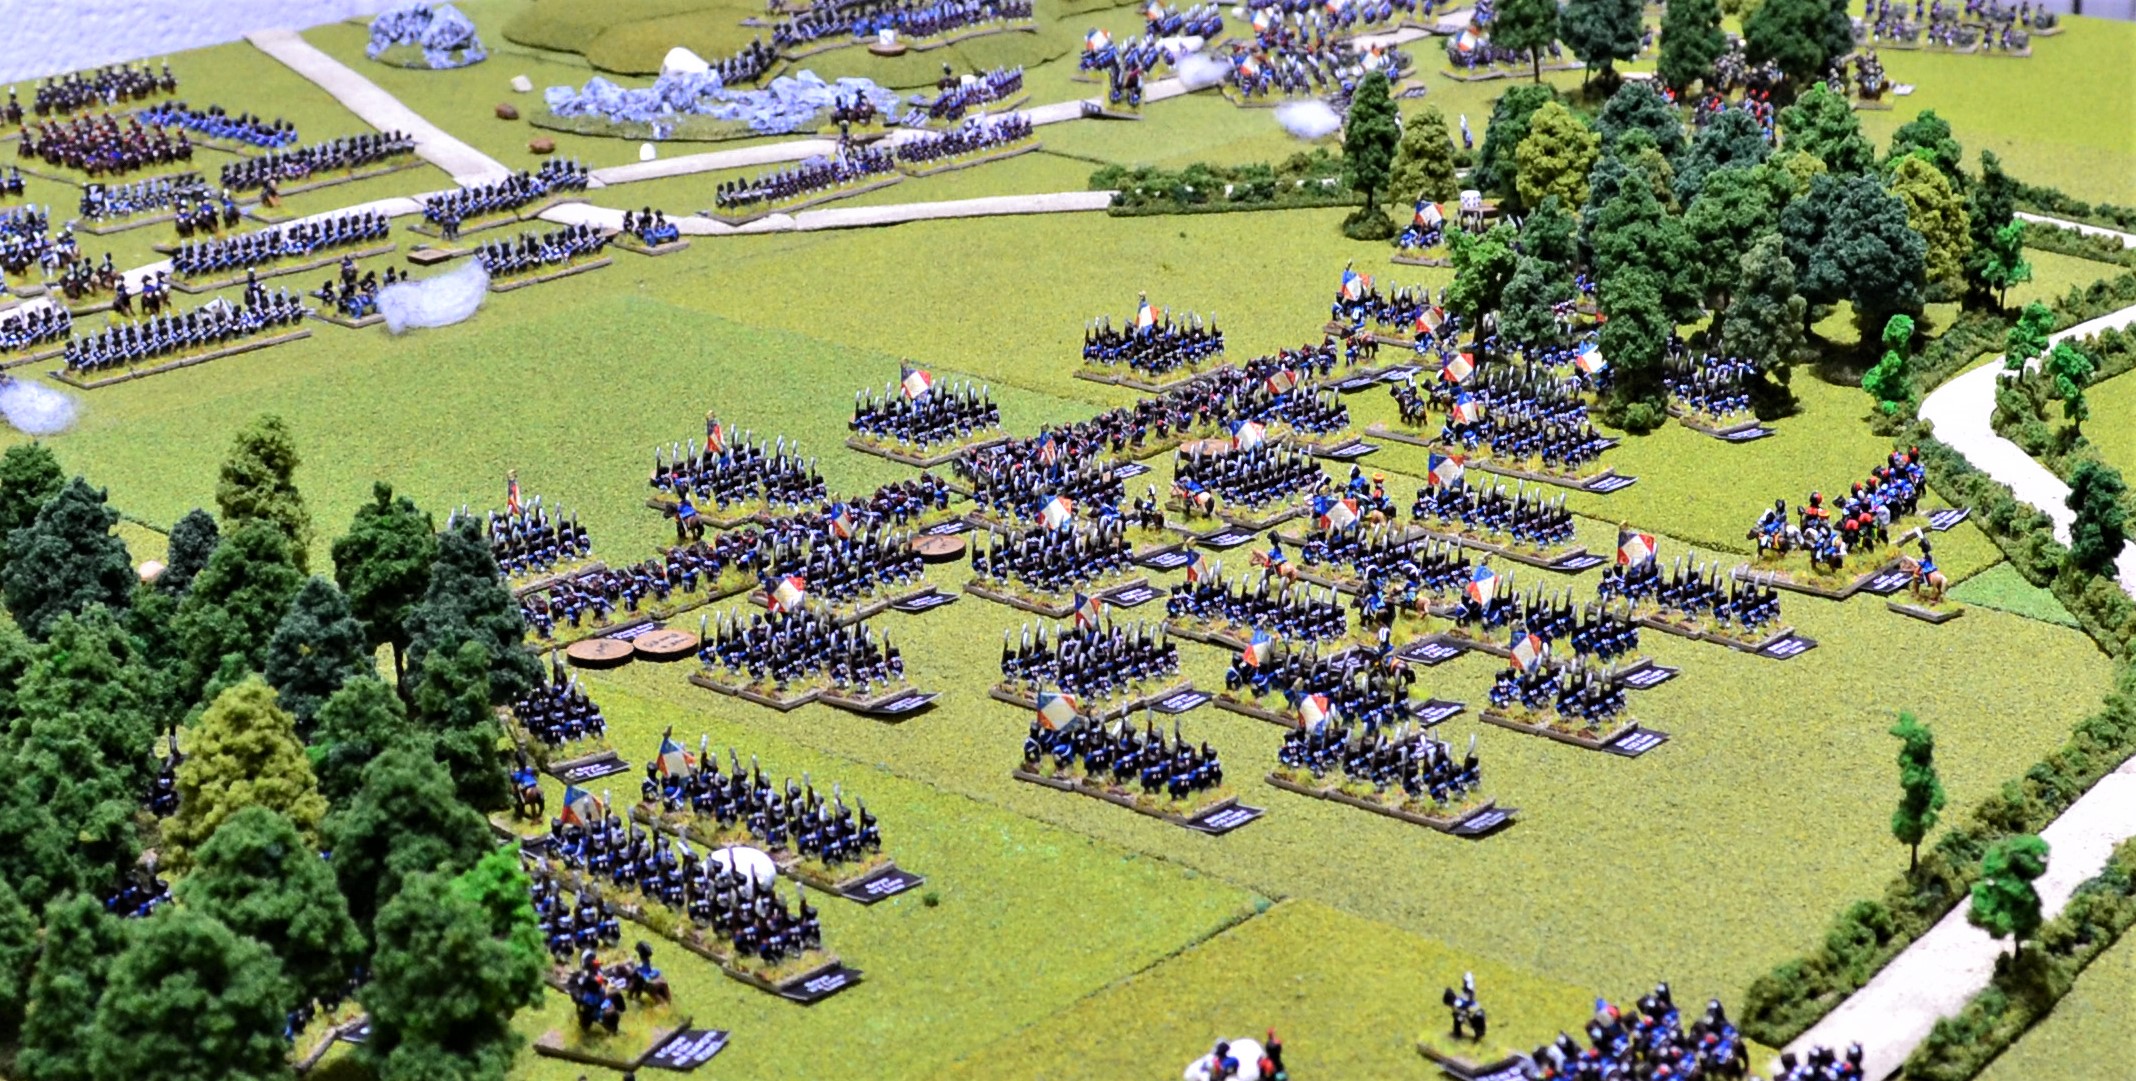
| Napoleon decides he can wait no longer and orders Vandamme to begin his attack on the Prussian centre. The first columns move through the artillery line, several becoming unformed in doing so. |
Continued -
 |
| French skirmishers ranging out ahead of Vandamme's Corps inflict severe casualties on one of Braun's artillery batteries in particular and wounding Reuss in the process (a double 6 had been rolled). Combined with losses sustained from the French grand batteries the Prussian artillery was looking a little threadbare. |
 |
| The Prussian right flank observes their French opposite numbers suddenly form columns and begin moving away generating a great deal of excitement! Prussian artillery occupying the steep rocky hill fire into the French columns but their lack of numbers, and one battery being low on ammo, resulted in only minor casualties. |
 |
Reille was the cause of Prussian excitement. Scouts reported to him that a large Prussian force to the south (off table to left of photo) now no more than 2 hours away and possibly even 1 hour (4 moves) given their current progress. Reille acting on his own initiative decided it was time to reposition his Corps ready to receive the Prussian reinforcements and protecting the French flank.
Here Bachelu's 5th Division along with Pire's 2nd Cavalry Division begin to fall back with a view to forming a defensive line across the Prussian line of march. |
 |
Foy's 9th Division emerge from the woods. They will join the 5th Division in forming a defensive line. Jerome Napoleon's 6th Division will redeploy replacing the 5th and 9th along the woods' edge to hold the flank against any Prussian attack from their right.
It would now be down to Vandamme's 3rd Corps and the Guards Corps to complete the job of breaking the Prussian line. |
Turn 12
 |
| The Imperial Guard columns have now entered broken terrain slowing their advance. The Prussian infantry on the heights take advantage and pour volleys of musketry into the densely packed columns. On the flipside for the Prussians, the artillery battery (top left of centre) was unable to use canister due to the close proximity of Prussian units in their arc of fire. Firing shot into the nearest column was not nearly as effective. |
 |
| Here the 1/2nd Grenadiers of the Old Guard have charged the 2/10th Prussian infantry who retreated in disorder prior to contact. They passed through the 2/3rd Neumark Landwehr unforming them. Seeing their chance for glory the French Grenadiers continued their charge towards the Landwehr. Despite being unformed, the latter delivered a shattering volley (rolling 11) inflicting 3 casualties. This was enough to halt the Grenadiers' charge. |
 |
As Vandamme's columns continue to advance through their artillery, they join reforming columns leaving a dense mass target for Prussian artillery. Fortunately for the French the Prussians were particularly weak in artillery strength have been pulverised by the French artillery and now skirmishers. Only minor casualties were inflicted on the French.
In return, the French skirmishers had less success apart from one double 6 roll against Braun's 6pdr battery. This was enough to finish it off with survivors fleeing the field. Reuss, already wounded, received another light wound for his troubles and he retired for medical attention. |
 |
Kellerman's 3rd Cavalry Corps now moved off to support Vandamme. The 2nd Corps and their cavalry support continued to reposition.
Elsewhere, the 2nd Corps reserve 12pdr battery was finally destroyed by concentrated Prussian artillery fire. Bauduin also lost the veteran 2/1st Light battalion who failed to rally from retreat and fled the field. |
Turn 13
 |
Seeing 2 French columns moving towards a Landwehr battalion, Ryssel launched the last of his brigade, a squadron of the 2nd Silesia Landwehr cavalry, in an opportunity charge on the nearest column consisting of the 2/4th Grenadiers of the Middle Guard.
The column managed to turn to face the oncoming Prussian cavalry, but so startled were they by the suicidal Silesians, their morale collapsed and they retreated prior to contact. |
 |
The retreating Grenadiers passed through the 1/4th Grenadiers who managed to maintain their formation but did not have enough time to react to the elated Silesians who continued their charge into them lead by Ryssel.
|
 |
The 1/4th Grenadiers had already been faltering from earlier but now their training and morale kicked in. Combined with the Prussian cavalry being so few in number the French successfully repulsed them for no loss.
The Prussians lost one of their number leaving just 3 figures left along with Ryssel. They would now retreat and although dejected, they had caused significant disruption to the Imperial Guard assault. |
 |
| The target for the 2 columns was the 1/1st Silesian Landwehr which now faced just the single column of the 2/3rd Grenadiers of the Middle Guard. The Landwehr stood their ground delivering an effective volley thinning out the French column. It was not enough to stop the Guards as their column ploughed into the Prussian line. This was too much for the Landwehr and after a brief fight they routed. |
 |
To the centre of the Imperial Guard, two more French columns conducted charges. On the left the 1/3rd Grenadiers of the Middle Guard charged the 1/15th Infantry accompanied by Creilsheim. As with the Landwehr they also delivered an effective volley but the Guardsmen shrugged off their losses and charged into the Prussians. A one-sided melee ensued and once again the Prussians were routed.
To the right the 1/1st Grenadiers of the Old Guard charged the 16th Brigade's 6pdr foot battery. The artilllery was still unable to fire canister due to the proximity of Prussian troops so had to relay on shot only. Knocking down only one figure resulted in the column charging home. The artillery crew proved steadfast and fought to save their battery. They did not have much of a chance though and the battery was annihilated. |
 |
| On the left of the Imperial Guard formation, the 1/2nd Grenadiers of the Old Guard finally made contact with the unformed 2/3rd Neumark Landwehr. Schmalensee had joined the Landwehr who fought well but not quite enough to defeat the Old Guard column. They were pushed back with the loss of just 2 of their number inflicting 2 in return. |
 |
| An overview of the Imperial Guard attack encompassing all 5 melees. The routing units generated several morale checks with nearby units with most holding steady. 2 battalions however, would retreat leaving the Prussian left flank looking increasingly precarious in the face of the relentless Imperial Guard. Adding to the Prussian problems was the failure of Creilsheim's Brigade morale check resulting in his regiment (brigade) becoming broken. Creilsheim's two routing units therefore fled the field just leaving him with the 2/15th Infantry battalion. |
 |
| On seeing the rapidly deteriorating situation on the Prussian left, Blucher ordered several reserve formations to cover the centre's left flank. |
 |
| Blucher himself decided it was time to relocate to his right flank where his best chance of success lay, especially with the anticipated arrival of von Ziethen. His centre and left flank would be left to his Corps commanders. |
 |
| Vandamme's columns now made their approach to the Prussian centre. Prussian artillery was proving to be rather ineffectual leaving the French skirmish screen to continue to pick off crew members and infantry. |
 |
| Reillle was becoming increasingly concerned with the chaos emanating among his Corps due to the press of troops, mainly cavalry, repositioning. This was delaying his divisions from redeploying and in the meantime Prussian reinforcements moved ever closer. |
 |
| The chaotic movement of the French was not lost on the Prussian right flank. With the impending arrival of von Ziethen they began to prepare for what they hoped would be the knock-out blow, turning back the French tide once and for all. |
 |
| The view from French lines as Prussian columns emerged over the heights on their flank. |
Turn 14
 |
| Turn 14 begins with another attack by the Imperial Guard. The 2/1st Chasseurs of the Old Guard (larger column on the right) and the 1/4th Chasseurs of the Middle Guard (far left of the 3 columns), charged the 2/2nd Neumark Landwehr. The Landwehr startled both columns by delivering a shattering volley inflicting heavy casualties. Both columns faltered in their attack. |
 |
| There were no further charges among the corps of Guards with columns trudging their way through the broken terrain towards the heights. The Prussians for their part managed to rally all three retreating battalions and prepared for the onslaught. |
 |
| A dense cloud of smoke erupted along the Prussian line holding the centre as Vandamme's columns approached. Significant casualties were inflicted on the French columns with 4 battalions having to take morale tests, two of which resulted in them faltering. |
 |
| Chaos continues to bedevil the 2nd Corps as troops attempt to reposition. |
 |
| Only Bachelu's Division make any progress with one brigade now fully on the road to speed movement (middle left). |
 |
| Prussian columns continue to pour over the high ground on the French left with little to oppose them. Soye's Division have yet to redeploy in the woods to face this Prussian threat with only a single battery available to fire on them. |
 |
| An overview at the end of turn 14. By now Napoleon hoped to have rolled up the Prussian left and be in the process of destroying their centre. His hopes rest on Vandamme alone makes quick work of the Prussians and Reille's 2nd Corps quickly sort themselves out. |
A brief break here before I start turn 15. Originally I had units of the Prussian 1st Corps arriving on turn 16. This should have been the end of turn 16 arriving at start of turn 17. Therefore they will test for arrival from turns 15 to 19 and not 14 to 18 as originally planned.
Therefore turn 15 will start with the Prussians testing for arrival. They must throw a '6' on a D6.
Turn 15
Prussian reinforcement dice roll = 3. The French get another turn to sort themselves out.
 |
Prussian morale began to break down under the relentless attacks of the Imperial Guard. This turn saw the departure of Ryssel and the last of his 14th Brigade as his squadron of Landwehr cavalry fled the field following a volley from the 2/3rd Grenadiers which killed another of their number leaving just two left.
Also fleeing the field was Schmalensee's 2 battalions of Neumark Landwehr following attacks by Guard columns. Elements of the Imperial Guard were now turning their attention towards the Prussian centre. |
 |
| Vandamme aggressively threw his columns at the Prussian centre, a gamble that paid off. Although several columns were stopped, primarily by artillery, many got through with serious consequences for the Prussians. Several Prussian battalions retreated or routed leaving gaping holes in their front line. This also lead to a failed Brigade morale test for Schmidt losing 2 of his 3 battalions of the 9th Infantry. Only his depleted Fusiliers remained, the heroes of Grissburg where they captured and eagle. |
 |
| The view from Grazzbenn as a disturbing number for French heavy cavalry mass in the open ground to their front. |
 |
| The view from the opposite direction. Several Prussian battalions begin to move out from the Grazzbenn perimeter. |
 |
| Gradually the 2nd Corps sort themselves out from the traffic jam. They have precious little time though to form their defensive line. |
 |
| More Prussian columns pour over the high ground threatening the flank of the 2nd Corps. Many though have yet to receive their attack orders. |
 |
| The view from the 2nd Corps. Only a small number of French skirmishers have been able to deploy with their parent battalions still in the process of repositioning. They were outgunned by Prussian skirmishers who began taking French casualties. |
Turn 16
Prussian reinforcement dice roll (5 or 6 required) = 6!
The Prussians arrive early much to the consternation of the 2nd Corps.
 |
| Bachelu's Division (bottom right) are the first to react as significant numbers of Prussians hove into view. |
 |
| The 6 battalions of Bachelu's Division, which was to hold the left of the 2nd Corps line, hurriedly turns to face the new Prussian arrivals. Joubert's Brigade is worryingly close to the enemy as they redeploy. Skirmishers begin to engage the Prussian skirmish screen. |
 |
| At the bottom of the photo, Pire's 2nd Cavalry Division moves across the rear of Kellerman's Cavalry Corps onto firm ground where they can reform to face the von Ziethens troops. |
 |
| Prussian columns slowly move off the high ground towards Soye's Division holding the woods and protecting the French left flank. The broken terrain that bedevilled the French now affects the Prussians moving at half speed. This buys Soye precious time to properly deploy. |
 |
| An overview of the south west corner of the battlefield and the French 2nd Corps' precarious situation with the arrival of substantial Prussian reinforcements. |
 |
| Blucher decides now is the time to continue to turn up the heat on the French left and orders more infantry, cavalry and artillery onto the offensive targeting the extreme right of Soye's Division. |
 |
| A view of Soye's thin blue line from the Prussian right. |
 |
| The 3rd Elbe Landwehr deploy on the eastern boundary of Grazzbenn ready to defend it should the French defeat the Prussian right and centre. |
 |
Lafol's 8th Division angles towards Reckow's troops holding the south side of Grazzbenn. The Prussian 1/21st Infantry fire a volley at long range towards the approaching columns causing only light casualties.
At bottom left, 2 French battalion columns charge one of Braun's 6pdr batteries. A highly effective blast of canister halts them in their tracks causing both to falter. The French 1/12th Line on the left move to threaten the flank of the battery. |
 |
| Vandamme's troops fair little better further along the line with no units able to make contact with the Prussians. Two Prussian battalions pour fire into the mass of French infantry causing one battalion to retreat in disorder. Although the Prussians do well holding them off, the sheer numbers of French are now threatening to overwhelm them. |
 |
| Kellerman's heavy cavalry present a threatening sight to those Prussians observing from Grazzbenn. |
 |
| The view looking east at the Prussians desperate defence. |
 |
| The view from the opposite direction. Just ahead of the artillery in the lower middle of the photo, the 2/1st Chasseurs of the Old Guard finally charge into the pesky 2/2nd Neumark Landwehr who had caused the Guards significant problems with its unexpected effective musketry. The Guards now easily defeated them forcing them to retreat. |
 |
| The Imperial Guard continues to make steady progress in turning the Prussian flank. |
 |
| An overview at the end of turn 16 looking south west. |
 |
| Looking north west. |
 |
An overview of the entire battlefield at the end of turn 16.
The Prussian left and centre are finding it increasingly difficult to hold back the superior numbers of French infantry. For the French, it is important to defeat the Prussians in and around Grazzbenn quickly in order to free up troops to face the strong Prussian forces engaging the 2nd Corps.
The next moves could be critical for this battle. |
TO BE CONTINUED


Absolutely cracking game and AAR there Jon! I'm really rooting for the Prussians, who have managed to somehow inflict enough disruption on the Guard and in the Centre to give them a slight chance of holding on, to allow the newly arrived reinforcements to do their thing. Can't wait to see how the next moves unfold, which as you say, could be critical for the outcome of the battle.
ReplyDeleteMany thanks Steve. I may have resolved the problem of your post not appearing here. It was flagged as spam in my comments feed so hopefully should not have that problem again.
DeleteIt is certainly an intriguing game to play out especially with the early arrival of the Prussian reinforcements. This really could go either way.
I get that every now and then with regular followers to my Blog. Absolutely no idea why they suddenly appear as Spam. Hence I check my spam folder everytime I log on just in case. The joys of technology!
DeleteThis comment has been removed by the author.
ReplyDeleteAbsolute top quality battle and write up. Thank you
ReplyDeleteMany thanks Will.
DeleteYour photos and write up bring the action to life. I catch myself wondering how the Prussians will hold on. Truly a showcase for using the scale for the period.
ReplyDeleteGreat looking game Jon and an excellent AAR. This is a cliff hanger and I await the next exciting instalment.
ReplyDeleteMany thanks Elenderil.
DeleteI always look forward to another instalment and this one has been well worth it. Both the eye candy and accompanying storyline are excellent. A very close game and an exciting finale to come. I imagine these games take a considerable amount of time and effort to set up and play - this is very much appreciated. Phil
ReplyDeleteMany thanks Phil. Yes it is time consuming but ultimately very rewarding. Not one for the average club night!
DeleteWonderful stuff Jon, quite the clash of armies.
ReplyDeleteCheers
Stu
Many thanks Stu.
DeleteGood evening Jon, having gone back over this campaign I find myself like others in admiration of your batleground. Aan aside your OoB is outstanding, how long do they take to produce. Regards Peter
ReplyDeleteMany thanks for that Peter. The Orbats do take time initially but I create a master which is then updated with casualties, unit mergers etc. It is then just a case of copying and pasting the relevant sections for each battle.
Delete