This game is taken from the Regimental Fire & Fury Scenarios Volume 1 book. This is a relatively minor early war engagement involving green troops.
Translating the RF&F orders of battle to Guns at Gettysburg rules is relatively simple. Each RF&F stand = 1 stand of 6 x 6mm figures for infantry. 1 artillery cannon =1 for GaG. Cavalry is slightly different in that mine are based 2 to a stand. Therefore 1 RF&F stand = 2 x GaG stands.
Background to the battle:
In response to the growing Federal threat to the east of Richmond, Col. John Magruder was sent to Yorktown to organise southern defences. Cavalry commanded by Lt Hood and Col Hill's 1st North Carolina volunteers reinforced Magruder. They fortified a strong position at Big Bethel Church. From these positions the Rebels could observe and harass the growing Union forces.
Concerned by the threat to new Union camps, Maj Gen Butler decided to destroy the rebel positions. He sent converging columns on a night march for a dawn attack against the southern outposts. As they closed on the rebels, green Union troops fired into a friendly regiment. Alerted by the fire. the Rebels abandoned Little Bethel and fell back on their fortified positions at Big Bethel.
An overview of the battlefield:

The Union troops approach from the right (south).
Confederate entry and exit point is 'A' with 'B' for the Union.
The area inside the breastworks south of points X - Y is a key position.
Continued -
The Battle of Big Bethel
10th June 1861
Scale = 6mm (Baccus figures)
Table size = 4'6" x 3'9"
ORBATS:

A brief explanation of the Orbats. The figures in the second column are the number of figure stands. The exception is cavalry. The figure in italics is the number of dismounted stands (each has 3 figures) + the number of horse holder stands. The 3rd column is the number of figures.
Artillery: Normally one gun stand = 2 cannon. In this scenario each cannon is represented by a model at 1/2 effect. Therefore each gun as 2 crew for casualty purposes and will fire at 1/2 effect.
A note about uniforms. At this stage of the war there were many colourful uniforms including the grey clad 3rd New York leading to a friendly fire incident. All my figures are painted for the forthcoming Gettysburg game so have few suited to this stage of the war. I apologise to the purists but my more generic blue and grey/butternut have been deployed. I intend in time to add these more colourful units but for the time being they have to join the queue on the 'to do' list.
The scenario in the book is scheduled to run for 14 moves. Given the differences in scale and movement rates I have doubled this to 28 moves.
The scenario in the book is scheduled to run for 14 moves. Given the differences in scale and movement rates I have doubled this to 28 moves.
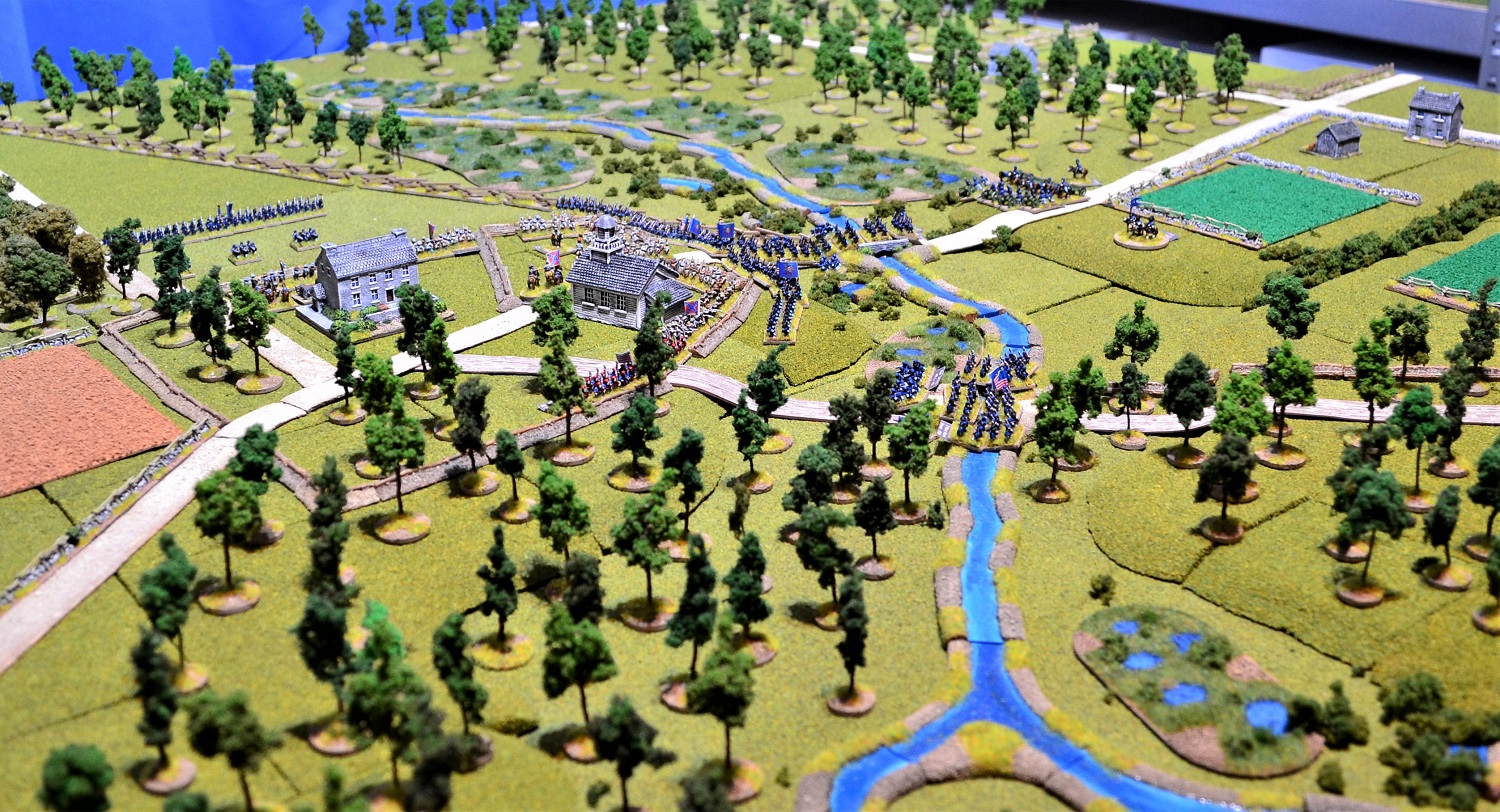
Initial deployments:

In the next few turns, Union reinforcement will arrive at point 'B' on the right.

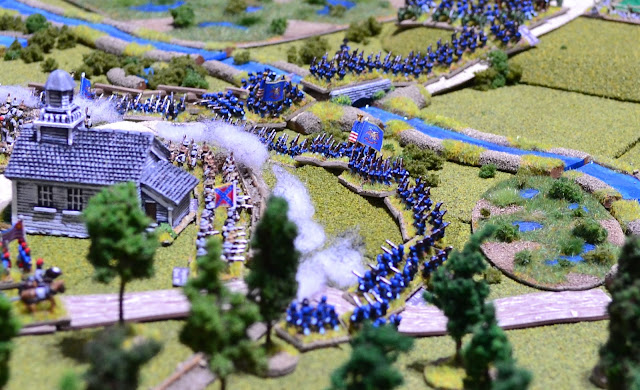
The main Confederate position at Big Bethel Church with the large 1st North Carolina to the right and the Virginia Battalion to the left.


Two more views of the main Confederate position.

Lt Hood and his dismounted cavalry detachment at the rear of the Rebel position.

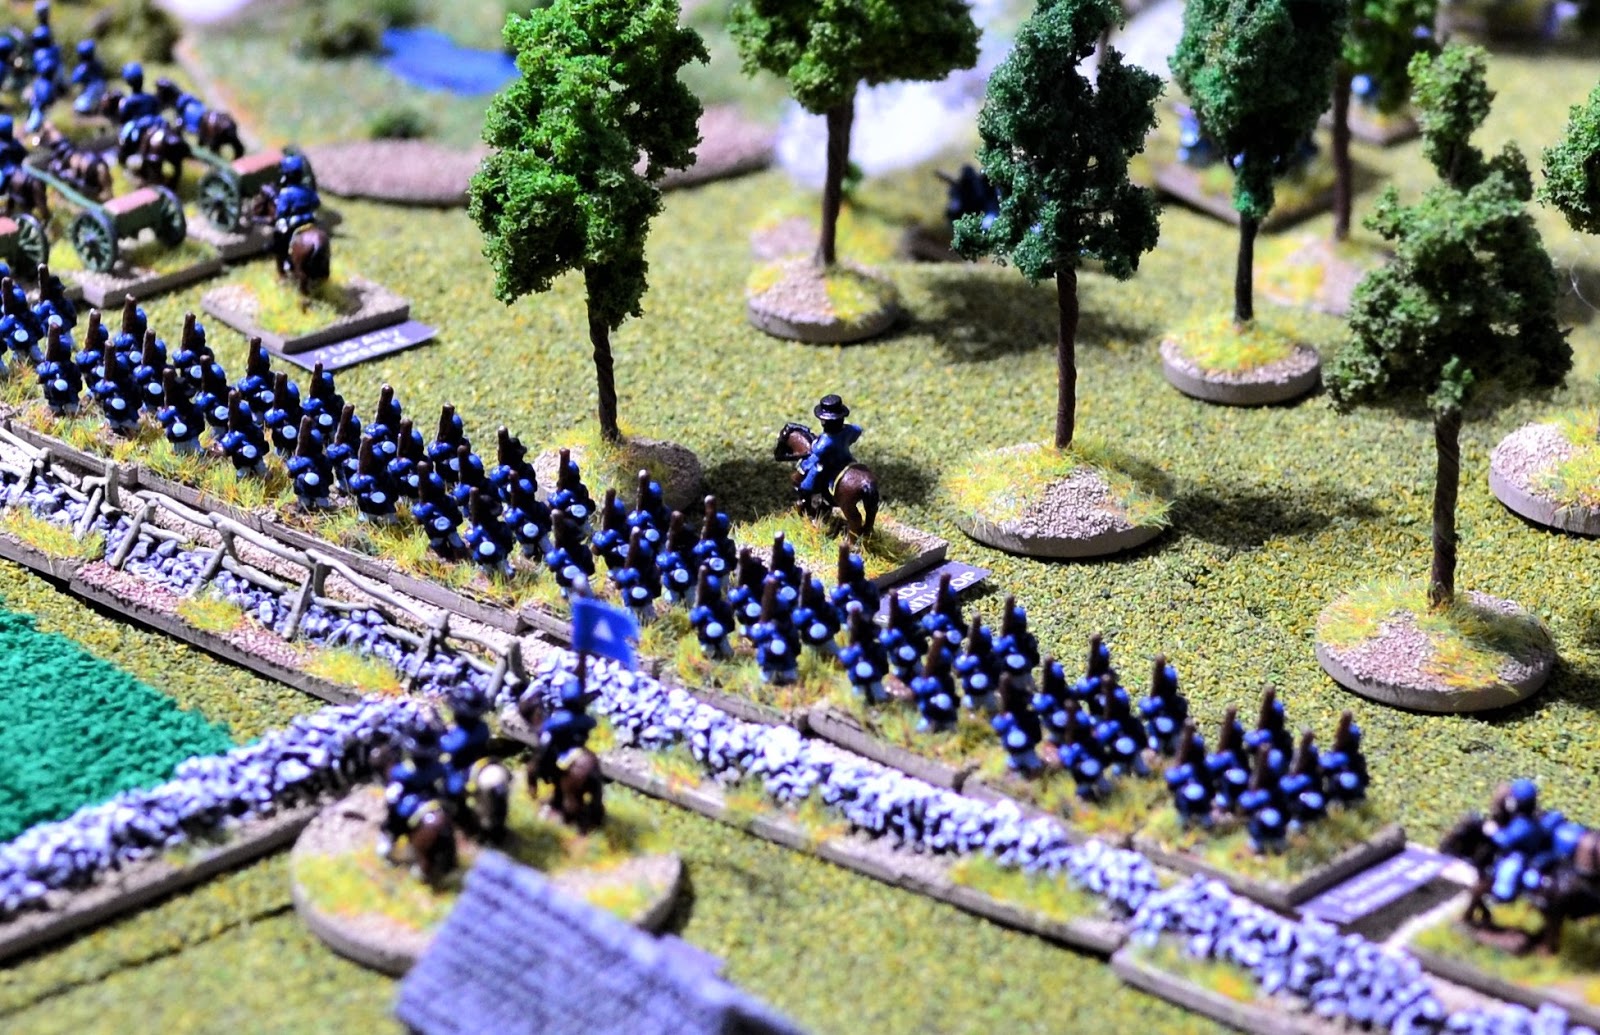
The 3rd Virginia forward deployed in the outworks.

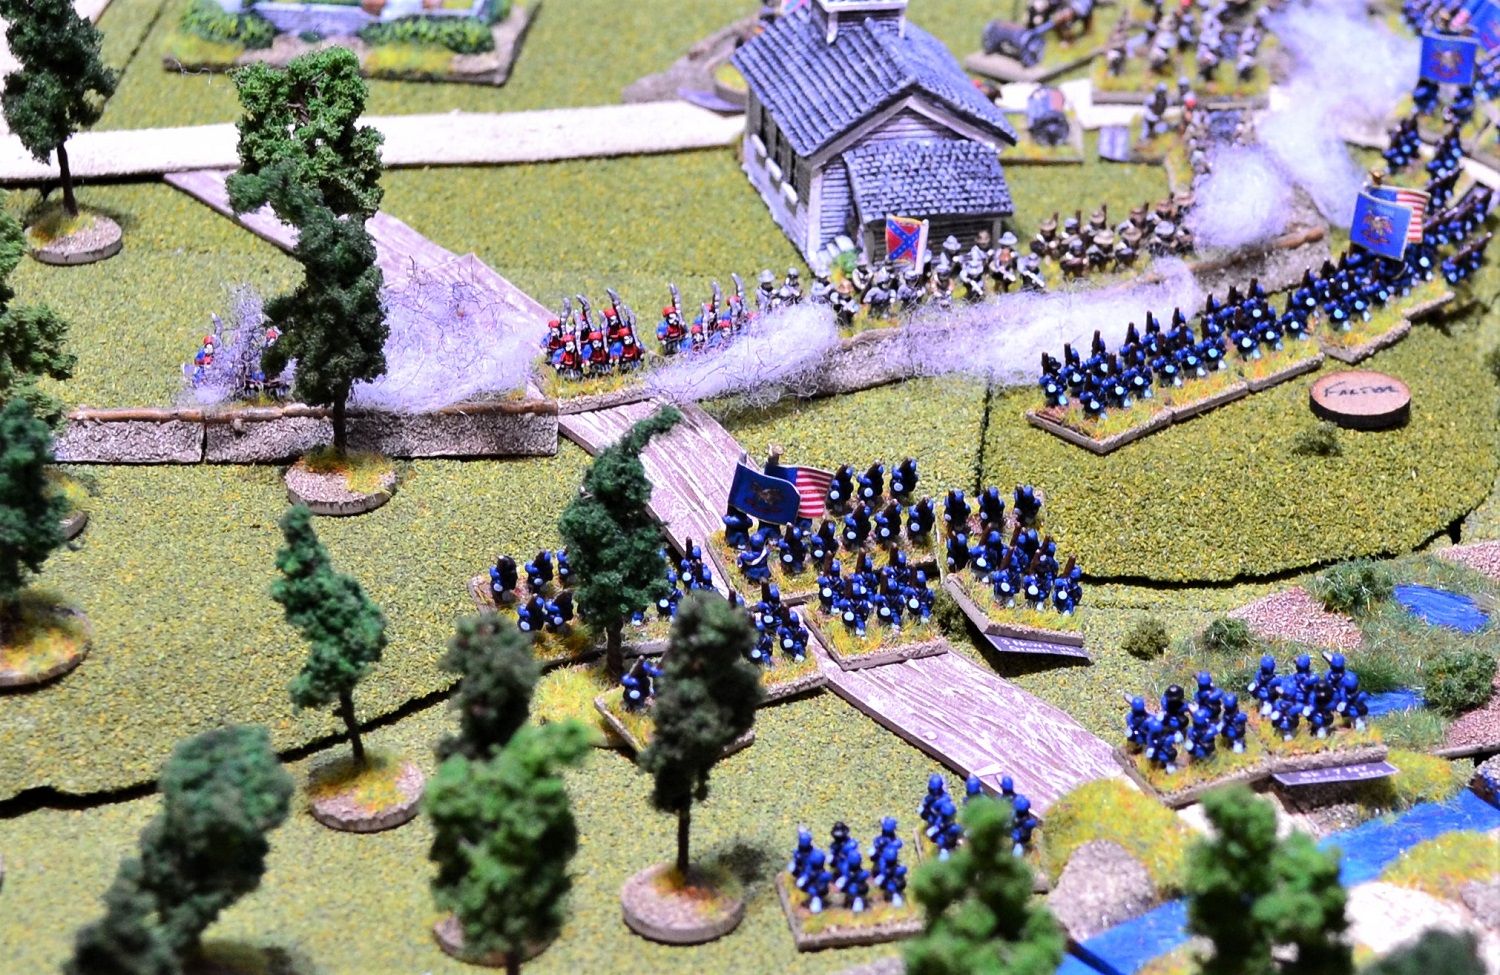
Col Peirce at the crossroads.

The 5th New York in the background with its skirmishers advancing through the woods to the left.


 The 3rd New York move to the edge of the orchard.
 While their skirmishers continue to exchange fire with the 3rd Viriginia.


Turn 1
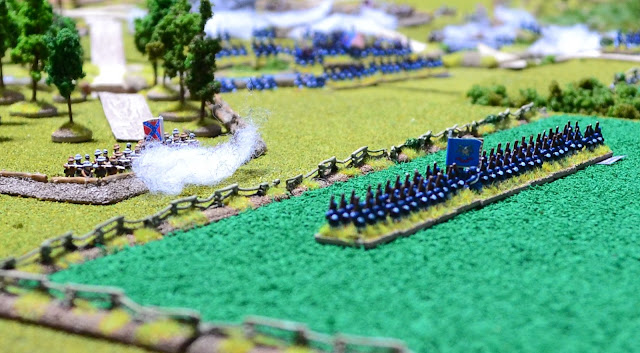
The Confederates held their position observing Union movement.

The first clash came as the 3rd New York skirmishers exchanged fire with the 3rd Virginia behind the breastworks. First blood came to the Union side as the rebels lost a figure.
Turn 2
2 command failures delayed the Union advance. The 3rd New York skirmishers continued to exchange fire with the Virginians.
Turn 3

This turn saw the arrival of Union reinforcements along the Hampton Road. A light howitzer cannon leading the combined 1st Vermont/4th Massachusetts approach the crossroads.
Greble has ordered the 2 6pdr cannon to limber up and reposition closer to the rebels (middle left). In the background the 5th New York make heavy weather of advancing through the woods.


The 3 Confederate cannon lining the breastworks open fire on the limbered Union artillery but miss completely! The nervous green artillerymen need to calm down a little!
Turn 4

The single Confederate cannon with the 3rd Virginia fire a blast of canister at the skirmishers with no effect. The 3rd New York now clear the orchard and move into the cornfield.

As the skirmishers of the 5th New York move to the edge of the woods, they come under immediate fire from the 1st North Carolina skirmishers spread out in the swamp. Neither side gains the upper hand as they trade shots.

The view from the Confederate position of the Union reinforcements advancing along Hampton Road.

Another view of the large Union battalion lead by it's skirmishers.
Turn 5

As the 1st Vermont/4th Mass continue long Hampton Road, more reinforcements arrive behind them in the shape of another howitzer and the 7th New York.

With their skirmishers heavily engaged, the 3rd New York deploy into line.


 The 3rd New York recalls it's skirmishers preparatory to an attack on the 3rd Virginia.


 Elsewhere Hood's cavalry advance towards the fence line bordering the swamp.


 The 5th New York skirmishers steadily advance through the swamp towards the Rebel skirmishers.


Turn 12
 The skirmishers of the 7th New York are moved to support the Union left flank and open fire on the attached cannon of the 3rd Virginia. No casualties are caused on either side. The routing 3rd New York (off to the right) successfully rally and begin reforming.
 Over at Big Bethel, the Union troops of the 1VT/4MA prepare to make the difficult assault across a stream and swamp before attacking the defensive positions uphill! The 7th New York (bottom right) moves forward to support them.
 On the Union right, the 5th New York skirmishers again charge the confederate skirmishers who stand firmly and pick them off as they negotiate the swamp. The Union skirmishers lose heart and go to ground. In the foreground, Lt Hood lines up his dismounted cavalry detachment along the fence line.
 Within the Big Bethel redoubt, the 2 companies of North Carolina are ordered towards the centre of their position to act as a reserve. There is increasing concern by Magruder of the Union build up threatening the right of his defences.

 The confederate outworks position takes a turn for the worse as the 7th New York skirmishers successfully kill the remaining crew of the attached howitzer.

 As the 1VT/4MA skirmishers approach the confederate position they receive a highly effective volley from the companies of the 1st North Carolina killing 3 of their number and generating a morale test. The skirmishers panic and go to ground.
 As the confederate skirmishers gradually fall back on their parent battalion, the 5th New York emerge from the woods and begin making their way through the swamp. This slows them to 1/2 speed and unforms them.


Turn 6

The 7th New York moves off the Hampton Road towards the cornfield.
The ADC, Wynthrop, forms an ad-hoc brigade consisting of the 5th and 7th New York and the 1st Vermont/4th Mass. The plan was for Wynthrop to use his brigade on a frontal assault on Big Bethel with the 3rd New York attacking from the left flank. When the 1st New York arrives it will be sent on a wide flanking move to the right keeping to the road for speed. When or if the 2nd New York arrives it will be deployed as required at that time.


Lt Hood mounts up his cavalry detachment and limbers up the attached howitzer.
Turn 7

This turn sees the arrival of the 1st New York.

The 3rd New York moves to the fence line braving a volley from the 3rd Virginia and it's attached Howitzer. Although minimal casualties were caused it was enough to lose a stand. This battalion had already lost a stand to friendly fire at the start of the game.

Lt Hood leads his cavalry and artillery onto open ground.
Turn 8

The 3rd New York delivers a devastating volley (rolling 11) causing 6 casualties to the 3rd Virginia and one of the 2 crew to the howitzer. In the subsequent morale test both units falter.


An overview of the centre shows the Skirmishers of the 1VT/4MA engaging the confederates at Big Bethel Church. It's parent battalion moves across the heights to the rear. The Union artillery fires on the 1st N. Carolina causing a single casualty. The Confederate artillery replies with no hits. The skirmishers of the 1st N. Carolina exchange fire with the 5th New York skirmishers in the swamp.
Turn 9

With the Rebels faltering, the 3rd New York seizes the moment and charges. Having crossed the fence they are met with a ragged volley from the heavily outnumbered 3rd Virginia and the Howitzer causing just a couple of casualties. Incredibly that was enough. The Union troops stopped mid-charge and faltered!

A view of the Union centre as the 1VT/4MA deploy into line with the 7th New York approaching their rear.


The 1st New York are given orders to conduct a flanking manoeuvre following the Back River Road towards the Ford Road.
Turn 10

In the middle of the photo the 5th New York skirmishers have charged the 1st N. Carolina skirmishers with the latter faltering and recoiling to their rear.
The artillery of both sides continue to exchange shots with minimal results. At the outworks all is quiet as both sides take time to recover from faltering.
Turn 11

The 3rd New York, having reformed, charge again but this time meet a steady volley from the defending 3rd Virginians and a round of canister from its attached howitzer. Although only 3 casualties were inflicted (and another stand lost), the green Union troops panicked and retreated back across the fence. Worse was to come as the officers and NCO's attempted to rally them in the morale phase only for them to fail abysmally. They dissolved into a rout. The 3rd Virginians, who had been convinced they were about to be overrun, now cheered wildly as the blue-coated troops fled towards the orchard.

The faltering confederate skirmishers now rallied on the opposite bank of Brick Kiln Creek. Elsewhere in the centre, the artillery of both sides continued to fire largely ineffectually.
Turn 12


On the Union far right flank the 1st New York continues making good progress on its flanking march.
Turn 11


And to the front of the 3rd Virginia, the 3rd New York has successfully reformed posing a significant threat.


Bad news for the confederates. On this turn the final reinforcements for both sides test to arrive. They must roll a '10' on a D10 to arrive. The Confederate 1st Louisiana battalion fails but the 2nd New York succeeds! Here they arrive on the Hampton Road.
Turn 14
 The 3rd New York, now reformed, advances once again towards the 3rd Virginia who wastes no time in giving the Union troops a volley. Several fall but morale holds.
 The difficulty of attacking through a swamp becomes all too apparent as the 1stVT/4thMA struggle through the severe terrain becoming unformed. The 7th New York advances to support them. Widespread Union command failures brings their force largely to a halt. Peirce, being a poor General, has fewer command pips to issue and hence more susceptible to command and control issues.
Turn 15
 The 3rd New York deliver a shattering volley at long range scything down many of the 3rd Virginia despite being behind breastworks. They falter in response.
 The 1VT/4MA commander attempts and fails to recall their skirmishers who are now fully engaged with the defending 1st North Carolina and the Virginia Battalion. They come under intense fire from the Confederates losing several casualties, faltering as a result. Their parent battalion, still wading through the swamp receive a blast of canister from the 3 rebel cannons in Big Bethel but do not suffer quite enough to generate a morale test.
 The attached cannon to Hood's cavalry run low on ammo. As there are ample supplies in Big Bethel, they will have to retire to replenish their stocks.
 The Union artillery does not have that luxury. Both 6pdrs run low on ammo severely restricting their effectiveness, which was not that great in the first place!


 In the middle left of the photo the 5th New York continue to wade through the swamp making slow progress. Top right the 2nd New York steadily advances along the Hampton Road making a detour around the artillery.

Turn 14

Turn 15


Help arrives for the Confederates. The 1st Louisiana tigers arrives with an attached cannon.
Turn 16

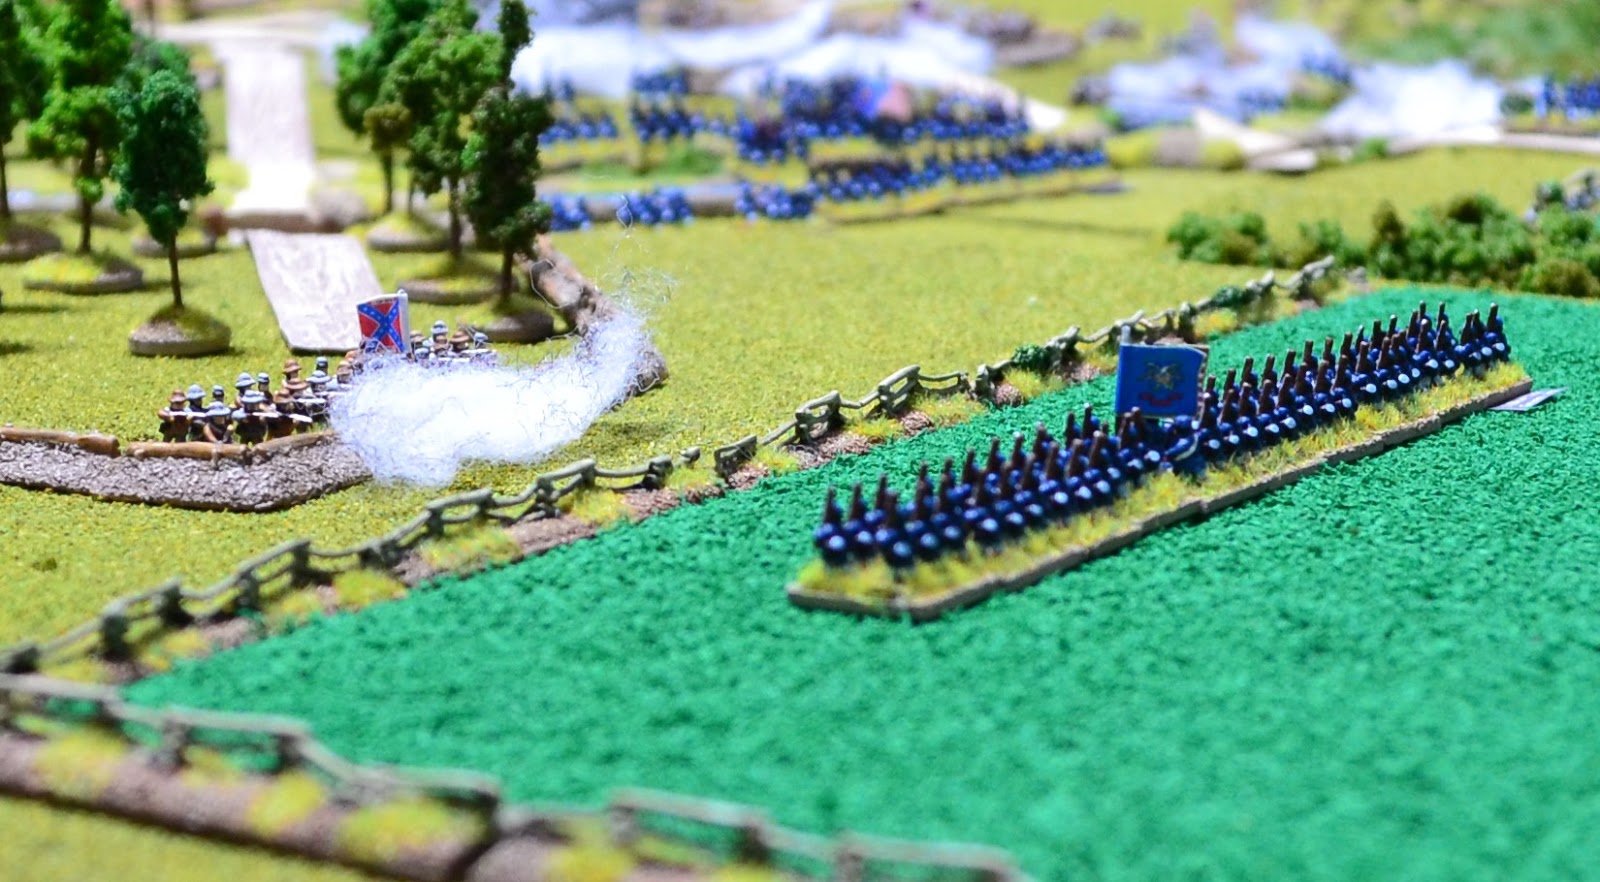
As the 3rd Virginia rallies from falter they receive another blast from the 3rd New York. More casualties takes them to the 50% casualty dispersal point. They conduct a morale test and pass! Clearly made of stern stuff.
The 1VT/4MA finally clear the swamp but now have to reform on the slopes leading to Big Bethel. They come under fire again from both infantry and artillery but survive the hail of musket and canister balls. To their rear the 7th New York form a single line ready to take their turn through the swamp.


Hood's attached cannon limbers up to replenish it's ammo.


Turn 17

The 3rd Virginia grimly hangs on fighting a one-sided battle with the 3rd New York who deliver another killer volley. The weakening 3rd Virginia fails to inflict much damage in return with just one Union casualty suffered.

The 1VT/4MA skirmishers, who had been sandwiched between their parent unit and the Confederates defending the breastworks suffered my casualties reducing them to their 50% dispersal point. In the subsequent morale test they failed and dispersed. Due to their small size they had no effect on neighbouring units. The 1VT/4MA had though managed to reform.

The Louisiana Tigers enter Big Bethel.
Turn 18

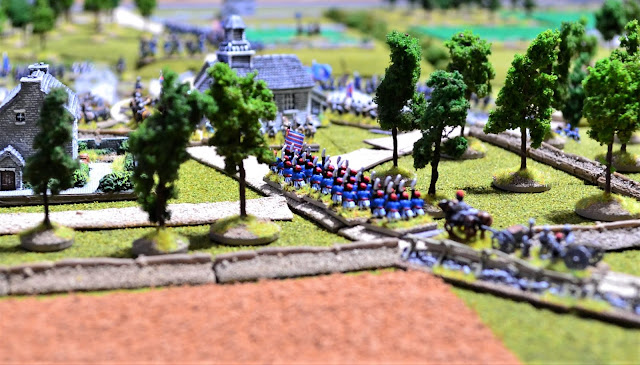
In the middle of the photo, the 1st North Carolina move a company onto Hampton Road to head off the 2nd New York who are now crossing the bridge in front of their position.

An overview at the end of this turn. To the right, the 1st Vermont/4th Massachusetts fire their first volley against the Rebel defenders aided by the skirmishers from the 7th New York on their left flank. The 1VT/4MA inflicted 5 casualties for the loss of 7.
Out of view to the right, the firefight between the 3rd New York and the Confederate 3rd Virginia has come to a conclusion. A final volley from the Union troops reduces the 3rd Virginia to below 25% strength automatically dispersing them.
Turn 19

 The 1VT/4MA charge towards the Confederates manning the breastworks. Several of their number fall causing them to halt and return fire.

 Wynthrop fails his command test and orders an all-out attack. His impetuosity was to prove costly. Ordered to charge, the 1VT/4MA come under withering fire from the Confederate defenders. The two cannon roll a double six automatically causing the Union troops to falter. They lose 8 casualties in total causing the green troops to rout.

 Luckily for the Union, all nearby pass their morale tests as a result of the routing 1VT/4MA. Crucially the ad-hoc brigade under Wynthrop also passes its test. Here the 7th New York now reform.
 The 5th New York moves out of the swamp towards Big Bethel but must reform from unformed before it can assault the Confederate position.

Turn 19

The victorious 3rd New York forms column and moves towards Big Bethel.


The 5th New York recalls its skirmishers and advance to the fence line.
Turn 20


They burst through the 7th New York to their rear. The situation goes from bad to worse as they fail their rally test and disperse from the field. The loss of this battalion pushes the Union force beyond their 'severe casualty' limit gaining the Confederates a victory point. It also means that 1 will be deducted from all future command rolls.


In the distance the Confederates see the 1st New York advancing along the Ford Road completing its flanking manoeuvre.
Turn 21
 The 2nd New York charged along the Hampton Road towards a company of the 1st North Carolina. They met with ferocious fire from the rebs (a double 6) combined with a blast of canister from an adjacent cannon scythed down the front ranks causing them to falter. Wynthrop received a light wound taking him out of the action for this turn.
 As the 1st New York drew closer, it became imperative that the confederates protect their exposed flank. Hood's cavalry is recalled to assist in that.
Turn 22
 All along the Union line a cloud of smoke erupts from the numerous levelled rifles. The Virginia battalion (in the foreground next to the church) suffers the most losing a stand and faltering.


 With time running out Peirce becomes more desperate. He orders another assault by all available troops hoping that surely one will make contact and make that all important breach in the confederate defences. In the middle of the photo the 3rd New York charges the Louisiana Tigers who pour fire into them. The morale of the 3rd New York evaporates and they rout.


Turn 21


Turn 22


At the sight of the 3rd New York advancing towards Big Bethel, the Louisiana Tigers prepares to move to the perimeter to counter them.

Artillery, cavalry and infantry are rushed to the left flank to oppose the 1st New York.
Turn 23
the 
With the Virginians faltering, Wynthrop sought to exploit the weakness and ordered a general attack. The 7th New York (nearest the camera) charge the rebels including the faltering Virginians. They received several casualties during the charge which was enough for the green troops to immediately retreat back into the swamp! The 2nd and 5th New York battalions to the right suffer little better, both faltering during their charges.

As the 3rd New York approach Big Bethel, the Louisiana Tigers take their position in the line.

A mix of Hood's cavalry, two cannon and the detached 2 companies of the North Carolina man the perimeter facing the 1st New York's line of advance.
Turn 24

The Louisiana Tigers fire their first volley into the approaching 3rd New York.

The Union troops reform along the line preparing for the next assault.

The approach of the 1st New York is met with cannon fire from the 2 rebel cannons inflicting only minor casualties.
Turn 25

This turn sees many of the Union troops paralysed by command failures. The confederates have now reached their heavy casualty level gaining the Union a victory point. This means the confederates now have -1 to their command rolls. As the Union troops have lost more they are subject to -2.
The only movement is another attempt by the 2nd New York in column on the Hampton Road to charge the rebels. Once again they fail going to ground.
Turn 26

Adjacent to the 3rd New York, the 7th New York, having extricated themselves from the swamp, make another charge and once again fail to make contact and falter.


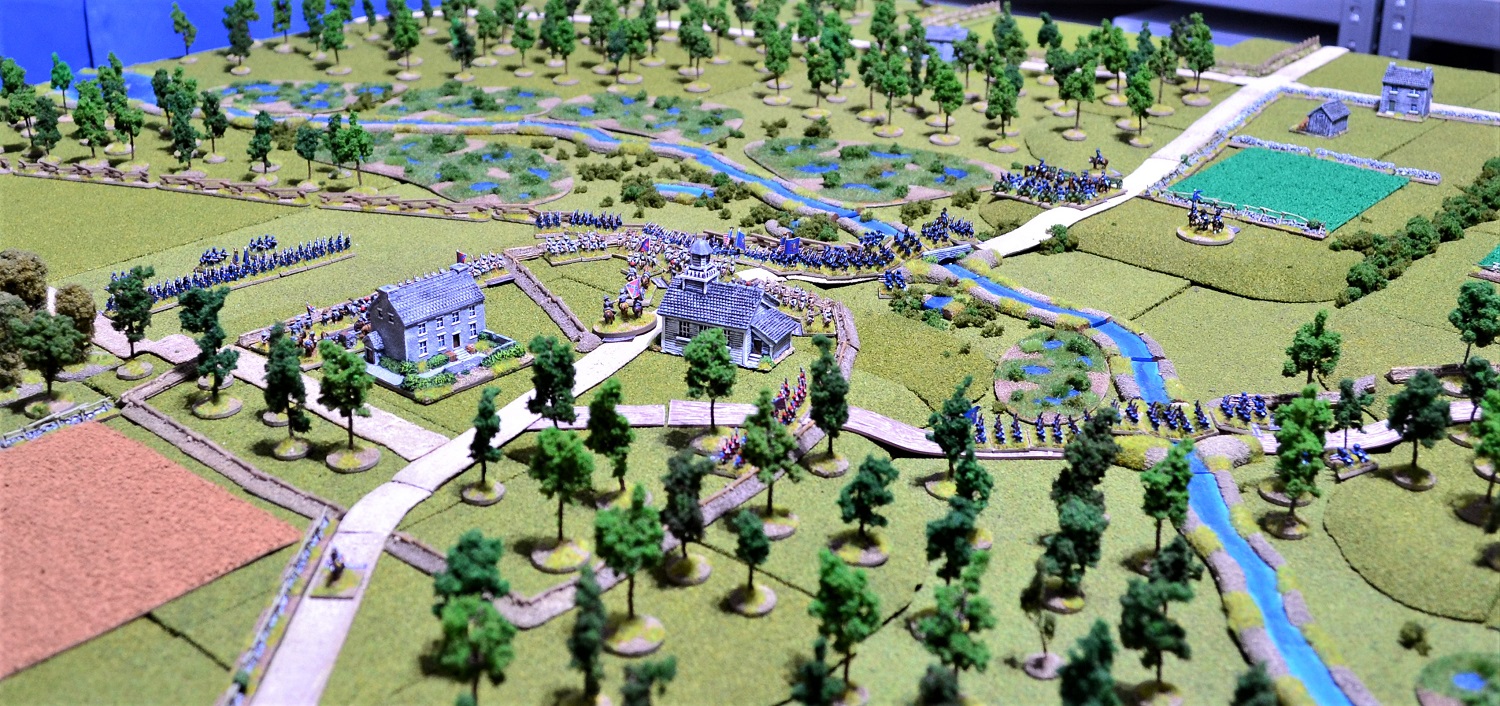
3 photos covering an overview with all the counters and 'smoke' removed to review the current situation with 2 moves to go. The confederates have run out of reserves with all their available units now strung out around the perimeter. The only realistic chance of the Union side winning is to achieve a dramatic breakthrough, or at least cause a unit to rout that has a ripple effect on the rest. As we now move on to the end game:
Turn 27

The Louisiana Tigers scores a double 6 as they fire on the skirmishers of the 7th New York. 4 casualties are inflicted and the skirmishers are forced to retire 12cms before going to ground. (Skirmishers bottom right in photo after fall back).

The 7th New York continue to trade volleys with companies of the 1st North Carolina and the Virginia battalion. With no reserves left to plug gaps in the line, the confederates are beginning to look threadbare.

The confederate line firing on the approaching 1st New York with Hood's cavalry dismounted cavalry detachment closest to the camera.

The 1st New York fails its command test and remains in position.

Another view of the 1st New York as their skirmishers engage the rebels.
Turn 28 (last turn)

With the last turn of the game, the Union troops throw everything into a last ditch attempt to dislodge the confederates. It begins inauspiciously with the 3rd New York charging in column formation along the Passway faltering in the teeth of the Louisiana Tiger's rifle volley.

Success at last as the 7th New York delivers a shattering volley reducing the Virginia battalion to 50% strength. In the subsequent morale test the confederate battalion disperses leaving a yawning gap on the rebel line. The 7th New York also sustained casualties though taken it below 50% strength, and....

It too dispersed! The 2nd New York on the Hampton Road failed to charge but did fire off a volley from it's leading company. A double 6! This caused the company rebels defending the road to falter. The nearest General, Randolph in this case, conducted a 'Risk to General' test. He shamefully left the field in disgrace ordering his men to retreat (which they ignored).

The artillery commander, Randolph, galloping away along the Hampton Road believing all is lost!

The final action of the 1st New York moved into rifle range and exchanged shots with the rebels with neither side inflicting many casualties.


With time run out for the Union attempt on Big Bethel, 3 photos of the final positions.
The Union gain a victory point for inflicting heavy casualties on the Confederates. The Confederates score 2 points for inflicting more heavy casualties on the Union plus another point for retaining possession of the redoubt. So history is repeated with a Confederate victory.
The final butchers bill reveals the size of the Union defeat. The Union lost 39 bases and the Confederates 15 1/2.
Three factors were against the Union side, even though they heavily outnumbered the Confederates. 1. Peirce was a poor General and therefore more command test failures occurred. This slowed the advance of their troops eating up valuable time.
2. All troops are green apart from the artillery. This made it harder to charge home. If just one of their sizeable battalions had made contact it could have made a significant difference.
3. The Confederates were in an excellent defensive position. By the time the Union troops were through the swamp they were having to reform in effective rifle range of the Confederates. They then had to charge uphill to hastily prepared breastworks under the teeth of that fire. Only the flanking move by the 1st New York was in clear ground.
With more time the Union troops could have relied on their advantage of weight of fire to grind the Confederates down. On a number of occasions this was tried with a degree of success but it would have been debatable that breaches in the Confederate line could have been made in time to exploit. In hindsight though this would probably have given the Union troops a better chance of success.
The Regimental Fire & Fury scenario translated easily to Guns at Gettysburg rules. There were several very large units and under GaG these can be split to smaller more manageable sizes. I was interested though and how this would play out as written.
That brings to an end The Battle of Big Bethel. Next up for ACW will be McDowell, a GaG scenario.
Fascinating game Jon, a really handy sized table and order-of-battle, nice to see the final game turn bring a few moments of decision.
ReplyDeleteMany thanks Norm.
DeleteExcellent as always. Those Hobbycraft fields work well in this scale.
ReplyDeleteCheers, Richard P
Thanks Richard. Yes they are rather useful. When I get time I intend drybrushing them to tone them down a little and make them a little less uniform in appearance.
DeleteSuperb battle report, Jon, with many stunning eye-level battle scenes. Great job and a visual treat. Twenty-eight turns is a long, long game. Is this the length given in the scenario and how long did this take to fight?
ReplyDeleteMany thanks Jonathan. The original scenario was for 14 turns but I calculated (rightly as it turned out) that this would be nowhere near enough for the Union to properly engage the Confederate defenders. Although I have scaled the board down it is still a larger area for 6mm. I would guess probably around 6 or 7 hours playing time in total when deducting the time it took to photo. It was though played out over several days in bitesize chunks.
DeleteSplendid game Jon, well narrated and documented as usual. You really know how to make a great looking table!
ReplyDeleteMany thanks Mike
DeleteAs I patiently wait for the news on your Napoleonic campaign this excellent report keeps me occupied ;)
ReplyDeleteNice story and visuals as always. Guns at Gettysburg seems like a nice set of rules.
Thanks Pascal. Yes I find Guns at Gettysburg a nice set from the General de Brigade family of rules. I have a little work to do before the next Nap campaign battle (Grissburg). Mainly buildings to be acquired and painted. Hopefully not too long though.
DeleteWhat a very pretty, neat & tidy game.
ReplyDeleteReally excellent write up, sounded like fun.
Best wishes,
Jeremy
Many thanks Jeremy. Yes it was a fun game.
Delete