Showing posts with label WW2 Operation Nostalgia. Show all posts

Tuesday, 21 July 2020

Operation Nostalgia: Allied Invasion of Rhodes Part 3 - Landings at Faliraki

Troops of the 2nd Infantry battalion loaded their landing craft from the troop transport 'Glenearn' and will form the first wave.

I have given the landing craft BKC stats and will move 10cm each turn. Each invasion wave will begin 20cm out from the beach with 2 turns between them. If a landing craft becomes suppressed it will continue to move as normal but will be unable to fire any armaments (mainly MG's). If a landing craft is destroyed/sunk all troops and vehicles are lost. If within 5cm of beach infantry units land but are suppressed with half their maximum hits, rounded up, recorded against them.

When troops disembark I have referred back to the BKC rules for deployment.  

Turn 1

The battle opens with a bombardment from the cruiser HMS Dido. Several positions became suppressed but all survived.

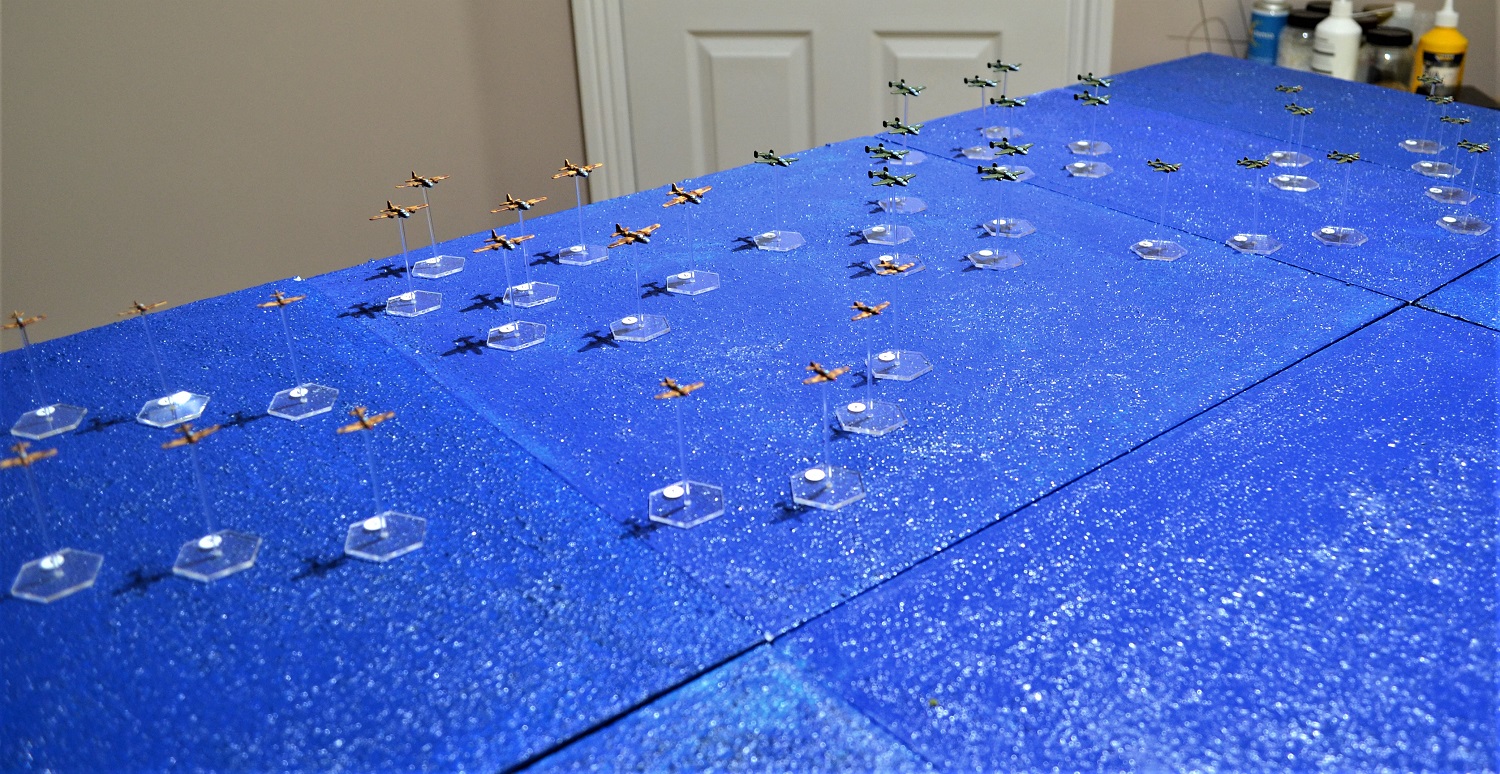
 The Germans open fire on the approaching landing craft who survive unscathed.

Continued -

Tuesday, 14 July 2020

Operation Nostalgia: Allied Invasion of Rhodes Part 2 - Landings at Faliraki Introduction

Focus now switches to Table 1:


This will involve the British landings at Faliraki where they hope to begin their conquest of the liberation of Rhodes.

The game will be played on a 6' x 3'9" board using Blitzkrieg Commander IV rules. Throughout this campaign you will see some uniforms and paint schemes not ideally suited to this theatre of the war. Most of my WW2 collection is set in early war North Africa or late war eastern and western fronts. I have therefore, shoehorned in figures and models from my existing collection but hopefully will not detract too much from the overall presentation.

Orders of Battle will be listed at the conclusion.

This posting will set the scene prior to the game proper.

Continued - 

Wednesday, 8 July 2020

Operation Nostalgia: Allied Invasion of Rhodes Part 1

I did not realise it has been so long since I last posted on this campaign (Oct 2018!). Time to press on with this project.

Over the last couple of weeks I have been completing terrain for the invasion of Rhodes and is now ready to go.

The original magazine articles described Rhodes as made up of four 8' x 5' boards. Bearing in mind this was primarily designed for 20mm figures I have simply translated this to 8 x 5 of my own 9" terrain boards, or 6' x 3'9". 


When overlaying a grid on the original stylised plan of Rhodes I found that tables 2 to 4 were slightly squashed. Hence oblongs rather than squares. However, for the tabletop I will revert to squares which will slightly elongate the island.

Continued -

Monday, 29 October 2018

Operation Nostalgia: Map Moves Day 3 Move 2 - Move 3

With the air phase of Day 3, Move 2 complete, all naval elements were moved:

The US landing fleet (red 2) approach its target beach at the north end of Karpathos (north red beach on map). The 8th Army landing fleet (red 1) closes in on its target at the north end of Rhodes (north east red beach on map). 

Several Axis flotillas have returned to port for refuelling. The U-Boats (blue 3 & 4, the latter submerged) attempt to close in on the US fleet.

Continued -

Friday, 26 October 2018

Operation Nostalgia: Axis bombing raid on US landing fleet & Swordfish locate a U-Boat

As the allied fleet transporting US landing forces destined for Karpathos steams towards that island, a formation of aircraft is picked up on radar heading in their direction. The sole remaining Seafire performing a CAP piloted by a Junior Ace Squadron Leader, is vectored towards the formation which is a mere 10,000 yards away.

The Axis forces consist of 9 x JU88 medium bombers escorted by 6 x Italian Folgore fighters. 

Allied Transport Fleet.

Overview at the start with the lone Seafire in the centre on his way to intercept the enemy bogeys.

Continued - 

Tuesday, 16 October 2018

Operation Nostalgia: Allied Air Raid on Cattavia

Hoping to replicate their success on the Maritza airfield raid, a combined allied bomber formation escorted by fighters set out from Cyprus to bomb the other Rhodes airfield at Cattavia.

In total, 12 Mitchell and 7 Boston bombers are escorted by 10 Hurricanes and 9 P38 Lightning fighters.


P38 fighters with Mitchell bombers in the background

Closeup of Mitchell bombers.
Continued -

Monday, 8 October 2018

Operation Nostalgia: Map Moves Day 2 Move 6 - Day 3 Move 2

Fine weather continued into nightfall for the final move of Day 2. With no intelligence gained this turn and no aircraft in the air it was straightforward ship movement.

Axis forces continued their random movement on patrol with the allied main fleet to steaming towards their destination.

A note about the counter blue '1'. This is the Kormoran which in the campaign was purely to be a troop transport rather than the famous Armed Merchant Cruiser. However, I have had second thoughts and it will be that AMC. I apologise to the purists as this is of course totally unhistorical, but having acquired it together with all the other AMC's in a pack from Navwar, felt it would add a little more spice to the campaign. I have reduced it's troop carrying capacity to that of a cruiser and it will now roam the map looking for victims. 

The first move of Day 3, another night move, saw the fine weather continue and the Axis forces gained intelligence about red '2'. The allied force having split in two with '1' heading for Rhodes and '2' Karpathos. The only Axis naval units that can pose a realistic threat to the allied fleets are the 2 U-boats, blue '3' and '4'. They make for the location of the fleet sighting and other units close the gap should any opportunity arise for them to intervene with any stragglers etc.

Continued -

Monday, 1 October 2018

Operation Nostalgia: Axis Air Raid on Main Allied Fleet.

Scale = 1/600 Aircraft; 1/3000 ships
Manufacturers = A/c Tumbling Dice; Ships Navwar & Davco
Rules = Bag The Hun 2 for Air to Air; General Quarters 3 for Air to Ship
Table Size = 6' x 3'9"
Terrain = Sea boards by Purbeck Terrain (no longer trading)

Having been spotted by an Arado Floatplane, the main allied invasion fleet is the target for an Axis air attack.

Axis air units were scrambled with 8 x ME110 fighters and 9 x HE111 torpedo bombers out of Samos rendezvousing with 8 x Italian Folgore fighters and 6 x SM79 torpedo bombers out of Kos before heading out in the direction of the allied ships.

The Axis air formations were picked up on ship's radars at 15,000 yards (150cm) leaving little time to get aircraft airborne from the carrier HMS Avenger. 4 Seafires from blue section were already in the air forming a CAP. 8 Seafires on the deck of the Avenger scrambled to get airborne.

Before I detail the AAR a few words about the rules. Bag the Hun is used for purely the air to air phase with GQ3 for the air to ship. You will have seen from the previous action involving the Cyprus fleet that this neatly split into two different parts with the air to air phase concluded before the bombing attack. This action will not be so convenient due to the close proximity of the fleet.

I had considered just using BTH as it caters for ship action. However, I felt it was all a little too generic for the purposes of my campaign. The ship's AA capability is based on the type of ship rather than what it was actually equipped with historically.

I have therefore created a basic hybrid of the two to allow the ships to respond as per GQ3 but BTH continues with the air to air section. A very brief overview:

2 x BTH moves = 1 x GQ3 air phase (3 air phases = 1 GQ3 move)
A chart was created showing the GQ3 altitude levels in comparison with those of BTH (14 levels in GQ3 v 6 in BTH). Fortunately level 3 in GQ3 is the same as level 3 in BTH which happens to be the maximum height for close range AA fire. Long range being level 4+.

The tricky part commences when the bombers begin their torpedo attack runs. Any Seafires attempting to shoot them down would have broken off by now to prevent them from flying into the barrage of AA fire. So GQ3 now kicks in for the bombers covering the torpedo attack.

Continued -

Tuesday, 18 September 2018

Operation Nostalgia: Map Moves Day 2 move 5 & Air Raid on Maritza

The weather at the start of move 5 was fine as a result air operations would resume. As this was the final move before nightfall, and with all 3 Arados available, they all took to the skies to resume their designated patrol areas. A reminder -

Aside from patrolling the sea on the lookout for allied ships or aircraft formations, those that passed over islands not occupied by Axis troops were instructed to check for any signs of enemy activity. In this instance Kasos is the only island where British commandos had landed. Aside from daily checks to establish if they had been discovered through intelligence, each time an Arado passed over them they threw a D6 and if a '6' result they would have been sighted. Neither of the 2 Arados passing over Kasos spotted any activity.

Continued -

Friday, 14 September 2018

Operation Nostalgia: HMS Triton attacked by Italian Corvettes

Having resurfaced following it's escape from an attack by a German Arado floatplane, the submarine, HMS Triton sights 3 Italian Corvettes bearing down on them. The weather has turned stormy with a force 7 sea state giving the sub crew confidence that they can successfully evade their attention.

Scale = 1/3000th
Models = Tumbling Dice
Rules = General Quarters 3
Table Size = 4'6" x 3'.

This is another small action but one in which I can further explore the submarine rules in GQ3. On to the action:

The 3 Italian Corvettes in line astern sight the Triton as they are in turn sighted by the sub.

HMS Triton on the surface sights the Italians.
Continued -

Wednesday, 5 September 2018

Operation Nostalgia: Map Moves Day 2 Move 4

The situation at the end of Move 4 -

This move saw the return of stormy conditions and therefore all aircraft are grounded. Several Axis ships have returned to port for refuelling and repair. 

Having evaded the Arado floatplane, the submarine, HMS Triton (red 5), resurfaces and continues to move towards the sighting of Blue 6. As it approaches Anafi, it's lookouts spot 3 Italian anti-submarine Corvettes (blue 8) bearing down on them. 

NEXT: Triton's fight for survival. 

Tuesday, 4 September 2018

Operation Nostalgia: Arado Floatplane v Brit Submarine

This was always going to be a quick action and so it proved! Having scanned the rules I am using for this campaign I settled on Action Stations which provided for dice rolls for each weapon firing and thus a little more detail.

The Arado stats varied between GQ3 and those contained within Action Stations and Bag The Hun rules. Principally that in GQ3 the Arado is equipped with Depth Charges whereas the other two list it's ordnance as 2 x 110lb bombs. On checking my books and online there is no reference to depth charges so I am going with the other two. Which is unfortunate for the Germans in this action.

The Arado is also equipped with two front facing 20mm cannons and an LMG. There are also 2 rear LMG's which cannot be used for straffing.

HMS Triton has a 4" deck gun but no AA armaments. On to the action:

On seeing the Arado closing on them, the Triton immediately crash dives. It is clear though that the German plane will get in at least one attack. As it approaches the submerging submarine the Arado opens up with it's 20mm cannon and forward machine gun. Hits are scored but only superficial damage caused.

As the Arado passes overhead it drops both light bombs. They straddle the sub and one is dangerously close but neither hit.

By the time the Arado has circled preparatory to another straffing run the submarine had submerged. The Axis forces were now alerted to the fact that an enemy sub was operating within the Aegean.

That has to be the shortest AAR I will ever write not helped by the absence of AA weapons on the sub! Placed into the context of the campaign though it adds to the story of how it is developing.

NEXT: Map Moves

Monday, 3 September 2018

Operation Nostalgia: Map moves Day 2 Move 3

The situation at the end of Move 3 (2nd Daylight move) on Day 2:

The weather continued to be fine so good flying conditions.

The Axis forces gained no intelligence this move on the whereabouts of the main allied fleet. An Arado floatplane however spotted a British submarine on the surface (more of that later).

For the allies intelligence revealed that blue 6 was a group of small escort vessels. Details were transmitted to their submarine in the area, HMS Triton (red 5) to investigate.

With regard to map movement, the remains of the Cyprus invasion fleet (red 3) continues to limp home to Limassol with the submarine U515 (blue 4) lurking not far away. The main Allied fleet (red 1 & 2) continues to make progress.

Allied aircraft are taking a break and assessing their losses and damage before launching another strike.

For the Axis forces, an Arado floatplane spots HMS Triton on the surface. It immediately transmits its position. As a result, several Axis vessels with anti-submarine capabilities are directed towards this location.

Triton has yet to make it's move but before it does it will have to contend with an Arado intent on sinking it.

This game is so easy to set up I thought 'what the hell', I will play it on the tabletop. This is one of the beauties of campaign games in that you get to play actions you would not normally think about playing as they are simply too small. To make it more interesting I will pour over the various rules I am using to see which would be best suited for such a small action.

NEXT: HMS TRITON RECEIVES UNWELCOME ATTENTION!

Saturday, 1 September 2018

Operation Nostalgia: Bombing Raid on Cattavia, Rhodes

Flying out of Cyprus and approximately one hour behind the American raid, are a squadron of Douglas Boston bombers escorted by a squadron of Hurricanes. Their target is the airfield at Cattavia at the southern end of Rhodes. As they approach the island they are intercepted by a squadron of Italian Macchi MC200 Saetta fighters who had been scrambled as a result of the earlier attack by American planes on the airfield at Maritza on Rhodes.

The Hurricanes would have to fight off the Saettas to make way for the bombers to get through.

Table size = 6' x 3'9"
Scale = 1/600 (Tumbling Dice models)
Rules = Bag The Hun 2 (General Quarters 3 for the bombing raid)

Orbats:

British

12 x Hurricane IIC
12 x Douglas Boston III

Italian

12 x Macchi MC200 Saetta (late)


The British bombers escorted by Hurricanes benefit from the sun being behind them. The red counters on the section leaders indicate that they are presently 'bogeys' meaning they have yet to be spotted by the Italians. The rules allows for dummy 'bogeys' to be placed but as I am playing this solo I have not included them on this occasion.

Continued -

Saturday, 25 August 2018

Operation Nostalgia: Air attack on Cyprus fleet.

As HMS Biter's fighter squadron gains height, formations of German aircraft approach:

Table size = 6' x 3'9"
Scale = 1/600th
Rules = Bag The Hun 2 (GQ3 for Air attack on fleet)


Orbats:

British
8 x Grumman Martlet F4-F
4 x Sea Hurricanes IIC

German
12 x Me BF109G-6
12 x Junkers Ju-87D Stukas

British Fleet
Exeter - 8" Cruiser (Flagship)
Biter - Light Escort Carrier
Sheffield - 6" Cruiser
Dauntless - 6" Light Cruiser
Hero - Destroyer
Jervis - Destroyer
Jackal - Destroyer
Aldenham - Destroyer
Envoy - Admiralty tug

Invasion force transports:
LCT
Prince David - Landing Ship

8 x Grumman Martlets and 4 x Sea Hurricanes from HMS Biter climb up through 20,000 feet acutely aware that the German formations are not far away.

A squadron of Me109's escorting a squadron of Stuka dive bombers approach at high altitude.

Continued - 

Monday, 13 August 2018

Operation Nostalgia: The Air War Begins

I am going to change the way I provide the After Action Reports a little for this campaign. It will be written up from the Allied perspective which I hope will make it a little more interesting for the reader. With that in mind, with good weather the war in the air has begun -

The Cyprus fleet regroup following the U-Boat attack and as they resume their slow passage back to Limassol, Biter's radar picks up a formation of aircraft heading in their direction out at the maximum 35,000 yards range. With their aircraft on deck and ready to launch, the Grumman Martlet's are first into the air followed by the Hurricanes. As the fighters form up with those already in the air performing the CAP, a decision is made to fly off the Swordfish to make for safety at Cyprus.

As the Fleet Air Arm fighters gain altitude they see two formations of aircraft ahead of them and heading in their direction.

Meanwhile two allied bombing raids are underway. A squadron of American B-25 Mitchell bombers escorted by a squadron of P-38 Lightning fighters have flown out of Cyprus heading for the airfield at Maritza on Rhodes. As they cross the coastline of Rhodes and approach the airfield at high altitude all is quiet. They become increasingly confident that they have surprised the Axis forces, but that turns to concern as the airfield comes into view. There is not a sign of a single aircraft on the ground!

A few puffs of smoke below them show that some AA batteries have sprung into life but clearly they are of insufficient calibre to reach their altitude. The Mitchell's aim to put the airfield out of action for a day or two and unload their bombs over the runway. Luck is not on their side as all miss and the only damage caused was to a hapless Italian truck who took a direct hit. Both squadrons immediately turn for home aiming to refuel and re-arm for another attempt.

To the south a squadron of British Douglas A-20 Boston bombers escorted by a squadron of Hurricanes are en-route to bomb the Rhodes airfield on the south of the island at Cattavia. They arrive approximately 1 hour after the American raid and as they approach the southern Rhodes coastline a formation of enemy fighters appears hurtling towards them.

Note:

For the Mitchell's bombing raid I did not set up the board. I am more than happy playing small actions in campaigns but to go to the trouble of building an airfield for the sake of one dice roll seemed a little excessive. Hence I used the system in GQ3 to determine damage, AA fire etc. The only difference being I wanted to determine what, if any, units on the ground are hit. The Mitchell's had two near misses which I took to mean landed within the environs of the airfield and therefore could affect any units based there. A dice roll determined that one had no effect but the second had hit something. Therefore, I rolled another dice to determine at random which unit had been on the receiving end. Fortunately for the Axis forces it was just a truck!

The two air contacts will be played out although there will be a delay of a few days until I get the final units painted.

NEXT: Air strike on the Cyprus fleet.

Friday, 10 August 2018

Operation Nostalgia: U-Boat sighted by Cyprus Fleet

With dawn came a new problem for the battered invasion fleet from Cyprus. The German submarine, U515, sighted the British fleet slowly making their way back to Cyprus: -

Scale = 1/3000th
Rules = General Quarters 3
Table Size = 4'6" x 3'9"

The Opposing Forces:-

British:
Exeter - 8" Cruiser (Flagship)
Biter - Light Escort Carrier
Sheffield - 6" Cruiser
Dauntless - 6" Light Cruiser
Hero - Destroyer
Jervis - Destroyer
Jackal - Destroyer
Aldenham - Destroyer
Envoy - Admiralty tug

Invasion force transports:
LCT
Prince David - Landing Ship

Axis:-
German:
U515 - Type XIC Submarine

The opening scene with U515 in the foreground. 2 combat air patrols are currently circling the British fleet. At the top left corner is one of those CAP's, a pair of Grumman Martlets, at 9,000 feet.

Continued -

Tuesday, 7 August 2018

Operation Nostalgia: Naval Battle Assessment and Map Moves

As ships completed the task of rescuing survivors from sunken ships, a roll call was made to assess the current state of the 1st Army Brigade and the viability of continuing to land what was left of them.

To assess casualties I created a system calculating losses dependent on the amount of damage suffered and if the ship sinks. If a ship does sink then the numbers who survive will depend on how long it takes for it to slip beneath the waves. In the rules a D12 is rolled with the result being the number of moves it takes to sink. So 10 - 12 moves = 90% saved down to 1 move = 10% saved. These percentages are of the total number of survivors from ship damage.

In the battle the Transports Leeds and Sepoy were torpedoed. The former took 5 moves to sink and the latter 1 move. That equates to 50% lost in the Leeds and 90% in the Sepoy with all equipment lost in both.

The Landing Ship, Prince David, survived but suffered significant damage. All 3 cargo holds, two of which contained troops and the 3rd equipment, were damaged with 2 set on fire. It also lost 3 of its 6 hull boxes. This equated to the loss of 40% of its men, 75% of its equipment and 6 of its 10 landing craft.

Of the 3 infantry battalions, there were now only the equivalent of just over one left with the 2nd battalion suffering particularly badly (being transported on the Sepoy). Only 2 infantry rifle platoons survived. The motorised battalion lost a third of its number and was no longer effectively motorised. The Brigade HQ survived.

Of the Brigade supports, the following were lost:
1 tank squadron (3 Sherman tanks)
Recce Squadron
Light AA battery
Field Artillery Battery (25pdrs)
1 of the 2 Sextons in the SP Field Artillery Battery
Both Forward Artillery Observers
1 of 2 Forward Air Controllers
The entire Supply company

The Biter, Sheffield and Aldenham were now carrying the survivors from the sunken transports.

Many of the surviving warships had suffered heavy damage, particularly the destroyers and the cruiser Sheffield.

It was felt that to continue would be inviting disaster and it would be wiser to return to Cyprus to conduct repairs and give the troops a chance to recover.

Continued -

Friday, 3 August 2018

Operation Nostalgia: Naval Battle off Cyprus

Scale: 1/3000th
Ground Scale: 1cm = 100yds
Models: Mostly Navwar with a couple of Davco
Rules: General Quarters 3
Table size: 6' x 3'9"

The Opposing Fleets:-

British:
Exeter - 8" Cruiser (Flagship)
Biter - Light Escort Carrier
Sheffield - 6" Cruiser
Dauntless - 6" Light Cruiser
Havock - Destroyer
Hero - Destroyer
Jervis - Destroyer
Jackal - Destroyer
Troubridge - Destroyer
Aldenham - Destroyer
Woodruff - Corvette
Brave - Minesweeper/Escort
Envoy - Admiralty tug

Invasion force transports:
LCT
Prince David - Landing Ship
Leeds - Transport
Sepoy - Transport

Axis:-
German:
Koln - 6" Cruiser (German flagship)
Z1 Leberecht Maass - Destroyer
Z2 Georg Thiele - Destroyer
Z3 Max SchultzDestroyer
Z4 Richard BeitzenDestroyer
Z18 Hans LudemannDestroyer
Z32 - Destroyer

Italian:
Raimondo Montecuccoli - 6" Cruiser
Lince - Torpedo Boat
Antares - Torpedo Boat
Palestro - Torpedo Boat

The British Fleet moving west at a sedate 8 knots due to the slow moving LCT.
German Flotilla steaming due east at 26 knots.

To the north of the Germans, the Italian flotilla also steams east at 26 knots.
Continued -

Saturday, 21 July 2018

Operation Nostalgia: Map Moves Day 1 - Day 2

Day 1 - Move 6 (Night)
Weather - Fine

The overall situation at the end of move 6 on day 1.

Continued -