
Bottom left: Hulsen still cannot clear the French 2/13th Light Infantry out of the wood who steadfastly repulses all attempts to defeat it. The battle rages in Rosenheim with no side gaining a clear advantage.
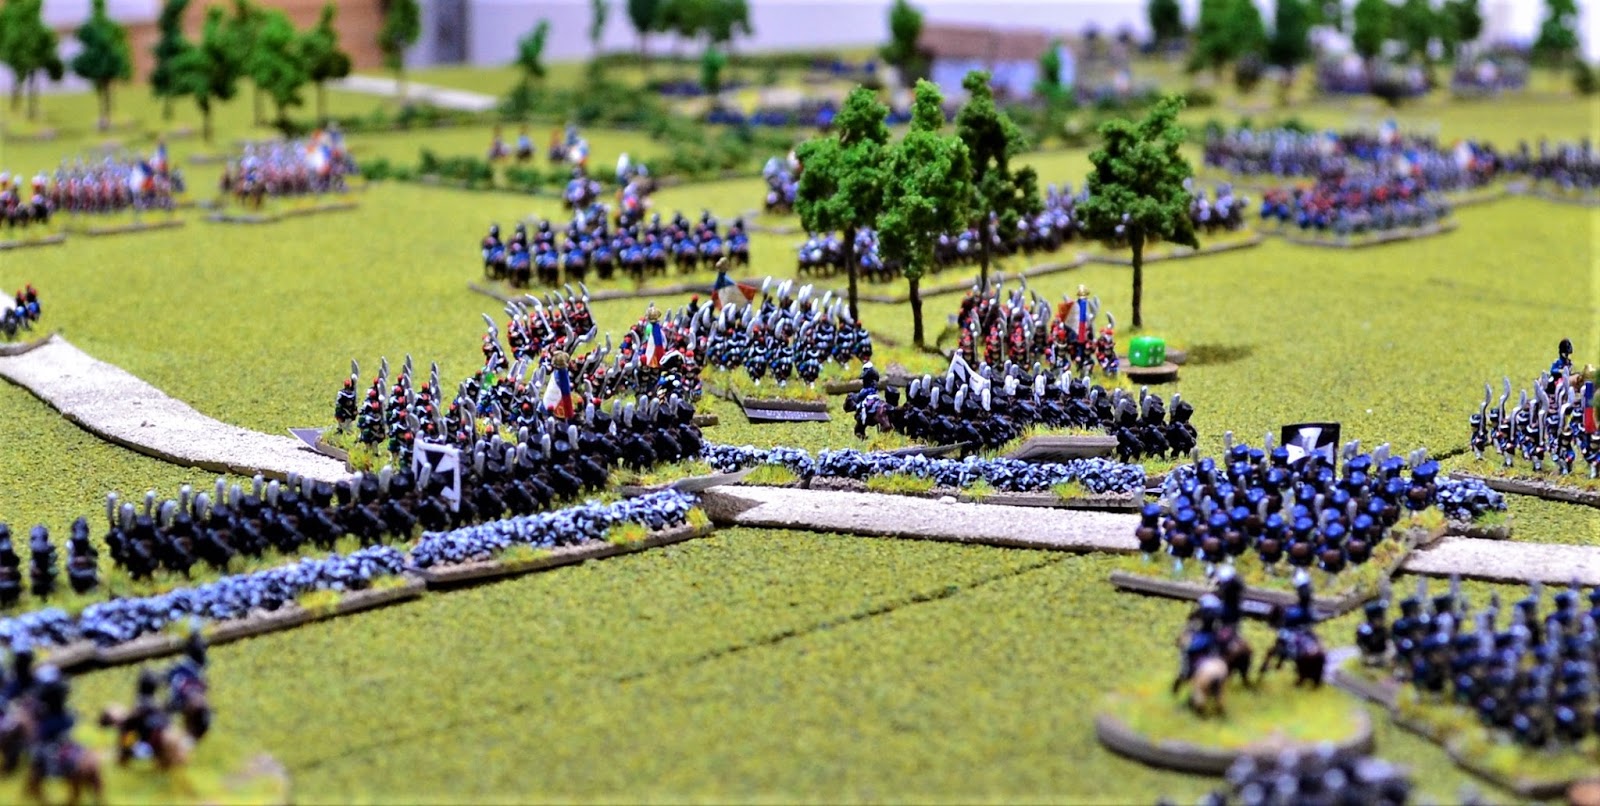
Middle: The French cavalry charge continues to make headway pushing through the allied centre and splitting the Prussians from the rest. Bylandt's Brigade within the walled field forms square due to the close proximity of the French cavalry.
Top: The French infantry continue to hold the woods but their cavalry on the far left of the French position looks increasingly precarious.

A closer look at the western end of the battlefield demonstrates the plight of the French Cavalry. Just one regiment is left out of 2 light cavalry divisions. The allies have been hampered by command test failures but now ready themselves for the final attack after which they intend to descend on the rear of the French left. The Hanoverians have now cleared the French battalions away from the hedgerow (middle of photo) and now advance into the empty field.

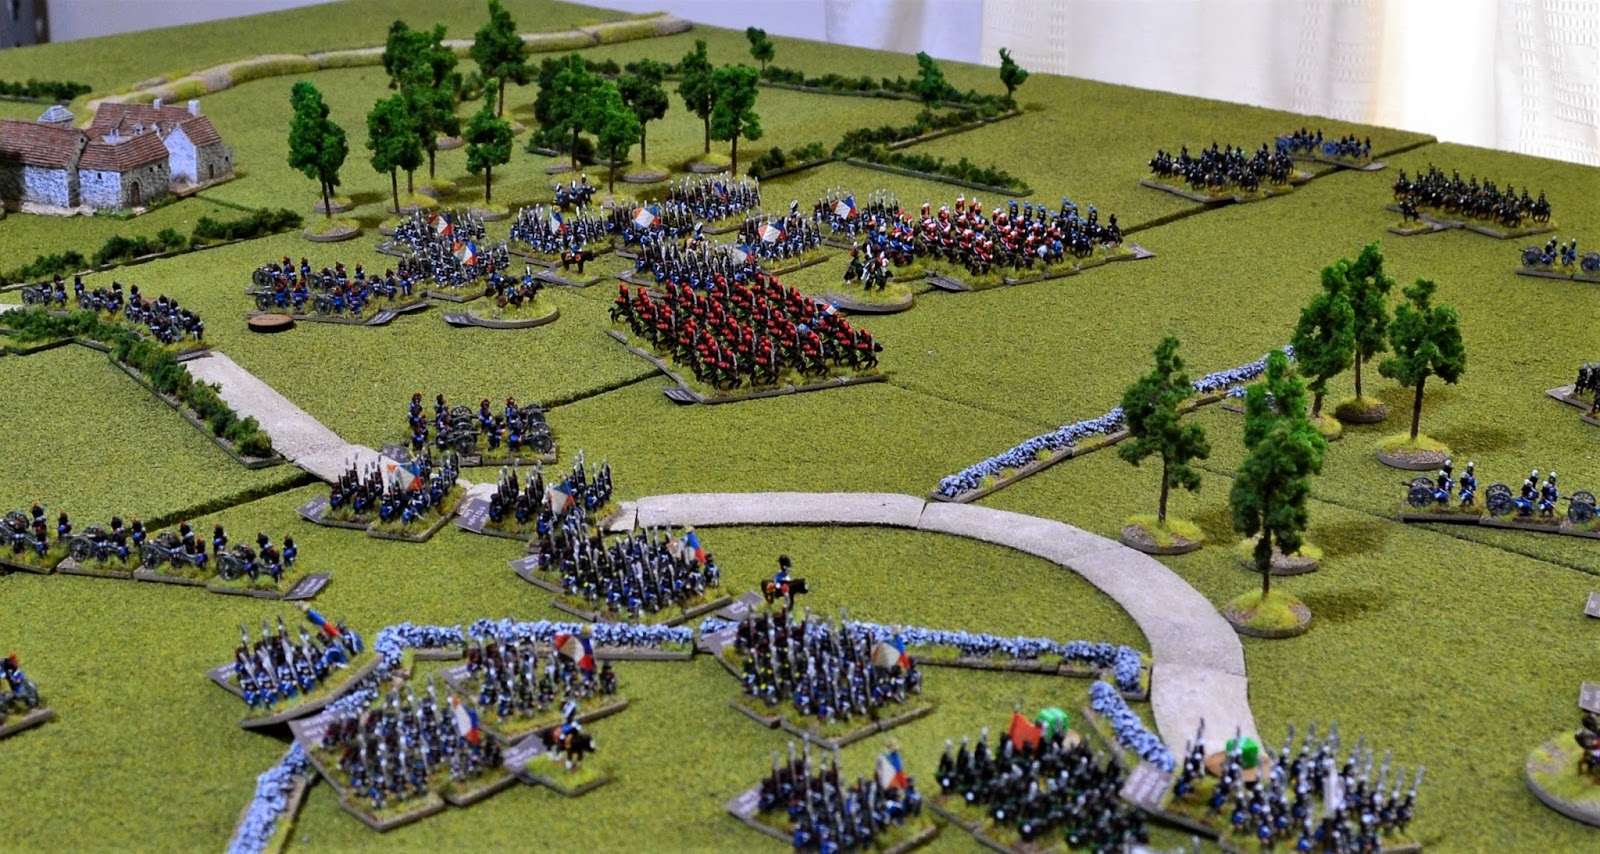
The French cavalry surge through the centre completely destroyed Treskow's Brigade. Lutzow had rallied the remnants of his Brigade and charged the 4th Cuirassiers of Dubois Brigade. Against all odd they won the melee forcing the Cuirassiers to retreat.
To the left of the photo the Young Guard has begun to engage a battalion of Kemphen's 6th Infantry defending the stone wall. With the rest of the regiment having formed square it was imperative that the wall was held. The Prussians enjoyed initial success causing 1 Guard battalion to retreat.

A highly effective counter attack by Villiers' Brigade punched through the stalemate in the woods with the Hanoverian Brigades. Both Vincke and Halkett were repulsed. It was now down to the Brunswickers to clear the French infantry from the left.

The allied cavalry however, had just one small Lancer unit to deal with and the flank was their's. They needed infantry and artillery support to take maximum advantage of this victory but that was in short supply!


The ADC in command of the French 2/13th Light infantry had pulled the battalion deeper into the woods to protect it from Prussian artillery fire. One of Hulsen's Landwehr battalions routed from the field and the other two suffered from poor morale having repeatedly failed to deal with the lone French battalion. Hulsen managed to get one of his two remaining battalions to charge the 2/13th who fired a devastating volley at close range. As the leading ranks fell the Landwehr battalion routed leading to a complete collapse in the Brigade morale check leading to dispersal. The 2/13th had done the seemingly impossible and routed an entire regiment of Landwehr despite being under fire from an artillery battery. And it was still in reasonable fighting condition.

Laurens' 24th Infantry have now gained the Manor House garden wall and attack the main building (middle left).

The Young Guard finally defeat the Prussian 1/6th Infantry who are forced to retreat. The French Guard now charge into the squares

The French columns burst through the first of the Prussian squares and now plough into a 2nd square. 2 battalions of the Prussian 28th Infantry form column and attempt to counter-attack the Young Guard (middle of photo).

With the allied cavalry crumbling, Bylandt lines the walls to protect his position from the dominant French cavalry. A diminished battery of artillery runs low on ammo but nevertheless causes the French some headaches (middle left).

The Brunswickers enjoyed early success in repelling the first of the French from the woods. Having won their early melees they were however, counter-attacked while still unformed. After a couple of hard fought melees they too retreated. This brought to an end to the infantry assault on this flank.

With one battalion acting as a reserve, Bylandt has his walls covered (middle right). His tactics were proving fruitful with fire from his artillery and infantry causing severe casualties to Walthier's Cuirassiers (middle of photo). The Young Guard continue to bear down on the 6th Infantry with another square hit (middle left).


A brief respite came in the allied centre with determined attacks by the 28th Infantry and 2nd Westphalian Landwehr drove back the Young Guard.


Schmitz' Brigade from Donzelot's Division attacked the Dutch Militia defending the western wall (bottom middle) driving them back. The 1/13th Light continues pushing back the Dutch leaving itself isolated.

With what was left of the Brunswick infantry falling back on a new defensive line being formed by the remnants of Vincke and Halkett's brigades, the victorious cavalry are now ordered to retire to their own lines.

The dejected allied light cavalry brigades fall back.

French artillery begin to move up to support the infantry advance. In the middle of the photo, an ADC has taken command of two infantry battalions and lined the hedgerows to protect the rear and flank of Girard's Division from an allied cavalry attack that is no longer coming.

It is now abundantly clear to the Prince of Orange that defeat is inevitable. He therefore orders a withdrawal. The Prussian reserve artillery has already left the field for safety. In the middle of the photo, both Young Guard brigades have combined ready to renew their attack on the allied centre.

Steinmetz' Brigade falls back from Rosenheim. Quiot's Division who have been engaged relentlessly with Steimentz' formation for most of the battle now triumphantly advance from Rosenheim.

Bylandt has so far been spared the worst of the French attention as a result of command test failures by the French infantry. 2 French artillery batteries have though caused havoc with one of his battalions who have fled the field. Bylandt forms attack columns with his militia and charges those battalions that have crossed the wall.

The Brunswickers supported by Hanoverians form a new defensive line on the allied right flank. In the distance (top left) the first battalions of Durutte's Division emerge from the wood.

As Quiot's rather diminished Division advances, the heroic 2/13th Light battalion forms square to protect itself from a possible Prussian cavalry attack (middle left).

The Young Guard break through the last of the Prussian resistance in the centre.

Bylandt's Brigade comes under intense pressure from Piat and Schmitz' Brigades.
The Light Cavalry of the Guard had swept across the battlefield towards the allied right flank in an effort to intercept the retreating allied cavalry. The rearmost units of the allied cavalry counter-charge the Guard but are easily swept aside.


The end finally comes with a total collapse of allied morale. With his command broken, Ziethen now contemplates how he is going to rally them to march to Blucher's aid. As the despondent Prince of Orange rides from the field he receives a message from Ziethen. He has been ordered to return to Prussia. Just when he thought matters could not get any worse! With his army streaming along roads back to Holland he prays that the British have arrived in force.
Grouchy can now once again advance into Holland. He vowed he would not retire again and was determined to finish the job this time around. Messages were sent to Marcognet to do likewise along the coast. There was just one hour left until nightfall.
CASUALTIES:


The situation by nightfall:

RESULT - A DECISIVE FRENCH VICTORY
NEXT: MAP MOVES
A critical turn of events! My Baccus 6mm French line and Cuirassiers have arrived, so I am experimenting with basing configurations.
ReplyDeleteExcellent Norm. Are you going to be using Black Powder? If so then you are likely going to be using different basing sizes to mine.
DeleteThe Baccus are on 20mm strips, so I am looking at 20mm bases, doubled ranked and then 3 bases per unit when in line and 4 bases (in a 4 x 4 arrangement) for attack column. This would work with home brew rules on hex terrain, but for an open table, BP is a good candidate, but I also have Dave Brown's General d' Armee that seems to be getting raves and which is probably closer to what you use.
ReplyDeleteSounds good Norm. Look forward to seeing the results.
DeleteOh my! A most costly loss for the Allies, with the Dutch forces on the ropes, and Ziethen's ability to reinforce Blucher diminished!
ReplyDeleteNot looking good for the allies. Defeat after defeat is not helping their morale!
Delete