The time came to test to see which map from 3 to 9 was next. I used a D10 using the first relevant number that was rolled. And that was a '6' so that map has now been added.
This map has no German forces positioned. However, 5% of the German total is deployed in concealed positions on such maps. In the book it describes that when blue (Russian) forces approach an area where troops can be concealed (e.g. a wood) they roll a D6 with a 5 or 6 revealing red (German) troops. A further die roll determines if it is the entire 5% (4, 5 or 6) or half that number with the remainder concealed elsewhere. The revealed troops immediately open fire.
To define what "approach" means in BKCIV I have included two methods. The first is to Reconnoitre the area using Recce troops. If successful then the D6 is rolled to determine if concealed troops are present. The second method is where troops move within 10cm of that area at which point the test is made. The revealed troops will immediately open fire using Opportunity fire.
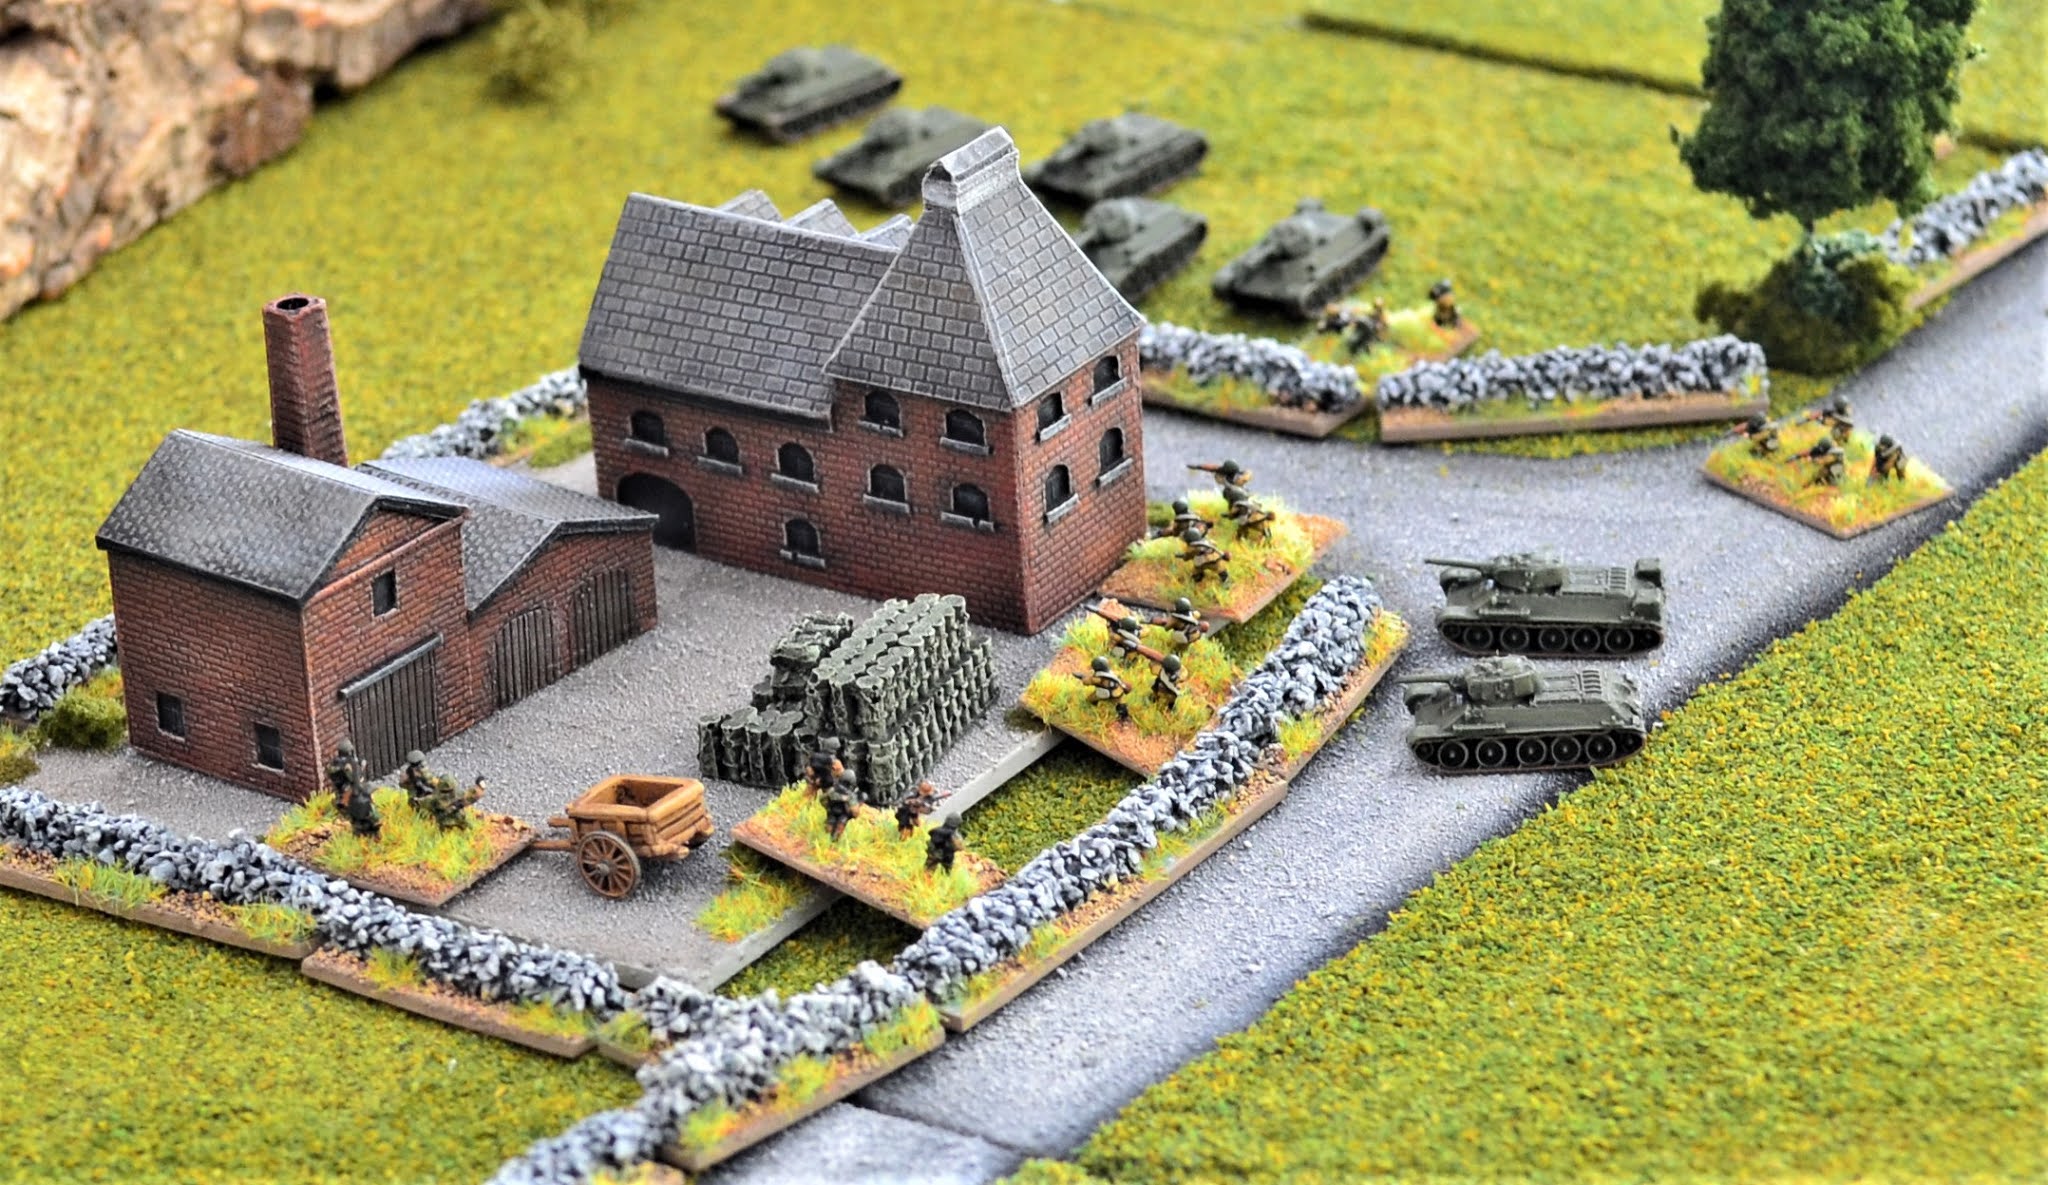
As you will see in the photographs I have introduced a second area of potential concealment, a couple of industrial buildings.
 |
| MAP 6 |
 |
| MAP 2 |
As previously only the bottom half of Map 6 will be represented rolling over to the full map as the Soviets advance.
Continued -
Turn 1
 |
| Half of Map 6 added at the top of the photo. |
 |
| After a slow start and a complete collapse of the company commander's authority, 'B' company of T34's lead by their battalion commander have become the lead armoured formation joining the recce troops. |
 |
| The Russian recce battalion along with sniper teams continue to pursue the retreating Germans although the gap widens. |
 |
| A lack of progress this turn for many Russian units as a result of command failures. |
 |
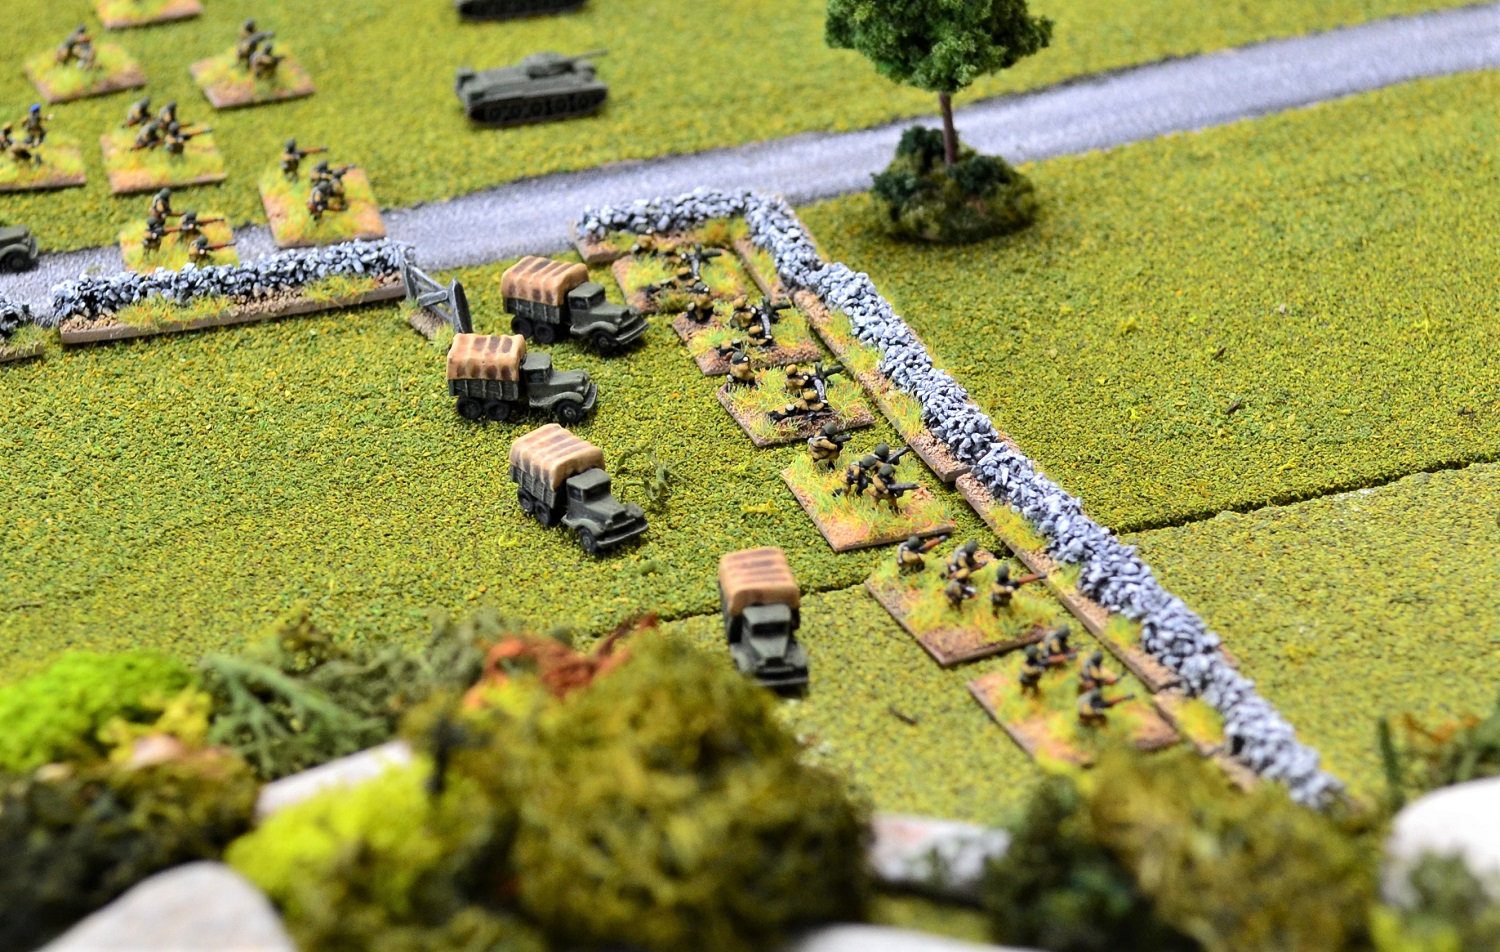
| With the 1st Motorised battalion strung out through the pass, the Russian commander decided to switch the lead infantry formation to the 2nd Motorised who had now arrived at the front in their trucks. |
 |
| The German troops continue their retreat. |
 |
| An overview looking from the north. |
Turn 2
 |
| An overview as the 2nd Motorised continues along the valley road. |
 |
| Using opportunity fire, the Germans open up on the lead Russian recce units causing a hit but otherwise of no real effect. |
Turn 3
 |
| The board has now been shunted down to include the whole of Map 6. The Soviets observe the woods to the left up a steep hill and accessible. It will need to be reconnoitered for any hidden enemy. They also see ahead of them an unmapped industrial building. The retreating German company appear to be heading for that. |
 |
| The 2nd Motorised battalion make very good progress and debus. Almost too good as they have overtaken some recce units! Likewise 'A' Company of T34's who have past a now static 'B' Company. |
 |
| The MMG company of the 2nd Motorised has also deployed behind the wall. |
 |
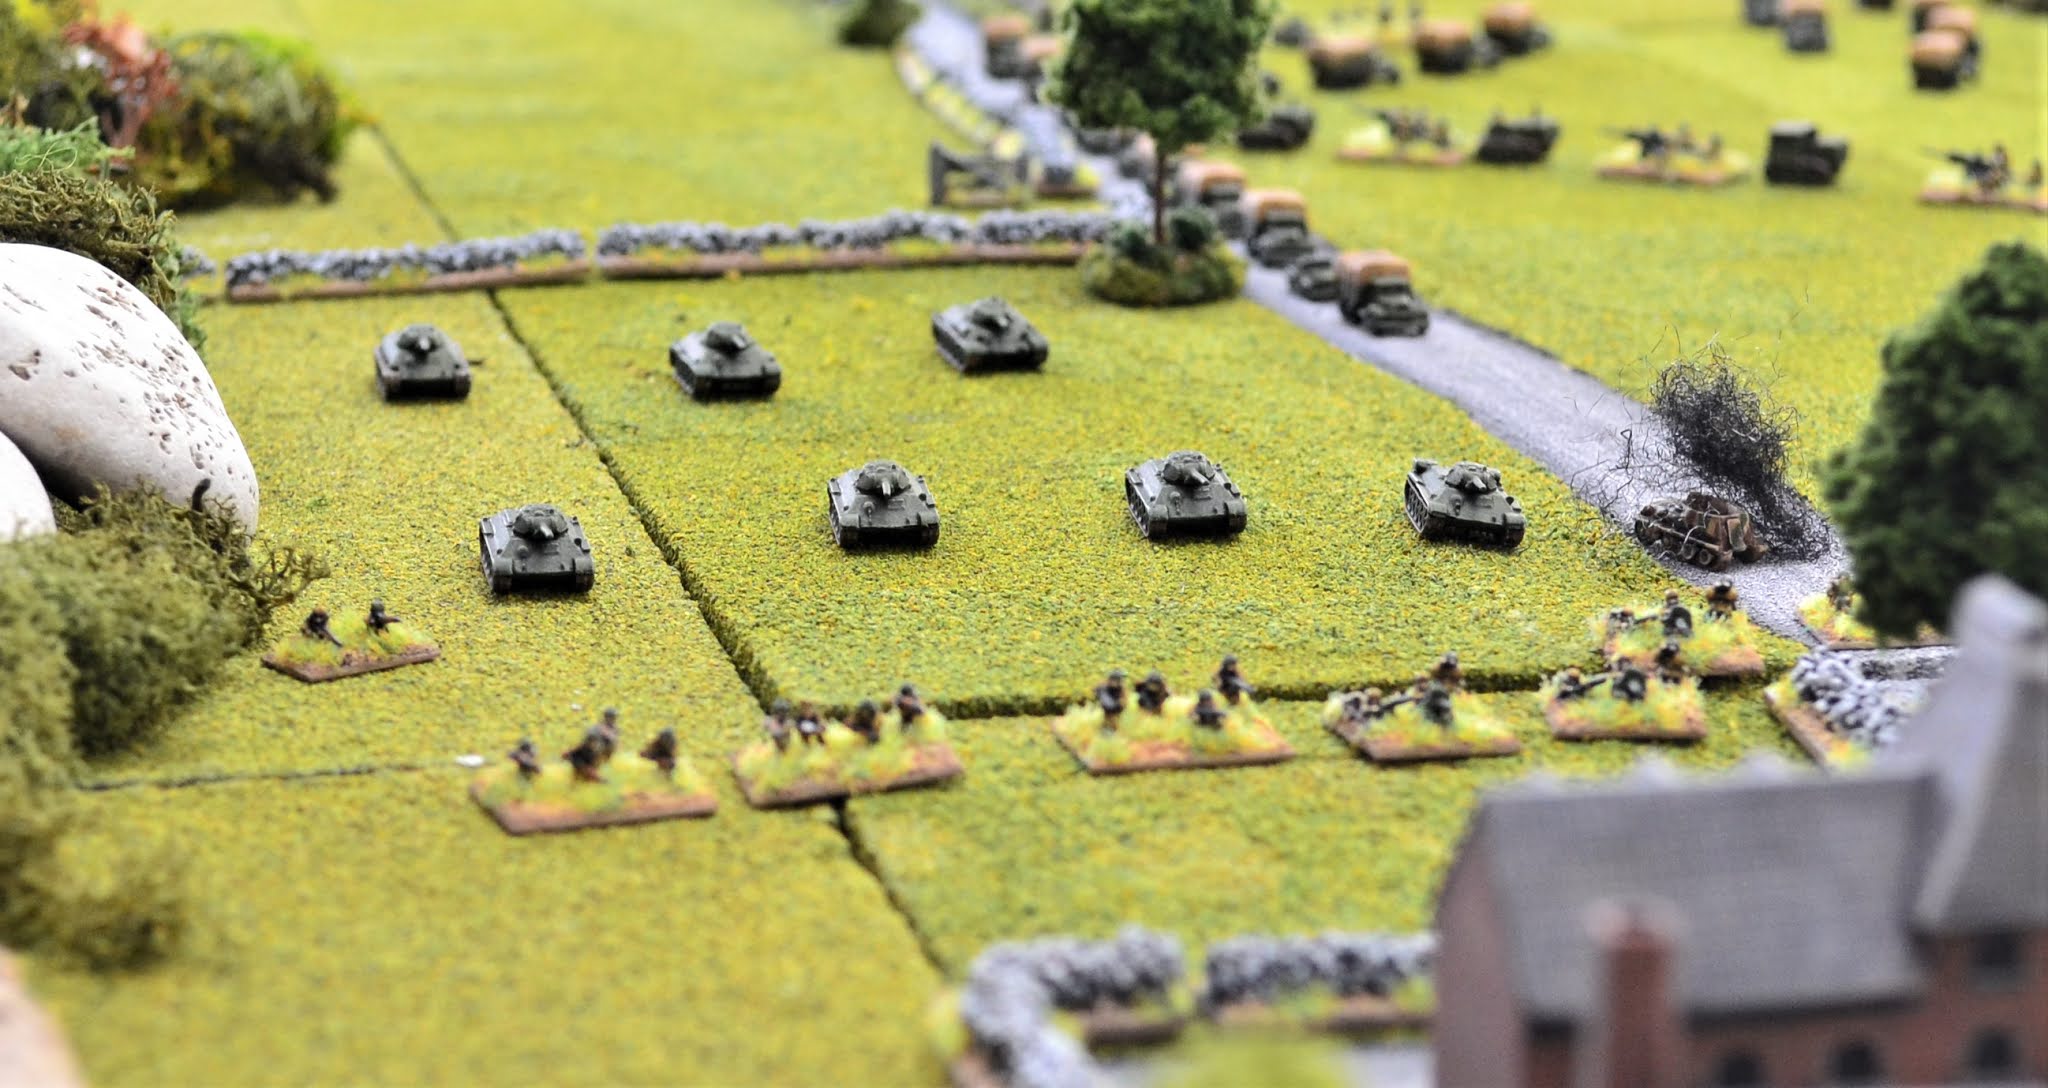
| The SS platoon on board the halftrack had just debussed when all 3 T34's fired into it brewing up in no short order. |
 |
| The Germans now retreat towards the cover provided by the buildings as fast as they can. |
Turn 4
 |
| A Soviet recce rifle company climb the steep slope to check out the woods. So far no sign of movement. At the base of the hill a sniper team try a shot but without success. |
 |
| An overview at the 2nd Motorised take a pause to allow the Recce and other units to catch up. |
 |
In the distance stragglers gradually appear. The 1st Motorised busses up as they arrive and once re-assembled will move forward to support the 2nd Motorised.
In the middle of the photo, the 2nd Motorised companies lining the stone wall open fire on the retreating Germans. The real damage was done by the MMG company who receive 2 activations. This is more than enough to shred an SS recce rifle platoon caught in the open. |
 |
| The surviving German platoons dive for cover behind the stone wall. |
Turn 5
 |
| With the Russians now massing they eagerly pushed forward their recce units to establish what, if any, opposition was in front of them. At the top of the photo the Russian recce company failed to successfully reconnoitre the woods. The recce units advancing across the open ground towards the buildings did not have enough actions to recon the position but unfortunately for them, they became the target for particularly accurate fire from the Germans behind the wall. One SMG platoon was knocked out. |
 |
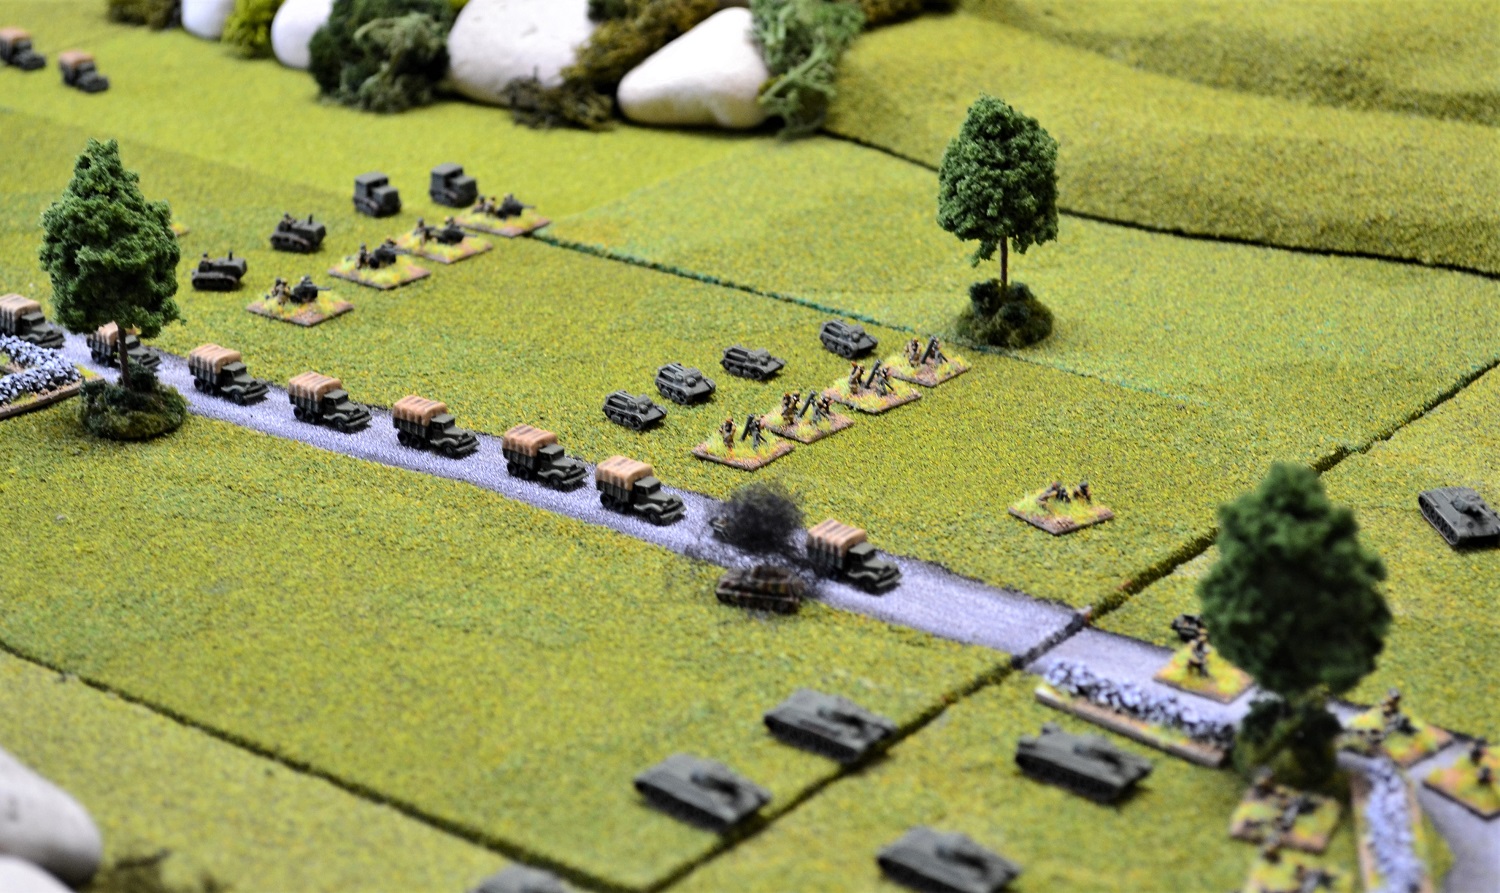
| The slowed Russian advance allowed units in the rear to catch up. Here the artillery battalion makes good progress along the road. |
Turn 6
 |
| Success at last. The Russian recce company tasked with checking the woods successfully reconnoitred it and found no hidden Germans. |
 |
| A general advance was ordered of the Russian front line. The 2nd Motorised battalion supported by the medium tank battalion moved out across the open ground. Ahead of them, the 2 German platoons sheltering behind the wall now moved into the buildings. The T34's opened up on the main building but failed to do any meaningful damage. |
Turn 7
 |
| As the Russians approach the buildings, their recon units successfully reconnoitre the buildings discovering the concealed troops (the entire 5%). The discovered Germans immediately open fire with an MG42 pouring fire from a window towards the exposed Russians. Rifle fire also joined in the hail of bullets and although several hits were registered, the Russians bravely withstood the onslaught. |
 |
| The bussed up 1st Motorised, now reformed, moves up the road to support the 2nd battalion. |
 |
| An SS rifle platoon with Panzerfaust looks out at the approaching wave of Russians.... |
Turn 8
 |
A Russian command blunder resulted in a lead rifle platoon suffering 4 hits. The MG42 immediately poured fire into the hapless Russians finishing them off. Russians returning fire had minimal effect and it was obvious that a close assault would be require to root out the Germans.
The Germans though were not going to make it easy for them suppressing two platoons with rifle fire. |
 |
| Units continue to catch up here with the deployment of the 120mm mortars. |
 |
| The artillery battalion deploys. |
 |
| The now empty trucks of the 2nd Motorised battalion are ordered to meet up with the 3rd battalion to speed them along. |
Turn 9
 |
The Soviet 2nd Motorised battalion commander decided to bypass any suppressing firepower and ordered his unit to assault the buildings supported by the T34's. This they did in the initiative phase and were greeted by fierce firepower from the Germans who managed to suppress two Soviet platoons as they stormed the main building.
Of the three platoons assaulting the main building (middle right) the two outer units were knocked out by the tenacious Germans. The central platoon however, stormed its way in causing the defending German platoon to retreat.
Of the Russian units attacking the perimeter wall in the foreground, those on the right succeeded in destroying the defending German rifle platoon. On the left the Germans were not so easily overcome and wiped out the Russian rifle platoon. |
 |
| The aftermath of the melee with the Russians capturing the perimeter wall. On the left is the retreating German platoon from the main building. |
 |
| An overview with the 1st Motorised battalion halted on the road. With both Russian and German commanders failing their command rolls no further action was played out this turn in the buildings. |
 |
| The 3rd Motorised battalion had now mounted the trucks sent back to collect them and made good progress along the road. |
Turn 10
 |
The Russians assaulting the main building including the platoon that had gained access, destroyed 2 German platoons and drove out the MG42 section.
The Russians failed to overcome the last defending German platoon in the courtyard and were repulsed. |
 |
| The successful German SS rifle platoon on the right along with the German company commander who had been pushed out of the main building on the left, were seen by the Russins to pull back. The MG42 could not be moved as it was suppressed and was now in the second building, |
 |
| A view of the 1st and 3rd Motorised battalions in their trucks slowly moving up the road. |
Turn 11
 |
| The MG42 team were now holed up in the building on the left. They used opportunity fire suppressing a Russian MMG in the courtyard. |
 |
In response 6 T34's poured fire into the building but due utterly woeful accuracy (horrendous dice rolls) they failed to score a single hit. The infantry in the initiative phase brought some salvation suppressing the Germans.
The Russians were hoping to finish off the MG42 during their command phase only to roll a command blunder from the off. The result being that the battalion HQ would suffer a -2 to its command value for the rest of this turn and the next. This put paid to any further Russian action against the German team. |
Turn 12
 |
| The MG42 team, having recovered from suppression, again used opportunity fire against a Russian Maxim MG and although scoring a hit failed to suppress it. Russians now poured into the courtyard seeking to put an end to this infuriating machine gun. Utter incompetence by the Russians failed to even suppress the German team let alone destroying it. Another command blunder saw a rifle platoon from 'A' company retreat out of the main building. |
 |
| To add insult to injury, the MG42 now used their superior training to good effect pouring fire into the Maxim gun team that had already sustained a hit and were now destroyed. |
 |
| Elsewhere, the anti-tank rifle company had moved up west of the buildings with the engineer company of flamethrowers to their rear. |
 |
| The 1st and 3rd motorised battalions are now jammed up along the road. The naval battalion on the right seek to avoid the hold-up and move across the open ground. |
Turn 13
 |
| 7 x T34's again fired into the building housing the Germans and on this occasions with a dramatic result. With shells bursting around them the end came for the MG42 with the crew killed outright. With much improved command rolls the 2nd Motorised and Medium tank battalions reorganised themselves ready for the next phase of the advance. The German survivors had now cleared this map area. |
 |
| An overview looking back along the line of Russian advance. |
 |
| The naval battalion continue to make progress. |
 |
| A final overview before moving onto the next map. |


Brilliant looking table and a great report again. Looking forward to seeing how this campaign progresses.
ReplyDeleteMany thanks Neil.
DeleteReally get the strength of using 6mm at this scale of maneuver.
ReplyDeleteMany thanks pancerni..... definitely one of the reason why I like 6mm.
DeleteThanks for another great AAR Jon and as always the phots and figures look great. Hindsight is a wonderful thing, but do you think that using the Soviet artillery to soften the defenders up might have made a difference to the direct assault route? Off course there is no guarantee that the former would have worked any better and the latter might have been very effective with better die rolls.
ReplyDeleteLooking forward to the next game and like the tweaks you are making for these games to make the campaign work for BKCIV.
Many thanks Steve. The answer is 'yes' regarding the artillery. By the time they had deployed though the forward troops had already begun engaging with the Germans in anticipation of a relatively quick victory, especially with the amount of firepower at their disposal. Given the difficulty they had though it would have been wiser to hold off the attack to allow the artillery to engage. Soviet commanders would have been unforgiving of any hesitancy! Lol.
DeleteI am liking how BKC is operating so far. Even though there has only been skirmishing they have been fun little actions which other rulesets set at this level would have dealt with by a couple of dice rolls, or a handful at best.
I think you having all the 'toys on the table' really adds to the feel of the Soviet advance, with the time taken to get units to deploy before they can support an attack not certain by any means. It makes a big difference I feel and one that is beneficial for the solo gamer.
DeleteIn my recent games I randomised when support might arrive so the commander on the ground couldn't be certain when it would turn up, which was nice and again added a nice level of friction to a solo outing.
I probably should add more randomised elements to my solo-games and what you have suggested would certainly add an extra dimension. The command rolls, or in this case many duff Soviet command rolls, is creating a headache for them although the slowing up of their advance is allowing all the trailing units to catch up.
DeleteThis all looks rather splendid! Very pretty table top & models for an engrossing encounter. If recon is this much hard work what happens when meaningful Jerry resistance is encountered?
ReplyDeleteBest wishes,
Jeremy
Many thanks Jeremy.
DeleteJon, can I just come and live with you and watch how you do all this? Your battlefields are works of art, your battle reports are as exciting as any novel about war I have read, and your details are inspirational. It makes me want to raise my game a lot. I think I have to try the Blitzkrieg Commander rules. I've just starting WW2 wargaming and trying out several rulesets. I wanted to start at the platoon level, but this post is making me think bigger now.
ReplyDeleteAs an aside, being a relatively new wargamer in my retirement years, I have only played solo. I see videos of wargames being played by two players and groups of players. They are interesting, but I somehow feel the solo player can enjoy wargaming just a little bit more without having to worry about "competition". Your reports are a great example of this idea.
Thanks for the great stuff!
Many thanks Dale and really pleased you are enjoying the blog. Solo gaming has a great deal to offer as I have highlighted in the 'Solo Wargaming' tab. Not least of which you can do your own thing without having to worry about anybody else.
DeleteDefinitely a great way to spend retirement!
Jon, yet another excellent action, cracking stuff. As you said solo gaming has a lot to recommend it IMHO, not having to worry about anyone else and being able to "tinker" with things without time constraints or complaints. I agree that BKC is indeed the go to set for actions at this level, smooth and seamless. It is definitely my belief that some element of randomisation adds much to the solo game hence my delight at discovering the Threat Generation System. Looking forward to the next map and already wondering what the final OB for the Germans will be......my money is on 2 battalion Infantry Regt and perhaps a Company of armour in suppprt
ReplyDeleteMany thanks BKC. That's the beauty of solo play. You can do whatever you like including introducing random activations/events etc. to enhance your play.
DeleteAs an addendum....I meant to say a rather depleted and battle weary German SS/Falschirmjager Regt. lol
ReplyDeleteAhhh, who knows what will happen next!!
DeleteWow, Jon, absolutely fantastic! A great game to be sure, but I'm always in awe of your troops and table, so bright and clean, it all just looks amazing.
ReplyDeleteV/R,
Jack
Many thanks for those kind comments Jack.
DeleteHi Jon, I don't think I have seen one of your games affected so much by the way the dice fall badly. The Russian tanks not even hitting a large building Turn 23 is testimony to this, still a great AAR and due to the Russians not getting any luck in the dice dept I would not like to predict the outcome.
ReplyDeleteRegards Peter
I had to chuckle Peter when I rolled the fistful of dice and not one registering a hit on the target. Not so much that they did not hit the building, more that they blew bits off it without hitting the occupants! They did redeem themselves in the end with an almost complete reversal of fortune.
DeleteThis is a really intriguing and engrossing story told by the lovely photos of your wonderful terrain/figs/vehicles. Top stuff!
ReplyDeleteRegards, James
Many thanks for that James.
DeleteWell more dodgy dice rolls for the Russians !!!
ReplyDeleteRegards Peter
The way this game is playing out its all or nothing for the Russians. One minute they are cocking things up and the next responding with very accurate devastating firepower!
Delete