 |
| A reminder of initial deployments. |
 |
| The first two turns consisted of artillery bombardments. The French targeted the redoubt with the British and Portuguese concentrating on the infantry columns. |
 |
| The pounding of redoubts had minimal effect with just a couple of crew lost. A handful of casualties was inflicted among the French columns. Whinyates rockets landed nowhere near their intended targets and his 2 x 9pdr cannon ran low on ammo with their first shot! (A double '1' rolled). |
 |
| With the main French attack now apparent, Fane and Doyle's brigades move to reinforce the left flank. |
 |
| With the French general advance sounded, the allied formations now scrambled to their defences as quickly as possible. Here only the Portuguese artillery were in a position to fire on the advancing columns. Rosado's battery on the right poured highly effective fire into one of the French battalions inflicting 3 casualties and causing it to falter. |
 |
| Fane angled his brigade towards the earthworks (middle of photo) to man the defences. He could only hope he had enough time before the French struck. Doyle (bottom right) aimed for the left flank to support Ashworth. |
 |
| Whinyates finally had some success. A rocket landed among an advancing French battalion causing much consternation. Losing a casualty the mayhem caused them to falter. |
 |
| Adam's brigade (middle of photo) now hurried to man the earthworks along the valley floor. |
 |
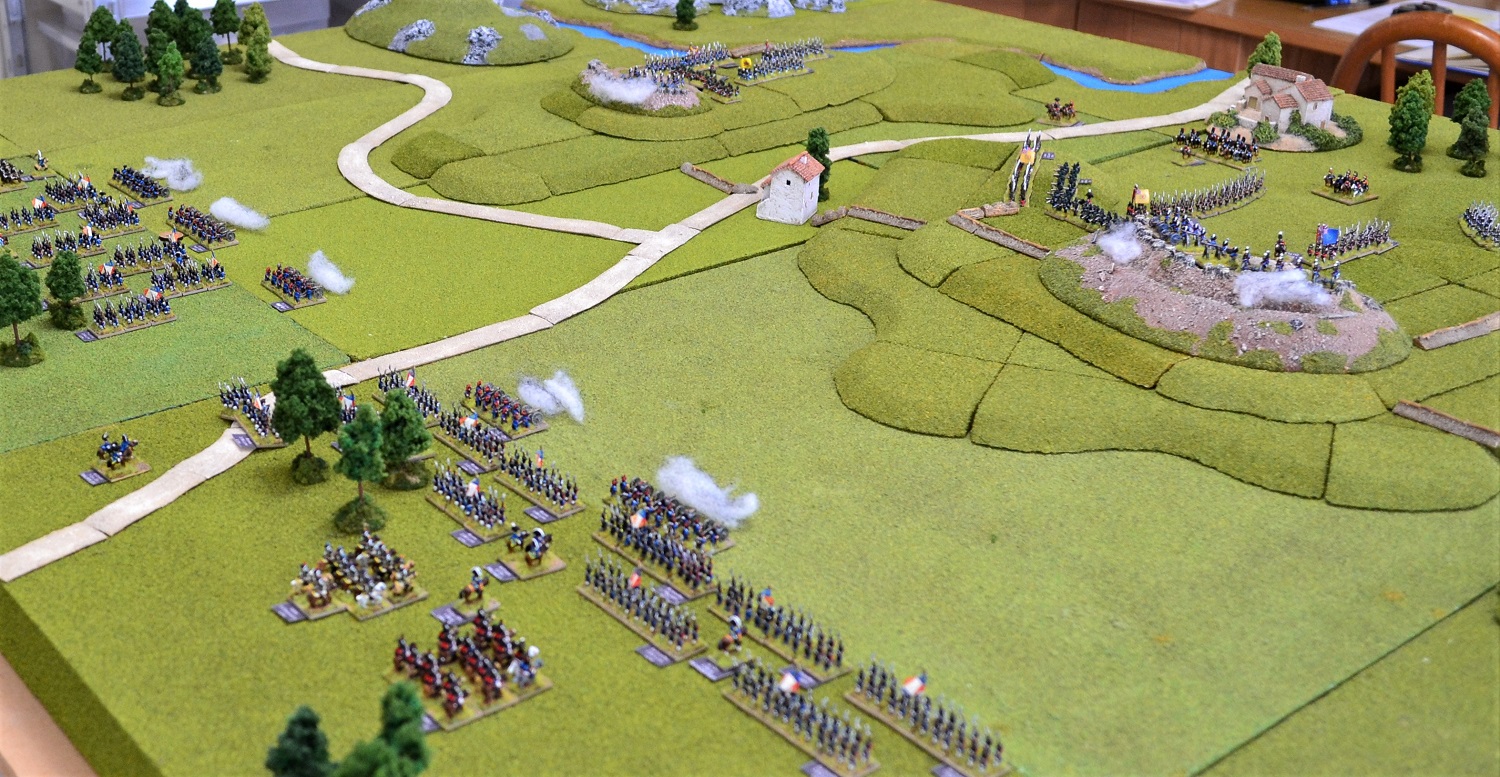
| As the main French thrust on their right, the Portuguese scramble to get into position ready to receive them. Their artillery causes some disruption to the French columns, and when combined with some units delayed passing through the artillery lines, several battalions find themselves out of position causing them to bunch up. |
 |
| The view from the Portuguese position. A little daunting! |
 |
| Doyle's Portuguese brigade (bottom middle) rush to join their mates on the left. They are sufficiently distant enough from the French to allow them to make a tactical march - basically double speed but slowed down due to severe slopes that they have to traverse. |
 |
| Adam begins to deploy his elite brigade across the British centre in what will be a precariously thin line. Whinyates rocket battery are elated when they land another whizz-bang plum on another French battalion! |
 |
| Simmer angles his entire division towards the heights occupied by the Portuguese. It will be a long hard slog for them to reach the summit. |
 |
| This turn sees the action proper begin. |
 |
| The 6th Cacadores (middle of photo) are the first target of 2 battalions of the 44th Line from Toussaint's brigade. As the French columns charge towards them the Cacadores poured fire into the densely packed battalions. This proved too much for both battalions. One halted and the other retreated in disorder. |
 |
| The large redoubt adjacent to the beach is the target of Mazarny's brigade of the 14th Division. The two battalions of the 9th Light surge forward. The 1/9th Light on the left falter in the face of a blast of canister from the defending Portuguese artillery. The 2/9th Light brush off casualties sustained during the charge and pour over the ramparts - |
 |
| The Portuguese 6th Line are on the receiving end of the charge. The ferocity of the French charge prove too much for the Portuguese who are defeated in the melee. They will retreat from the redoubt the next move with the only consolation being that the French battalion will be unformed after their victory. It should be noted that the two redoubts occupying the low ground as only confer fortification status on the defenders. The attackers do not have the hindrance of climbing steep slopes nor do the defenders gain the uphill bonus. |
 |
| The commander of the 43rd Light Foot battalion (middle of photo) bellows at the Portuguese battery lining the earthworks to "get out of the way"! The 43rd quickly form a double line formation as the artillery limbers up and scrambles down the slope. |
 |
| An overview of this part of the battlefield shows how little time the 43rd have to line the earthworks (on ridge upper right). The French though will be moving at half speed scrambling up the steep slopes. |
 |
| The overview of the British left flank as Doyle continues to move to support Ashworth. Vivian has also moved up his cavalry brigade (bottom left) in anticipation of countering any breakthroughs. |
 |
| The French 12th Division continues to advance towards the British centre. |
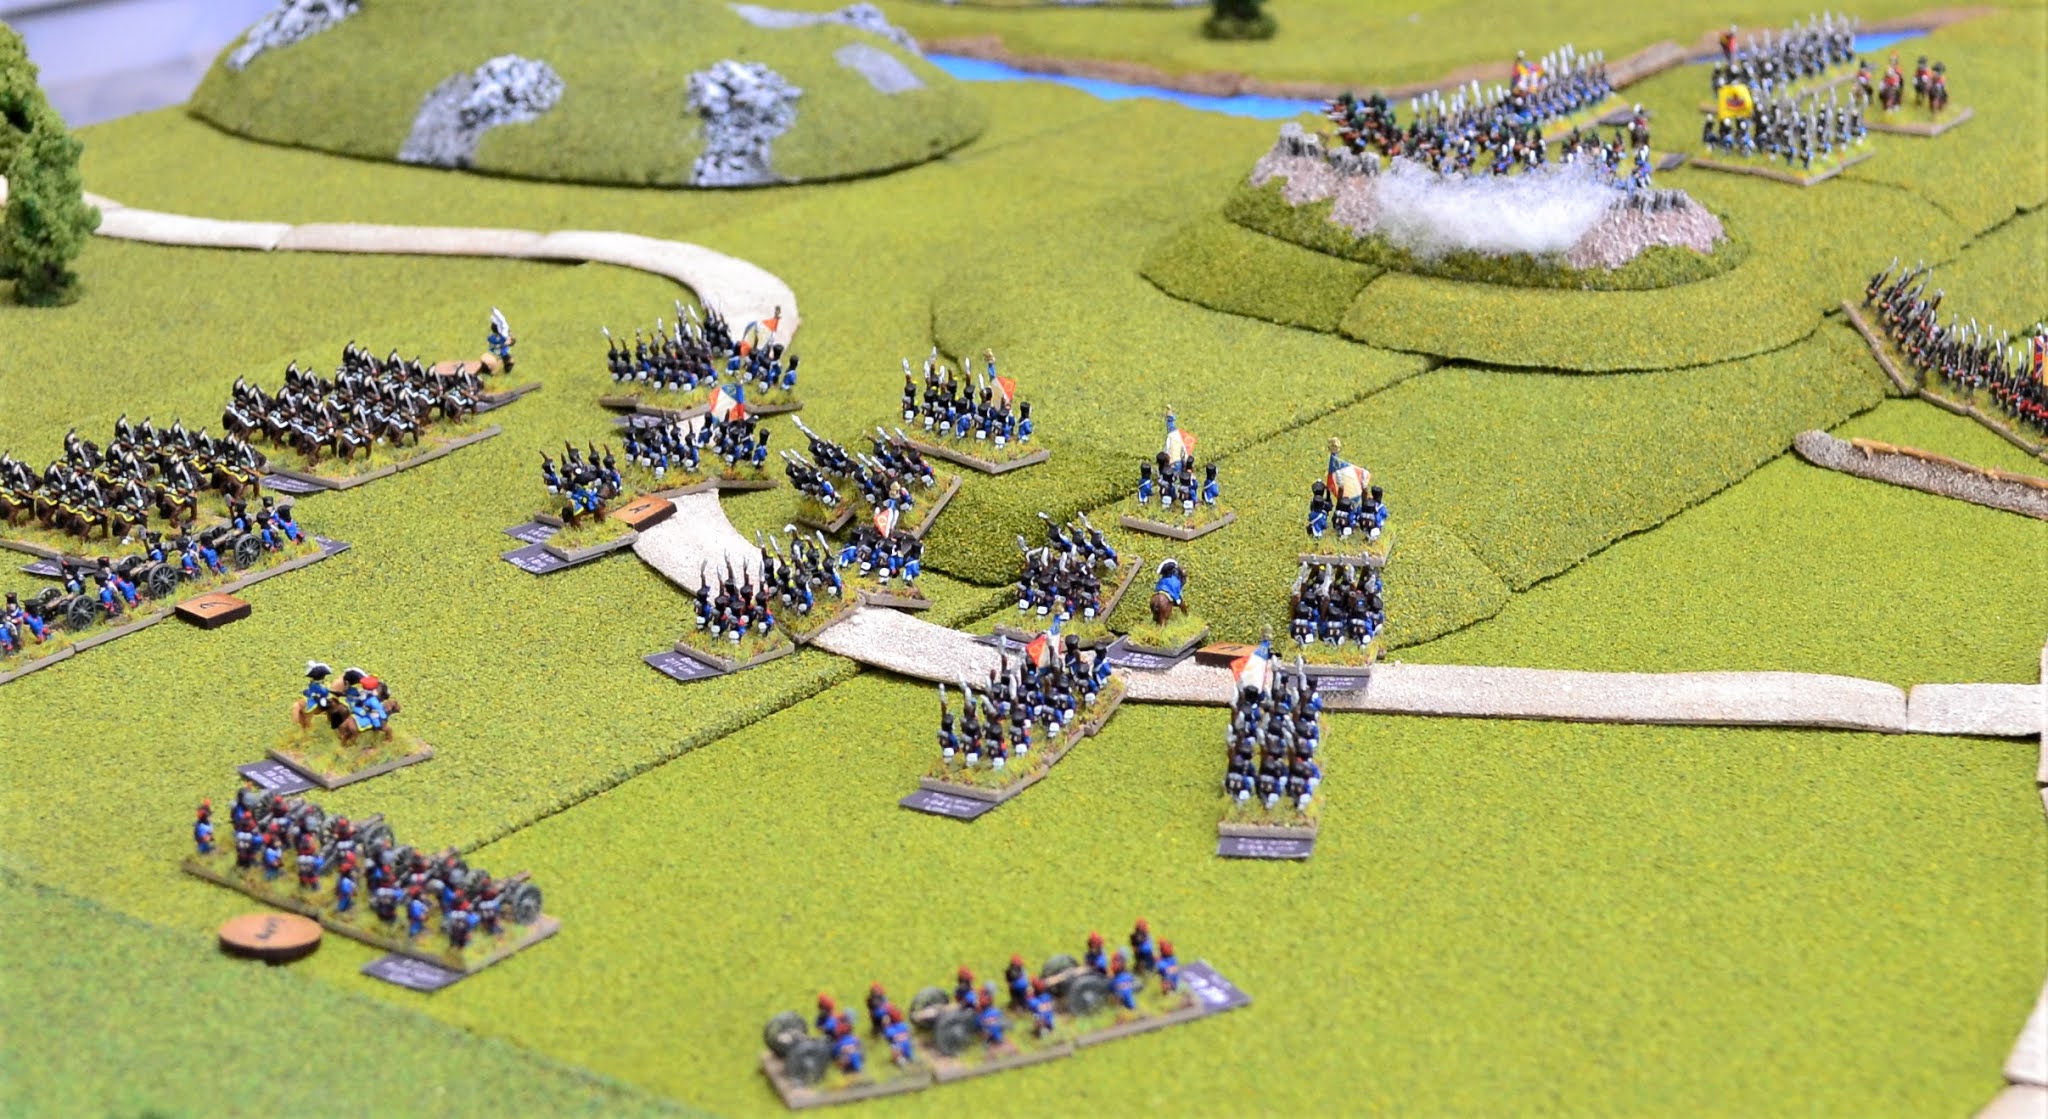 |
| Simmer's 19th Division draw fire from the KGL battery occupying the redoubt as they close painfully slowly and sustaining casualties in the process. |
 |
| An overview of the battlefield at the end of turn 5. |
I will conclude this part here with an early French breakthrough of the thin defensive line on the British left flank. And so far Whinyates rockets have behaved!
Beautiful photos Jon and the attendant text to them really does allow one to follow the action. The game really does evoke the look and feel of a Napoleonic battle, with massed French columns advancing forward, which you don't often see in games. This is all nicely poised, but I am worried about the French breakthrough on the Allied left. I can't wait to read the next slice of action
ReplyDeleteMany thanks Steve. If the Portuguese fail to hold that flank it will pose serious problems for Wellington that's for sure.
DeleteThe French always seem to have overwhelming numbers to throw at the Allies, as in real life. The tables are superb, the armies look very nice. The overall impression is very good, as 6mm armies should look like armies.
ReplyDeleteThe pictures, as I know from experience!, are difficult at this scale to focus.
Great reports.
Many thanks for your comments Khusru.
DeleteAs brilliant and as informative as ever.
ReplyDeleteRegards
Peter L
The prelude is nearly done, onto the main part of the symphony!
ReplyDeleteLol. Sounds good - pardon the pun!
DeleteYour Games look so good and are an inspiration :-)
ReplyDeleteMany thanks Dave.
Delete