3.00pm - 4.00pm
Napoleon is now having to re-evaluate how to break the allied line following the severe mauling of the 1st Corps at the hands of the Union Brigade. For the 1st Corps itself, the 1st, 3rd and 4th Divisions are still in reasonable condition. It is Donzelot's 2nd Division that has suffered the most being reduced to just 2 battalions. With the 1st and 4th Divisions heavily committed on both wings of the 1st Corps there is not a great deal that can be achieved with just Marcognet's 3rd Division.
He decides to focus his main effort on the allied right. Foy and Bachelu's Divisions supported by the Middle Guard will make a full frontal assault. They will be further supported by the 3rd Cavalry Corps, the Guard Heavy Cavalry and Pire's Light Cavalry Division. Jerome Napoleon's Division will continue to assault Hougoumont. There is a risk with only the Old Guard and the Light Cavalry of the Guard providing the reserve. With the imminent arrival of the Prussians though he needed to break the allies as quickly as possible.

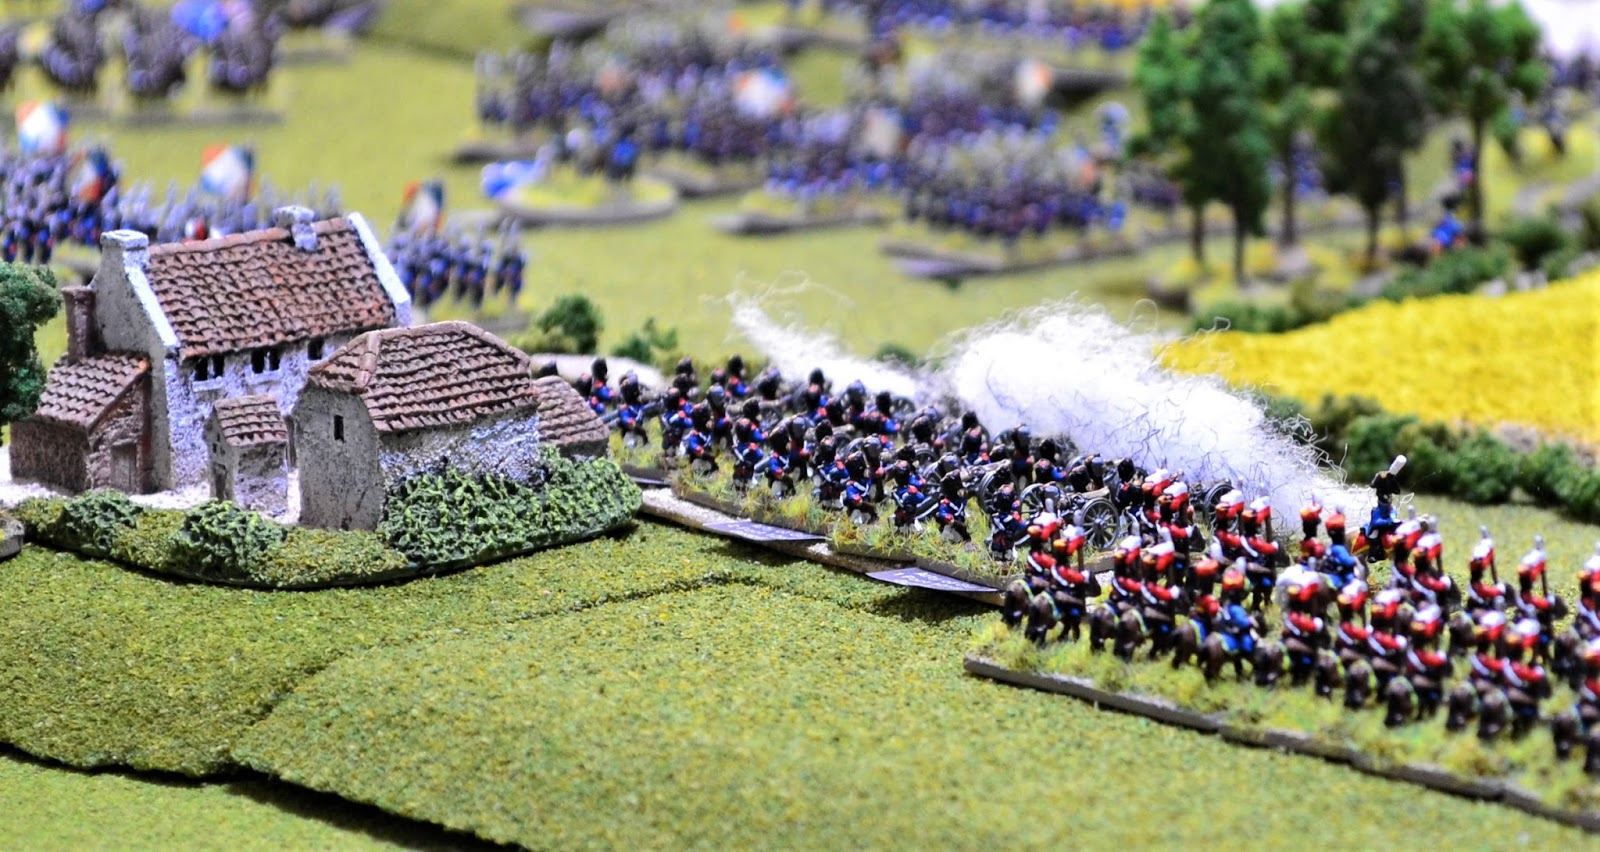
On the French right, Bruno with the 3rd Chasseurs (middle of photo) were able to conduct half a charge move with their 'Superb Discipline' result in the previous turn's Pursuit Test. They used this to close the gap on the Scots Greys bringing them into charge range.
Continued ...
Continued ...

As the 3rd Chasseurs charged towards the unformed Scots Greys, the latter tested in response to the charge and received a 'retreat' result. The distance they must travel is now 9cm + 1D6. The die result was a '1' giving them 10cm in total which they moved directly away from the Chasseurs.

Unfortunately for the Scots Greys it was not far enough to take them beyond the Chasseurs charge distance. The Chasseurs contacted them much to the consternation of the Scots.
The Chasseurs automatically win the melee inflicting 3 casualties for the loss of 2. The Scots Greys continue with their retreat but there would be no pursuit. The horses of the 3rd Chasseurs were blown.
The Chasseurs automatically win the melee inflicting 3 casualties for the loss of 2. The Scots Greys continue with their retreat but there would be no pursuit. The horses of the 3rd Chasseurs were blown.

The French 3rd Lancers who had been close to Papelotte, charged a half battery of Dutch horse artillery that had been causing the French problems on the right flank. The Dutch limbered up and evaded the charge. This left the 3rd Lancers clear to charge the British 12th Light Dragoons. With Grobrecht in the lead they adjusted their charge towards the British Cavalry. Vandeleur, who had been stood with the 12th Light Dragoons, lead their counter-charge into the French lancers.
To their left, the French 4th Lancers charged the 16th Light Dragoons who were in the process of reforming to charge the flank of Pegot's column. The Light Dragoons retreated in the face of the charge removing the threat to Pegot from that flank. The 4th Lancers pulled up adjacent to the melee involving the 3rd Lancers.
 The 3rd Lancers defeated the British Dragoons pushing them back (melee in centre of photo). They suffered a 'Horses Blown' Pursuit Test result.


Pegot (middle of photo) ordered his rear battalions to step back to break up the large column. He intended building on the success of his initial charge but needed the battalions to be more flexible if he was to exploit the breakthrough. In the foreground, Vial has reformed his Cuirassiers into a column of squadrons.
A shock came in the morale phase for the allies. Vandeleur's 16th Light Dragoons attempted to rally from retreat but failed and routed the field. This lead to a Brigade test which failed. This caused the 11th Light Dragoons who had been retreating, to also rout from the field. Vandeleur's Brigade had been reduced to just the 12th Light Dragoons.
A shock came in the morale phase for the allies. Vandeleur's 16th Light Dragoons attempted to rally from retreat but failed and routed the field. This lead to a Brigade test which failed. This caused the 11th Light Dragoons who had been retreating, to also rout from the field. Vandeleur's Brigade had been reduced to just the 12th Light Dragoons.

The 1st Royal Dragoons conducted an uncontrolled charge towards the nearest unit being the 1st Corps 12pdr artillery battery. The battery had been unformed by a routing battalion from Donzelot's Division. However, unlike the Scots Greys, it had a clear shot at the charging cavalry, as did the 6th Corps 12pdr battery to their left.

The die result from both batteries firing canister. The 1st Corps battery on the right was severely penalised for being unformed but this die roll of '11' proved decisive. Both batteries caused 4 casualties to the Royal Dragoons which caused them to falter in front of the artillery. The artillery had been saved, so far.

The Inniskilling Dragoons were also in the process of an uncontrolled charge. The nearest French unit was the 2/28th Line square with Bourgeois attached to them. The Dragoons fancied their chances and charged the French square. In the photo the square is contacted by the Inniskillings.
The Inniskillings were repulsed and pushed back losing 2 for the loss of 1 to the square. Ponsonby and Bourgeois were involved in the melee and as both sides rolled doubles there was a risk to both Generals. Ponsonby had his horse shot from under him. Bourgeois was less fortunate and was killed. The brigade would have to appoint a Colonel to take temporary command (classed as poor General).
The Inniskillings were repulsed and pushed back losing 2 for the loss of 1 to the square. Ponsonby and Bourgeois were involved in the melee and as both sides rolled doubles there was a risk to both Generals. Ponsonby had his horse shot from under him. Bourgeois was less fortunate and was killed. The brigade would have to appoint a Colonel to take temporary command (classed as poor General).


In the compulsory phase the 1/2nd Nassau battalion routed at Hougoumont. As they were surrounded they surrendered. This lead to chaos in the ornamental garden. The Scots Guards manning the wall were in a predicament as 2 battalions of French were launching assaults on them. Normally under the rules, units assualt a BUA, melee results are applied and they either capture it or do not (this is simplifying it slightly but that is essentially it). As mentioned before, I wanted to add a little more interest in the larger settlements such as Hougoumont. I therefore dealt with this situation in the following way:
The victorious 3/1st Line had advanced into the ground vacated by the Nassauers but were now unformed. Clearly it would have been chaotic in that confined space with Nassauers throwing down their arms and surrendering. The Guards were still formed having passed their morale test. I therefore decided that half of their strength from each wall would be sent to repel the invaders with the remainder dealing with the new assaults. It would have been impossible for those Guards engaging the French to remain formed so I treated it purely as a melee with no charge bonuses and both sides unformed. Basically it was a brutal brawl at bayonet point.
The two French charges were made. The attack on the south wall was repelled. The 4/2nd Light drove home their charge onto the east wall. The morale of the Guards defending that part of Hougoumont collapsed and they retreated which meant dispersal. The 4/2nd Light swarmed over the wall into the mass of fighting men. The Guards on the south wall launched themselves into the fray. The photos show this desperate melee with both sides having so much to lose or gain.
The French rolled separately for each battalion against one roll for the Guards. The result was a draw! Each side lost 3 casualties and the melee would continue for another turn.
 Elsewhere various artillery exchanges were made. One of the more interesting being Whinyates rockets. One missed it's target. The second went near vertical and then plunged into the startled 95th Rifles positioned next to the battery. They lost 2 of their number!
 The British artillery line west of La Haye Sainte were continuing to prove problematic for the French whose batteries were suffering particularly badly.
 Foy's and Bachelu's divisions had formed mixed formations with lead battalions in line flanked and supported to the rear by columns.
 Cavalry on the French left continued to advance past the west side of Hougoumont threatening the allied right.
The French rolled separately for each battalion against one roll for the Guards. The result was a draw! Each side lost 3 casualties and the melee would continue for another turn.


Partially out of camera shot bottom left, the 2 French battalions of the 29th Line poured musketry into the Hanoverian Verden Landwehr square. 5 casualties were caused but all credit to the conscripts, they held their nerve in the morale test.

The last of Vandeleur's Brigade, the 12th Light Dragoons, reformed.

In response to the near total demise of Vandeleur's brigade, Vivian began moving his brigade from the extreme left flank to plug the gap.


The 1st Royal Dragoons and the Inniskilling Dragoons are reforming
(middle and lower middle right).
(middle and lower middle right).


Dornberg's light cavalry brigade redeploys to the far right flank to counter the growing threat from French cavalry.

Once again the Household Brigade attempts to neutralise the threat from Cuirassiers. This time it is the very small Brigade of Travers in the 13th Cavalry Division.

The Horse Guards charged the 12th Cuirassiers who successfully counter-charged. The Dragoon Guards (I spotted an error on their label, they should be 'Elite' not 'Line) charged the 7th Cuirassiers who also counter-charged. The Dragoon Guards however, having sustained casualties from French artillery during it's charge, failed it's test to charge home and halted. This gave the much smaller 7th Cuirassiers the advantage when it charged home.
The Horse Guards made short work of the 13th Cuirassiers forcing them to retreat. They received a superb discipline result in the pursuit test.
The 7th Cuirassiers performed superbly as it carved into the Dragoon Guards. They defeated them despite being heavily outnumbered causing them to retreat. The Cuirassiers became unformed in the pursuit test.

Elsewhere artillery batteries continued their pounding. Unfortunately for the allies, the Grand Battery resumed it's barrage. Many of the allied formations were no longer on the reverse slope and were vulnerable to the shot raining down on them. The British artillery batteries near to the crossroads above La Haye Sainte became the targets of several batteries with Whinyates losing one of his precious rockets.
The three Imperial Guard 12pdr batteries (Napoleon's beautiful daughters), opened fire for the first time from the French ridge. They targeted Ross' battery at the crossroads who had been causing numerous casualties in La Haye Sainte. They were long range shots, but as you would expect from such prestigious artillery, they straddled Ross' artillery causing 3 casualties and knocking out a cannon. This took Ross to the 50% dispersal point. He passed the test which meant he left the field with full honours.

To the west of the crossroads French artillery continued to attempt to neutralise the British artillery lining the ridge. Foy's division had begun it's advance taking fire from Beane's, Bull's and Ramsey's batteries with the latter once again proving particularly accurate causing numerous casualties to the lead French battalions.


On the allied right, several clashes occurred between the advancing French cavalry and the Anglo/German cavalry. The 1st Carabiniers charged the British 7th Hussars (top right in photo) who had been retiring with blown horses. The Carabiniers caught them charging into their rear. The 7th Hussars were helpless as the elite heavy cavalry brought them down in large numbers. It lead to the destruction of the 7th Hussars with the Carabiniers retaining superb discipline.
In the middle of the 3 melees, von Estorff's Cumberland Hussars had charged the 5th Lancers who counter-charged. The Hussars defeated the Lancers forcing them to retreat but they would be retiring next turn with blown horses.
Arentschild (middle of photo) with the 3rd KGL Hussars charged the 6th Chasseurs who also counter-charged. The large number of KGL Hussars overwhelmed the Chasseurs killing so many that the survivors dispersed. The German cavalry uncharacteristically went into an uncontrolled charge.
Overview of French left:


Guyot with the Guard Heavy Cavalry moves to support the advance of Foy and Bachelu.


There were now 3 French battalions engaged in brutal combat with the Scots Guards. The 3/1st Line (23 figs), 2/2nd Line (27 figs) and 4/2nd Light (20 figs) lead by Buaduin. The Scots Guards numbered 33 and thus were outnumbered by more than 100%.
The 2/2nd Line gained the outnumbering modifier being the largest French unit. The 4/2nd Light gained the bonus of being lead by a General. When all modifications were added to the French die the result was as in the photo. The 2/2nd scored highest so that was the French result. +2 Guards modifier was to be added to the British dice resulting in another draw! However, this is where numbers counted. Each side killed 1 per 12 figures involved in the melee. So the Guards lost 5 to the French 2. The Guards were now just one away from their dispersal point. They have to win the next melee or their morale will collapse.


The French 7th Hussars return from their scouting mission having skirmished with lead Prussian cavalry elements. They alerted Lobau that the Prussians would be arriving shortly and to be prepared.
3.30pm

The situation on the allied left continued to deteriorate. Gobrecht at the head of the 4th Lancers saw the disarray in the conscript Hanoverian Luneberg Landwehr as it attempted to form a square. He took the opportunity and charged the unformed square much to the consternation of the Lunebergers whose formation fell apart as it retreated. In the centre of the photo we see the Lancers riding down the Hanoverian battalion.

The Hanoverian squares are vulnerable to the attentions of the French infantry. The two battalions of the 29th line pour fire into the Verden Landwehr square inflicting 5 casualties. The Conscript Landwehr continued to hold it's formation during the morale test.
Morale tests had to be conducted by all the Hanoverian battalions and 2 faltered in their squares. This made them vulnerable to cavalry charges in the next turn. The conscripts were wobbling!

The gap in the line of the allied left flank widens.

The ride of the 6th Cuirassiers! They lead an uncontrolled charge towards the British 3/1st Line battalion but was unable to contact it as it retreated. Next in line was the Inniskilling Dragoons (in photo) with Ponsonby. They were in the process of reforming when they were charged. That and combined with a flank attack resulted in them routing.

The 6th Cuirassiers did not stop there and continued with their charge with a battery of Hanoverian foot artillery being their next target. As the French cavalry bore down on them they routed (centre left hidden behind a square with the Inniskilling Dragoons next to them. The 6th Cuirassiers are top left). The Cuirassiers pulled up with blown horses and prepared to reform.

The green micro dice indicate morale tests that have to be taken as a result of routing units and the blue dice brigade morale tests. A worrying time for Wellington!


Ponsonby failed his brigade test and now the Union Brigade was 'Broken'.

The scene at ground level.
During the course of this turn the allied left was looking distinctly precarious.

Trip's Dutch/Belgian heavy cavalry brigade are sent to bolster the left flank (snaking through reserve formations bottom middle). Wellington is faced with pressure on both flanks and is reluctant to send too much to the left.

French artillery continues to pound the allied ridge with the Guard 12pdrs concentrating their fire on the crossroads above La Haye Sainte. Whinyates Battery in particular suffers several casualties. Here the Middle Guard 6pdr battery fires a deadly salvo at long range on the KGL Horse Battery of the 1st Division. The KGL Battery has already suffered casualties and the result of this caused them to disperse. The KGL battery had been facing the advance of the 2nd Corps on the ridge and could be a costly loss to the allies.

The Horse Guards (bottom left) pulled back to the ridge as Somerset contemplated withdrawing. Without the Dragoon Guards, who were still retreating, it would be highly dangerous if not suicidal to continue with his attacks, especially as he sights a large formation of French Dragoons making his way (middle left).
Foy's Division's attack is well underway (middle and right). His battalion formations hold steady in the face of canister causing significant casualties. 3 lead battalions of Jamin's Brigade launch a charge on Ramsey, Bull and Beane's batteries (far left of French advance). The latter calculated that the risk was too great to stand so all three horse artillery batteries limbered up and evaded the charge.


More views of the French advance on the allied right. Bachelu's Division has been held up by the presence of the Household Cavalry.

A view of the situation on the extreme allied right.

There were two cavalry melees as the French continued to push the allies back.

The French 1st Carabiniers lead by Blancard made their free half charge move as a result of their superb discipline result in the last pursuit test. As they crested the hill and began their charge on the Cumberland Hussars the received fire from a deployed battery of artillery nearby. The one casualty did not stop it from continuing its charge.
The Cumberland Hussars retreated in the face of the charge but were caught by the Carabiniers.

The Carabiniers automatically won the melee with the Cumberland Hussars continuing their forced retreat into the next turn.
In the foreground, Grant has reformed his two surviving cavalry regiments ready to get back into the fray.

Arentschild lead the 3rd KGL Hussars in an uncontrolled charge on the 1st Chasseurs. The latter faltered in the face of the charge and the Hussars struck home. The German cavalry won easily killing 8 Chasseurs for the loss of 2. The Chasseurs were now forced to retreat and the Hussars received an 'unformed' result in the pursuit test.

The Hougoumont dice. This is before any modifications. The Guards get +2 which equals the best of the French dice. However, the double 6 is also the score for the largest French battalion who receives and additional +2 for outnumbering the Guards by more than 100%. This equates to a push back for the Guards. However, they also lose 8 of their number taking them considerably past the 50% dispersal point. As they lose the melee it means automatic dispersal. So the 2/3rd Foot (Scots) Guards finally relinquish control of the ornamental garden. Byng survives the risk to General and the Coldstream Guards along with the company of Luneberg Light Infantry all pass morale tests including a brigade test. The Coldstream Guards along with the company of Hanoverians must now prepare for a last stand among the buildings of Hougoumont.

Meanwhile Chasse's 3rd Netherlands Division arrives with Detmer's Brigade in the lead having been summoned by Wellington from Braine l'Alleud to support the right.
The next turn saw some pretty dramatic stuff at both ends of the battlefield. On the allied left the morale of several Hanoverian Coscript battalions had begun to collapse with their squares becoming unformed and vulnerable to attack by cavalry. The 4th Lancers had it's blood up and had gone into an uncontrolled charge. However, the Allied army won the initiative this turn.

The Lancers were now at the mercy of the 10th Hussars. All they had to do was continue to charge and the Lancers would have been at their mercy. They rolled a double 1! Anything above a total of '3' would have done the job. The Hussars also faltered! They did achieve saving the Hanoverians from destruction but really!!


The 2nd Carabiniers charged Arentschild and the 3rd KGL Hussars who were unformed. Arentschild managed to turn the Hussars towards the Carabiniers before they were hit but were still unformed when the clash came. Once again the Carabiniers made short work of the lighter cavalry and caused them to rout. Arentschild also received a light wound in the process which could have implications next turn when a rally attempt is made on the Hussars.


Movements elsewhere:


Trip's heavy cavalry brigade continues to make it's way to the allied left flank.

Somerset issued a 'retire' order to the Life and Horse Guards which meant they could pull back at charge movement rates with the risk of becoming unformed. They completed the manoeuvre but all were now unformed (middle left in photo). There was no sign of the 1st Dragoon Guards who continued to retreat!

On the allied right, Dornberg's light cavalry brigade (lower middle and right) had been static now for 2 turns having failed activation tests. With the increasing French cavalry threat on that flank that delay could prove to be serious for the allies.


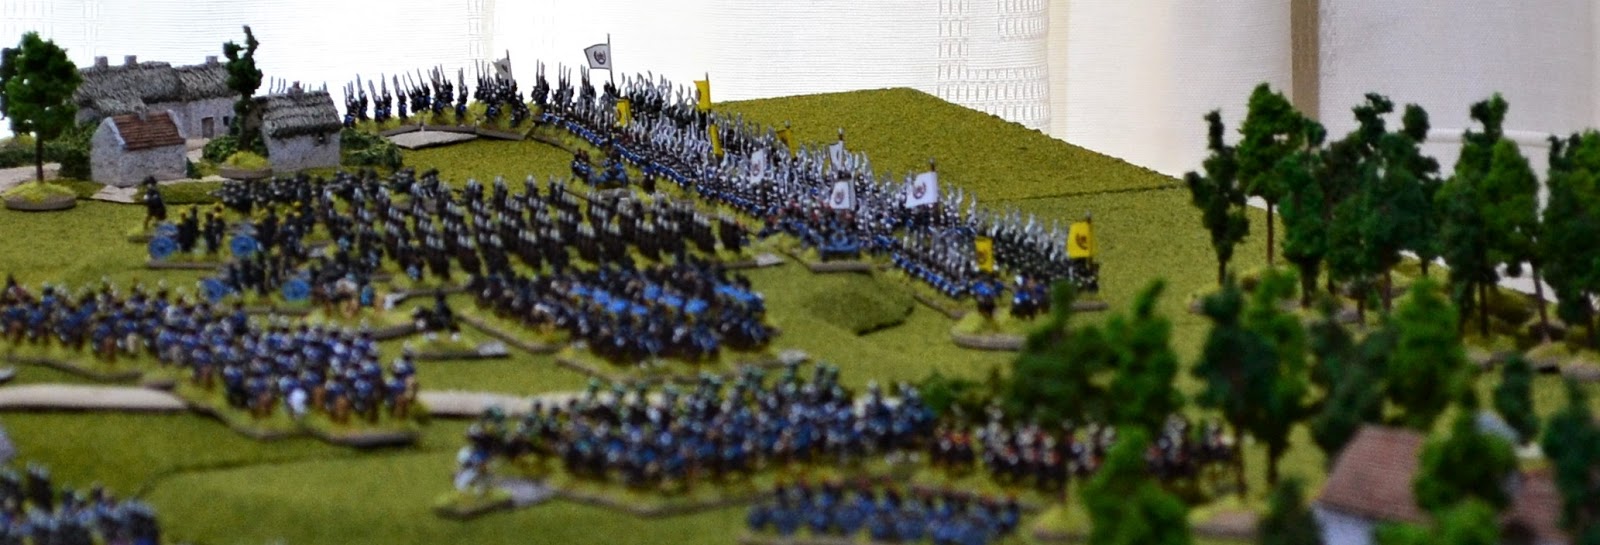
3 views of Foy's and Bachelu's Divisions supported by the Middle Guard, the 11th Cavalry Division , what was left of the 13th Cavalry Division, and the heavy cavalry of the Guard advancing on the allied right between La Haye Sainte and Hougoumont. The advance had been slowed to allow the allied batteries on the ridge to be degraded by counter-battery fire.
An ADC had taken command of Bourgeois's brigade of 2 weak battalions and occupied La Haye Sainte relieving one of Charlet's battalions. This enables Charlet, with an almost complete brigade, to join in the attack on the allied line. His target will be the crossroads.
Some general views now of the situation at the end of the move:


The overall situation at 4.00pm. The allied left with so many conscript battalions, is in danger of collapse. The French had sent the Cuirassiers of the 14th Cavalry Division, Jacquinot's 1st Cavalry Division, and the Guard Chasseurs to overwhelm any cavalry opposition and to take every opportunity to destroy any infantry that had failed to form a square. Infantry was a little short in number after the mauling of the 1st Corps. Pegot's Brigade had done a superb job in breaking the line and was still in good shape. Marcognet's 3rd Division was still in reasonable health with 6 battalions was sent to the increasing gap that had been created in the allied line.
With Papelotte captured it would now make it easier for the 6th Corps to deploy and prepare for the arrival of the Prussians. They were anxious to clear away as many of the Nassauers as possible including from Smohain.
The direction of travel for the 2nd Corps divisions attacking between La Haye Sainte and Hougoumont was becoming increasingly clear. The area around the crossroads was looking increasingly vulnerable and that would be the area of the main thrust although attacks would be made along the whole of the allied line.
Hougoumont looked increasingly likely to fall soon which would free up Jerome's division to join in on the attack on the allied right.
For Wellington, it was becoming a case of hanging on for the Prussian arrival. Although numerically it still looked good, much of those numbers, especially those in reserve, were of poor quality. If the French broke through the first line of defence, he was limited in the number of high quality troops he could use to counter them. Both right and left flanks were in trouble and he was now considering concentrating his defence west of the crossroads and along the high ground overlooking his far right flank.
In the past hour the number of units lost had swung towards the French. Total lost were now French = 25, Allies = 20 (Guards count double).
The Duke will have to wait a while for his tea
ReplyDeleteThanks for your comment nitpickergeneral. Yes he certainly will.
DeleteAnother Herculean effort to get so much detail out - thank you. You can feel the battle starting to move to various points of crisis being created and that emotional connection with the real battle of one side trying to break the other and do the job before the Prussians arrive and the other holding on to Dear Hope. I think the dice are doing a superb job of telling a good story - the double one rolled for the 10th Hussars wanting to hit the Lancers - superb, you couldn't make this up.
ReplyDeleteI could not believe it Norm when a double 1 was rolled after a double 6. There I was thinking the good old 10th Hussars of Airfix fame was going to roll over the dastardly Lancers and Bamm! Had to chuckle though. Wondered how the hell I was going to explain that one. 10th Hussars felt it was time for a brew?
DeleteProbably a nervous subaltern, who noticed all the pointy bits from the lancers, and did not have a good eye for the tactical situation.
DeleteYou could well be right there Clydwich.
DeleteTerrific battle account with stunning photos. The French seem to be giving better than they take. Riveting stuff with much drama and an engaging story line.
ReplyDeleteWell done, Jon!
Thanks Jonathan, really appreciate your comments. After the 1st Corps was given a thrashing I was wondering if this was going to be a pointless exercise for the French but that's the thing about wargaming. You never know! It did not take long for fortunes to change and is much more on a knife edge now. Certainly in my game it supports the view that Wellington could not have held without the arrival of the Prussians. The French artillery are now proving their worth whereas they started poorly with minimal results.
DeleteGive me night or give me Blucher ! I fear the game may be up for Old Nosey excellent write up and photos
ReplyDeleteThanks for your comment Graham. Yes Wellington is in something of a fix!
Delete"Hard pounding, gentlemen. Let's see who pounds the longest."
ReplyDeleteAt present it appears to be the French!
DeleteIt does indeed! A dark day for the Duke?
DeleteTruly spectacular Jon and something that is on such a grand scale that I would imagine people wanting to play in one of your games from all over the wargaming globe. Sensational.
ReplyDeleteThanks Carlo. Very much appreciate your comments.
DeleteOutstanding mass effect, absolutly superb and impressive! "Un rapport à la hauteur de cette magnifique bataille" could have said the Emperor...
ReplyDeleteGreat AAR, photos, and especially fantastic game! I seem to be hearing cheers of ‘Vive l’empereur!’ all along the French line! I’m surprised, however, that you’re finding GdB well suited for this scale of game - I always saw them as rather slow-moving and only fit for smaller scale encounters. Looking forward to the next instalment.....
ReplyDeleteMany thanks for your comments Mike and pleased you are enjoying the AAR. GdB is certainly not suited to larger games if you want it quick. For me though it is exactly the style of rules that I like rather than the fast play rules that is becoming the norm. One of the advantages of playing solo in that time is not an issue.
DeleteI wouldn't have believed this game could get any better but it has! The dice luck has evened out and the French have had a great segment. How marvellous if Hougoumont actually falls. This is truly the most gripping wargame ever. You are rewriting the history of our hobby Jon. It's fantastic!
ReplyDeleteThanks for your very kind comments BobH. Very much appreciated.
DeleteGreat game, great pictures, and a riveting narrative. Old Nosey's a bit on the ropes now, but the battle is far from over. It will not be long until the approaching Prussians make their influence felt. Time is not on the side of napoleon and the French!
ReplyDeleteAll being well I hope to get the next part up later today Peter. It is indeed proving to be a close run thing!
Delete