2.00pm - 3.00pm
The Allies won the initiative test but elected to pass control over to the French. They hoped that the 1st Corps columns would fail any charges giving the Union Brigade their chance for glory.
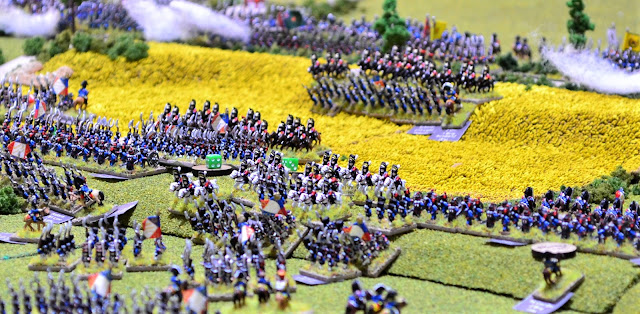
Following the compulsory move phase, the Order phase involved dicing for, and calculating the command dice for the next 4 turn period (see under 'Rules' label for command & control system). All command dice were allocated to Corps and Divisional Commanders, who in this turn allocated dice to individual Brigade commanders to assist them in their 'Orders' die roll. Several Brigade commanders failed to activate but the one most likely to cause difficulties was that of Somerset. His die roll resulted in a 'Hold' meaning his Household Brigade was prevented from moving any further forward. Clearly the heavy cavalry squadrons were struggling to negotiate the various squares in their path:

Household Brigade struggling to pass the squares in centre of photo.
Starting the charge phase, Pegot's column (on the right flank of the 1st Corps) charged a Hanoverian Battery of artillery who had left it too late to retire. A poor dice throw in response to the charge resulted in them dispersing from the field. The triumphant column continued towards the ridge summit but did not have enough movement left to make contact.
Donzelot's Divisional column that represented the best hope for the 1st Corp now made it's charge. Volleys from the 7th Belgian Line and the 1/28th Line caused 3 casualties. Not great considering what had happened in the battle so far but it was enough to force the 1/17th Line to retreat. It's immediate impact was to disorder the 2/17th Line directly behind them before they streamed down either side of the column.
Continued ...
Continued ...

Outside Papelotte, the 2/85th Line charged the wall and gates to be met with effective musketry from the defending Nassauers. The attack was halted.

The Young Guard are ordered to occupy Plancenoit.

Foy (left) and Bachelu's Divisions begin to move towards the allied right flank.


Vandeleur moves his light cavalry brigade past Hanoverian columns as he prepares to screen the allied left.

Now was Ponsonby's time. There was a problem though in that the way his charge was conducted was not allowed in the rules. In GdB units have to be formed to conduct a charge which is the only way to bring a unit into combat (apart from pursuit, reinforcing etc). Accounts from those involved in the charge describe how as soon as they had crossed the hedge they were upon the columns almost immediately. The distance was so short they could barely reach a trot before impact. It was also clear that having interpenetrated the infantry and crossed the hedge most were not formed. They merely charged the nearest targets as soon as they cleared the hedge.
I therefore created a house rule for this one occasion. In the movement phase the Union Brigade interpenetrated the units along the hedgerow and then conducted formation tests (as per the rules). If any came into contact with the French during their move they would enter into a melee but without the charge bonus and if unformed they would also suffer the penalty for that. From the left in the photo, the Scots Greys succeeded the formation test and remained formed but did not contact any opposition. In the centre the 6th Inniskilling Dragoons had become unformed and immediately contacted the 2/17th Line at the head of Donzelot's column with Ponsonby in the lead. On the right the 1st Royal Dragoons had become unformed but with no contact.
Most of the units that had been interpenetrated had also become unformed.

To the west of the Genappe road, the French sought to reduce the allied firepower on the ridge in preparation for an attack. The Old Guard battery which had excelled since it's first salvo as part of the Grand Battery had done so again. It fired on the KGL foot battery of the 3rd Division throwing a double six. 5 casualties were caused which resulted in the German battery dispersing. Somerset was the closest General and he received a Light Wound result. He would be out of action for the next turn which was not good news for the Household Brigade.

There was now a noticeable gap in the allied artillery line.

The next battery to fire was almost as successful causing 2 casualties to Lloyd's battery.

At Hougoumont the 1/2nd Light Infantry in the orchard attacked the garden wall defended by the Scots Guards. The 2/2nd Light in the open field adjacent to the orchard had formed a line ready to pour fire into the Guards. Unfortunately for them they came to the attention of Ramsey's, Bull's and Beane's artillery batteries on the ridge. All three fired on them with Ramsey's throwing a double 6. There were no Generals within 9cms, but that did not help the French battalion. In all 5 casualties were suffered and they failed the subesequent morale test forcing them to retreat.
Elsewhere Bauduin decided to try a different tactic and formed his battalions into lines to reduce the casualty rate. It was his intention to fire into Hougoumont maximising firepower before attacking.

The 1/2nd Light Infantry suffered badly in the melee with the Scots Guards. They were forced to retreat having suffered 4 casualties inflicting one in return.


They had already been pushed back so were at a disadvantage against the formed 2/54th Line. With the loss of 3 casualties to the French 1, they were ejected from La Haye Sainte and forced to retreat to the ridge. The triumphant 2/54th Line had captured La Haye Sainte and busied itself occupying the buildings.

Having dispersed the Hanoverian battery, Pegot's column had continued it's charge just stopping short of the allied line.

The 1/29th Line Infantry at the head of Pegot's column found themselves directly in front of the 2/44th East Essex and the 1/92nd Gordon Highlanders. Both battalions opened fire with the East Essex proving particularly effective (double 6). A total of 8 casualties were inflicted on the 1/29th and Pegot's horse was shot from beneath him. He calmly mounted a spare. His troops were impressed!
The 1/29th proved to be of stern stuff and passed the subsequent morale test.


The head of Donzelot's column had now been assailed by the Inniskilling Dragoons who had emerged from behind the ridge. The 2/17th Line at the head of the column had been trying to reform having been disrupted by the retreating 1/17th. It had no time to react as the dragoons who had suddenly appeared from the hedge and charged them pell mell. The French battalion had no chance as it was all but wiped out. The destruction of the 2/17th required all battalions in the column to take morale tests together with a brigade test for Schmitz's Brigade. All battalions had passed the test apart from the 2/13th Light who faltered. The Brigade test was also successful. The Inniskilling Dragoons took a pursuit test the result of which was pretty obvious. They would be pursuing in the next compulsory phase with the 1/13th Light Infantry being the target.

Noquez of Marcognet's 3rd Division had been in the process of reorganising his brigade breaking up his unusual column into something he felt would be more effective and result in less casualties. His battalions were still in line formation and separating themselves when the Scots Greys appeared in front of them. They were in good order and took on the appearance of preparing to charge! Noquez grumbled various expletives before shouting to his battalions commanders, "FORM SQUARE".

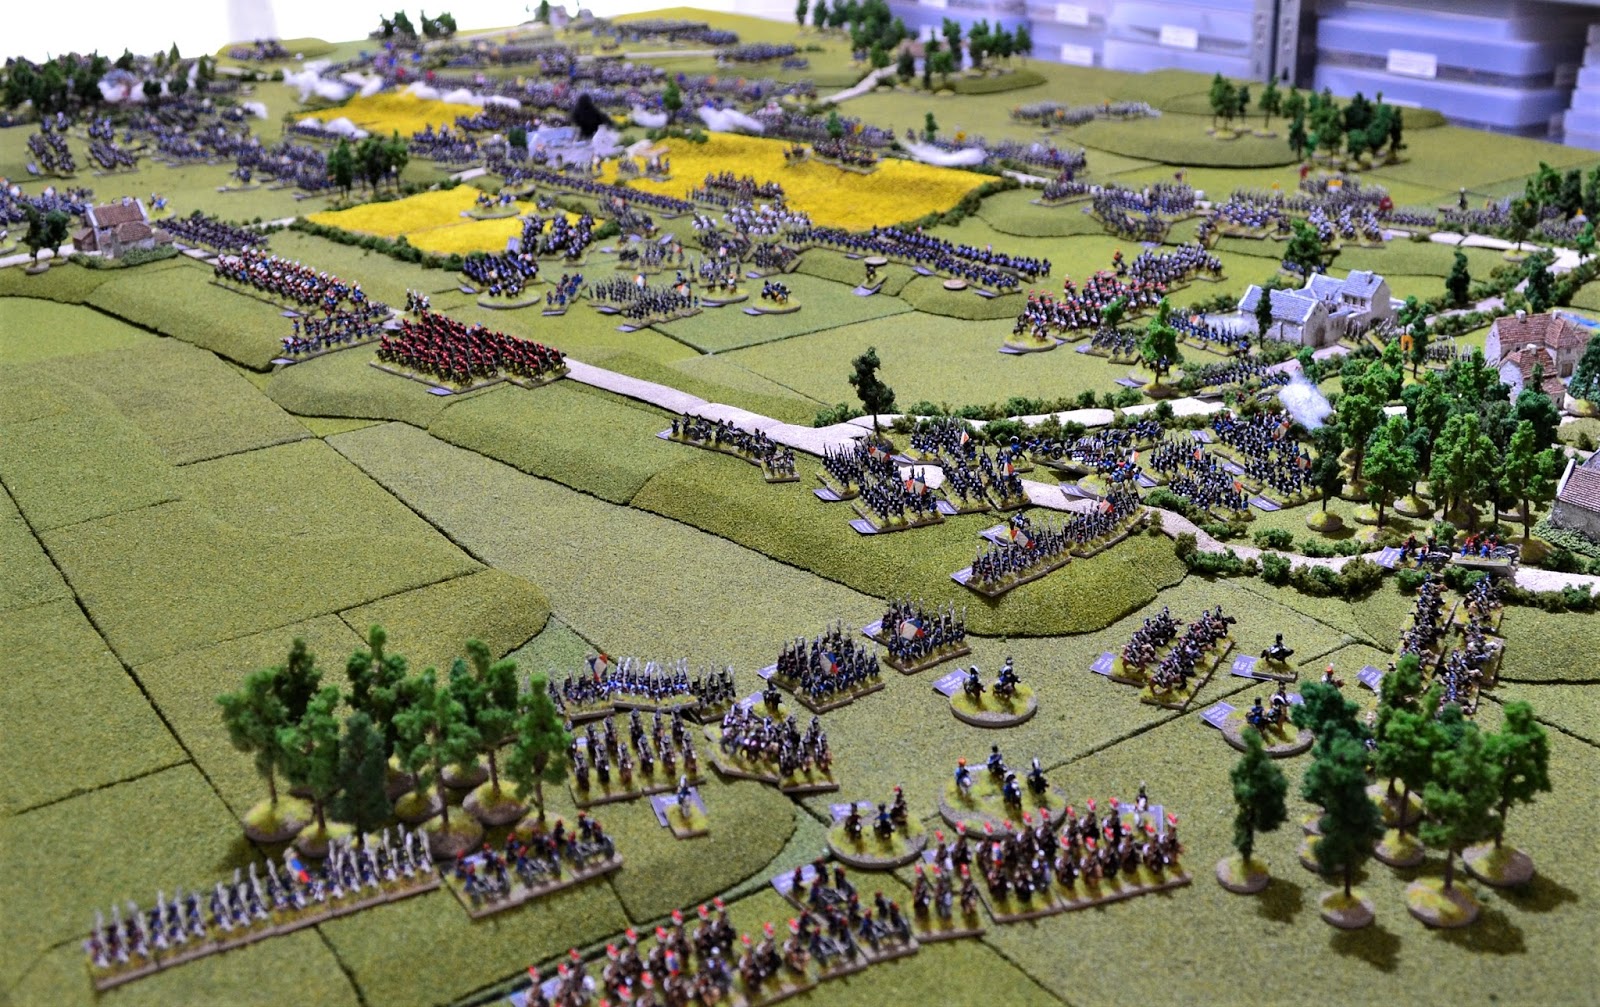
An overview from behind the French right flank as the turn came to a close.


The immediate aftermath of the melee.


Vandeleur advances his light cavalry brigade over the ridge to the left of Pegot's column.

On the opposite flank, Ramsey continues to fire highly effective salvos. Here he straddles an Imperial Guard horse artillery battery causing it to disperse through high casualties.

At Hougoumont, Bauduin continues to reorganise his reduced brigade. Both the 1/2nd Light and 2/2nd Light battalions failed to rally and routed from the field. Soye continues to move towards the north side of Hougoumont screened by Pire's cavalry division.

Foy (left) and Bachelu's (right) Divisions approach the Grand Battery ridge.


Overviews of the battlefield as the turn comes to an end.


The Young Guard enters Plancenoit.
This was a poor turn for the French who lost a total of 6 units to none for the allies. Worse was to come.
2.30pm:


Directly opposite Vandeleur, Jacquinot's cavalry division were advancing west of Papelotte. Vandeleur's cavalry had come to the attention of the Grand Battery with it's easternmost battery firing on them causing 2 casualties to the 11th Light Dragoons.

The Inniskilling Dragoons now ploughed into the 2/13th Light Infantry (at the head of the column, middle of photo). The French light battalion held steady presenting a uniform line of bayonets. The 1st Royal Dragoons were now formed up and ready to charge. They saw easier pickings in the flank of Donzelot's column (middle) rather than the battalion square of the 1/28th Line who was to their front further down the slope near La Haye Sainte. They manoeuvred their squadrons and charged into Donzelot's left flank. The outer most troops turned their bayonets towards the charging British cavalry forming a closed column. Of the three battalions in the path of the Dragoons, 2 passed their morale test with the third faltering. The 1st Royal Dragoons slammed into the side of the column having taken fire from the 1/28th Line to no effect.

The 2/13th Light put up stiff resistance successfully holding the Inniskilling Dragoons to a draw. The closed large column proved to be a reasonable alternative to a square for fending off cavalry. The 3/13th Light, 1/51st and 2/51st Line battalions were not so fortunate. The side of the column buckled under the impact of the 1st Royal Dragoons. With the 1/51st faltering, the Dragoons exploited the breakdown in cohesion and began sabreing the 3 battalions. All three began an uncontrolled retreat disordering the battalions to their rear. The 1st Royal Dragoons took a pursuit test and yet again pursued.

With the 1st Royal Dragoons gone from the front of these two batteries (Rogers and Whinyates) they had a clear view of the 1/28th Line infantry's square which was in canister range. The rockets caused a casualty and the 1/28th to falter. Then the cannon opened up with canister and there was little left of the French battalion once the smoke had cleared. The few survivors dispersed.


In the subsequent melee the Scots Greys continued their maniacal butchering.

And the aftermath! With two batteries destroyed a wide open gap remained. The Scots Greys tested for pursuit. Yep, you guessed it they continued to pursue. With their target completely obliterated the pursuit became an uncontrolled charge.
(For those of you unfamiliar with these rules, British cavalry suffer a -2 on the dice when testing for pursuit. That effectively means a score of 7 or less is a pursuit compared to 5 or less for just about everybody else).

French cavalry were urgently trying to close on the British cavalry to save the 1st Corps but struggled passed the survivors who were streaming back from the ridge. Here, Fanine's Brigade of the 14th Cuirassiers Division swing wide of Marcognet's and Donzelot's troops who were in the process of being rallied.

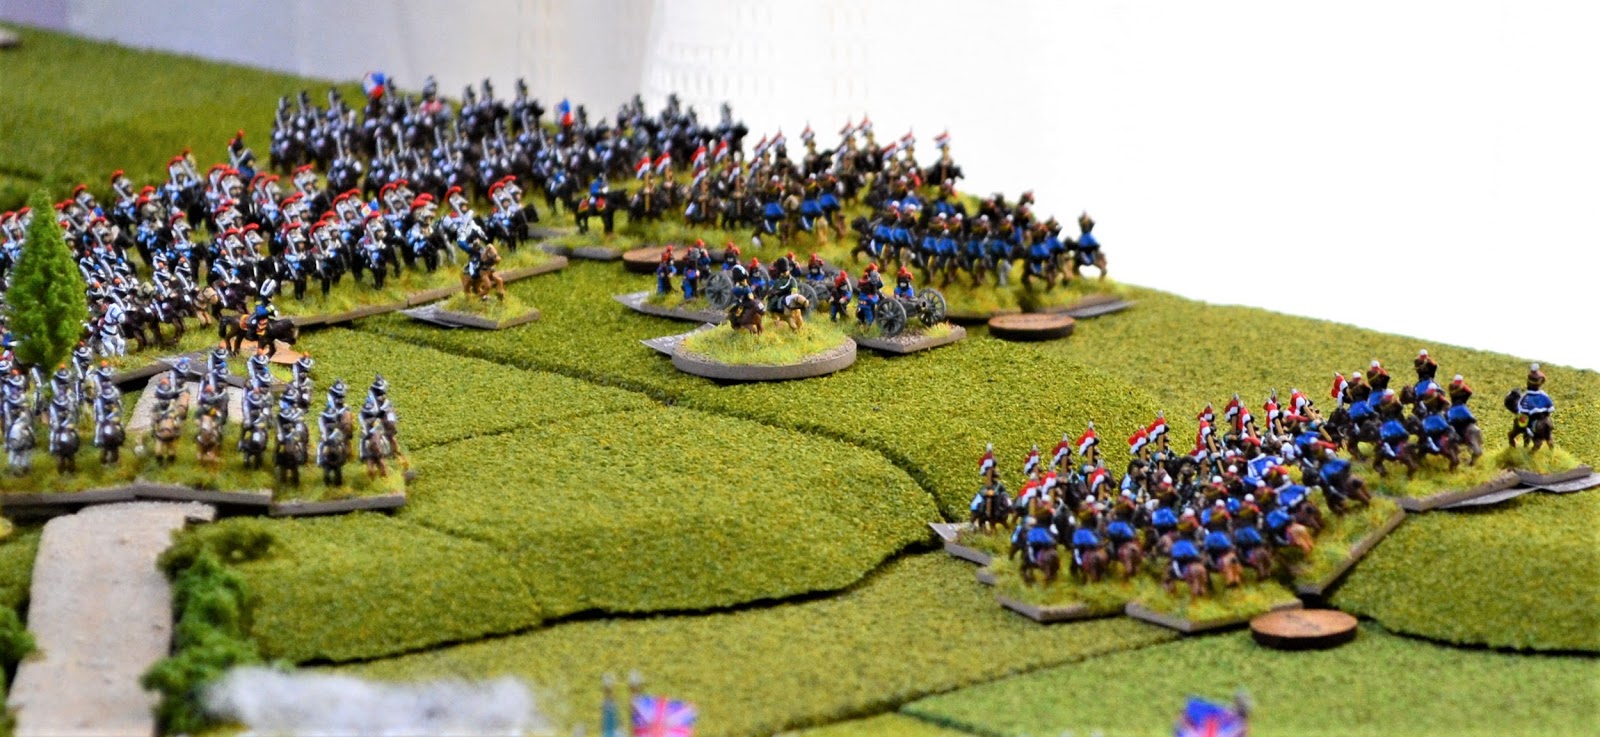
The Household Brigade finally forms up on the ridge.

Opposite them Dubois Brigade of Cuirassiers does likewise.

With Jerome Napoleon's 6th Division now surrounding Hougoumont, the
garrison fires from all sides.


Much to Pire's relief, the British 15th Hussars (centre) fails to complete it's charge on the 5th Lancers and falters.
The 1st Chasseurs successfully counter-charges the British 13th Light Dragoons and enters into melee (right). Despite the British advantage in quality of mount (a +1 in melee), the Chasseurs defeat the light dragoons. They inflict 6 casualties on the British for the loss of 3. The British dragoons are forced to retreat and in the pursuit test the Chasseurs received a 'horses blown' result. They will have to retire to their own lines in the next turn to recover.


Several overall views of the Battlefield at the end of this turn:


In the centre of this photo, Wellington has ordered Lambert's British brigade (centre of photo) to move to a reserve position on the Allied right in response to the build up of French forces.

 Vandeleurs' 11th Light Dragoons on the allied left flank (centre of photo) sees an opportunity of stopping or slowing Jacquinot's Light Cavalry Division as they advance towards the ridge. The British Light Dragoons charge the lead unit in the French division, the 3rd Chasseurs accompanied by Bruno. They took a chance as the French 4th Division's 6pdr foot battery, which was positioned on the end of the Grand Battery, had an opportunity to fire on them as they charged. The French battery fired their shot towards the light cavalry as it cantered towards the Chasseurs scoring an '11' killing 2 of their number. The heavy casualties caused the Light Dragoons to halt their charge. By now the 3rd Chasseurs were counter-charging and struck the British cavalry at the halt. The momentum of the Chasseurs won the day causing the 11th Light Dragoons to retreat and killing 4 more of them. In the subsequent pursuit test the Chasseurs received a 'Superb Discipline' result.

 Pegot's column had continued with their melee for an incredible 3rd round (this is highly unusual. Only a draw on the melee result continues for another round). Numbers were beginning to tell and gradually the column against the increasingly thin line were gaining the upper hand. The die result sealed it:
 This lead to the total destruction of the 92nd Highlanders with the 44th Line also dispersing having lost 50% casualties. The victorious 1/29th Line had also captured the Highlanders colours! Best was the nearest General who received a light wound. Fortunately for the Brigade commander, Pack, his brigade passed their brigade morale test. There was now a gaping hole in the allied line. The 1/29th had lost 2/3 of it's numbers and only the elation of victory was keeping it together. The rest of the column was still in good shape.
The obvious danger to Pegot's column were to his flanks with the 42nd Highlanders having wheeled onto their left flank and the 16th Light Dragoons had reformed on their right flank!
 The Scots Greys, having destroyed 2 batteries of artillery, were in no mood for a recall. They conducted an uncontrolled charge towards the nearest unit to their front which was the 2/45th Line which had the good sense to have formed a square earlier. This proved to be the extent of the Scots Greys advance as they failed to break the square and received a 'push back' result with the loss of 2 of their number.
 With regard to the fortunes of the rest of the Union Brigade, the 1st Royal Dragoons (centre of the photo) had begun an uncontrolled charge towards the nearest French unit. (An uncontrolled charge is carried out in the charge phase with all the normal morale tests to charge home and response to being charged. The only difference being the charging unit is unformed). The next French unit was the 1/19th Line who immediately retreated into the 2/19th Line who was already faltering. The 2/19th decided that it was perhaps a good idea to get the hell out and they promptly routed. This left the unfortunate 1/19th enduring another ritual slaughter at the hands of the Dragoons.
 The Inniskilling Dragoons (top of photo) had been held into a second round of melee by the plucky 2/13th Light infantry. There was not to be a third! The Dragoons broke up their ranks and put another French battalion to the sword. Both Dragoon regiments received 'Pursue' results in their pursuit tests. Clearly none of the Union Brigade were in any mood for exercising self-discipline!
 Ross' RHA battery situated at the crossroads (centre right - white smoke) fired at point blank range into La Haye Sainte. A double 6 was thrown causing a fire and killing 2 occupants. One of Charlet's ADC's was killed in 'Risk to General'.

 Somerset leading the Household Brigade, primarily the 1st Dragoon Guards and the 2nd Life Guards, they charged down towards Dubois 1st and 4th Cuirassiers. Dubois lead the counter-charge and both sides clashed mid-way.

 In the aftermath of the melee, both Household cavalry regiments tested for pursuit. And....... 1st Dragoon Guards had become unformed and the 2nd Life Guards received 'Horses Blown'. Not for them the recklessness of the Union Brigade.
To the west of this melee, British and French artillery batteries had been conducting counter-battery fire. For the most part it was fairly even. Further along the line though Ramsey's battery continued to excel. The surviving Guards heavy cavalry horse artillery battery had just deployed on the Grand Battery Ridge when they received a devastating salvo from Ramsey. Reducing the French battery to below half strength it dispersed.
 Now turning to the cavalry action at the western end of the battlefield, Grant had mixed success. His 15th Hussars (bottom right) had faltered and was at a disadvantage when charged by the 5th Lancers.

 The 7th Hussars (middle top) had pursued the retreating French 6th Lancers and inflicted more casualties on them. The 6th Lancers continued to retreat but would no longer be pursued. The 7th Hussars' horses were blown.


 The 7th Hussars were becoming isolated in their pursuits and French heavy cavalry advanced around them.

 The action around Hougoumont intensified. Attacks were mounted on the south and west facing walls and buildings. All were repulsed but casualties continued to mount on the Guards. Soye's Brigade had managed to bring units to the north side of the Chateau, protected by fire from the ridge for fear of hitting their own men. A first attempt was made on the north gate by the 3/2nd Line. It was defended by two companies of Coldstream Guards who managed to beat off the attack.

 Two French battalions, the 3/1 Line and the 2/2 Line launched an assault on the northern boundary of the ornamental garden which was the most vulnerable part of Hougoumont, only being a hedgerow. It was manned by 3 companies of the 1/2nd Nassauers. The rest of their battalion joined them on seeing the build up of French troops. With the French now on this side of the building, Hougoumont was completely surrounded.
Only the 3/1 Line charged home with the 2/2nd faltering. The Nassauers passed their test and entered into melee.
 The die result! This was potentially catastrophic for the garrison. When all modifications were added to the die result, the 1/2nd Nassauers were routed. Which was a problem as they were surrounded! More about this in the next turn's report.
Some photos now of movements elsewhere:

 Imperial Guard heavy cavalry advance towards the east of Hougoumont.
 Soye's advance to the north side of Hougoumont
 Foy's and Bachelu's Divisions approach the Grand Battery ridge (Middle left).
 Closeup of Foy and Bachelu.
 From behind Bachelu's columns.
 Vial's Cuirassiers Brigade clears the Grand Battery but become unformed.


 3 views of Simmer's 19th Division from the 6th Corps deploying towards Papelotte and Smohain.
 Jacquinot's Light Cavalry Division in front of Papelotte.
 3 battalions of Brunswick Line infantry advance through Dornberg's 3rd Cavalry Brigade towards the rear of the allied ridge.


It is now 3.00pm. More in the next report.


The obvious danger to Pegot's column were to his flanks with the 42nd Highlanders having wheeled onto their left flank and the 16th Light Dragoons had reformed on their right flank!


In a hard fought melee the Household Brigade defeated the Cuirassiers causing both regiments to retreat. The Cuirassiers lost 9 to the Household 4.

To the west of this melee, British and French artillery batteries had been conducting counter-battery fire. For the most part it was fairly even. Further along the line though Ramsey's battery continued to excel. The surviving Guards heavy cavalry horse artillery battery had just deployed on the Grand Battery Ridge when they received a devastating salvo from Ramsey. Reducing the French battery to below half strength it dispersed.

The 15th Hussars lost the melee and was pushed back losing 3 casualties and inflicting 2 in return.


Only the 3/1 Line charged home with the 2/2nd faltering. The Nassauers passed their test and entered into melee.

Some photos now of movements elsewhere:

H. Halkett's Hanoverian Landwehr form square in the face of French cavalry threats on the allied right flank.


Overall that has not been a good hour for the French. In the final morale test several French battalions failed to rally and dispersed. The 1st Corps is severely damaged with Donzelot's Division suffering particularly badly and reduced to just 2 battalions. They have lost a total of 16 units (battalions/batteries etc) to the allied 5.
For the allies, Wellington is reasonably content although he would have liked La Haye Sainte to have held out for longer. He is confident the breach to his line on the left flank can be contained. There is cause for concern with developments in Hougoumont however. Behind the front line he is particularly angry with von Estorff. He had been ordered no less than 3 times to move his Cumberland Hussars to the right to support Grant and, having taken them part way, he promptly stopped! Arentschild was sent in response to Estorff's failure.
It is now 3.00pm. More in the next report.
Fantastic - surely the best AAR ever! the rules seem to be pacing the game rather well, though the dice are having a lot fun with those double sixes!
ReplyDeletethanks for sharing all of this.
Thanks once again Norm. Yes they do pace a game well. I have altered them slightly to make Hougoumont etc more interesting. Almost a game in their own right.
DeleteReally enjoying your reports. Looking forward to the Prussians
ReplyDeleteCheers
Many thanks Jacko. Yes not long now for the Prussians.
DeleteI am with Norm on his assessment. Your Waterloo battle is one of the finest gaming spectacles these old eyes of mine have seen. Your troops and photography are truly inspiring.
ReplyDeleteGreat job!
Many thanks for your compliments Jonathan. Much appreciated.
DeleteThis has been an epic write up! Thanks very much for posting it!
ReplyDeleteAgain I have to agree with Norm and Jonathan this is the the finest game I have ever seen. Epic, truly epic!
ReplyDeleteCheers, Richard P
Thanks once again for your comments Richard. Really appreciated.
DeleteI can only agree with the comments that this is the best game and AAR I've ever had the pleasure to follow. Even though it appears to be all over for the French already, I'm still completely hooked and on the edge of my seat!
ReplyDeleteThanks for that Bob. One of the benefits of playing solo and playing both sides being that I now face the challenge of getting the French out of a hole largely created by the rather naff formation the 1st Corps adopted on the day. It is not over yet but it will be an uphill struggle for them.
DeleteI have only now discovered this blog spot. The set up is impressive - pretty looking tract of country, who knew? Engaging narrative keeps the interest. I'll be back!
ReplyDeleteThanks Archduke Piccolo. Hope you'll be back. Plenty more in the pipeline.
DeleteCatching up after a long work week... What can I say that others have not? The game continues to be a magnificent spectacle, with gorgeous terrain, troops, and photos of same. The narrative remains engaging, and, how about those Greys?
ReplyDeleteThanks Peter. Yep the Union Brigade and in particular the Scots Greys did run amok. Frustratingly for the French they found it difficult to get their cavalry through the morass of retreating and routing troops to deal with them.
Delete