ROLICA, PORTUGAL
17th August 1808
6mm Napoleonic Peninsular War
4'6" x 3' Table
This was a battle fought a couple of years ago and the first of what is intended to be a comprehensive refight of as many battles of the Peninsular War as possible in chronological order.
This was also the first test of using General de Brigade rules for 6mm. At the time I used skirmishers but it quickly became apparent that for larger actions it was not practical in this scale. It was simply too fiddly. This game was also played using the Command and Control system in the GdeB rules. Most British units have been painted up for Waterloo so wrong shako, grey trousers and the Dragoons also have wrong shako. Other units had to be used for Portuguese cavalry.

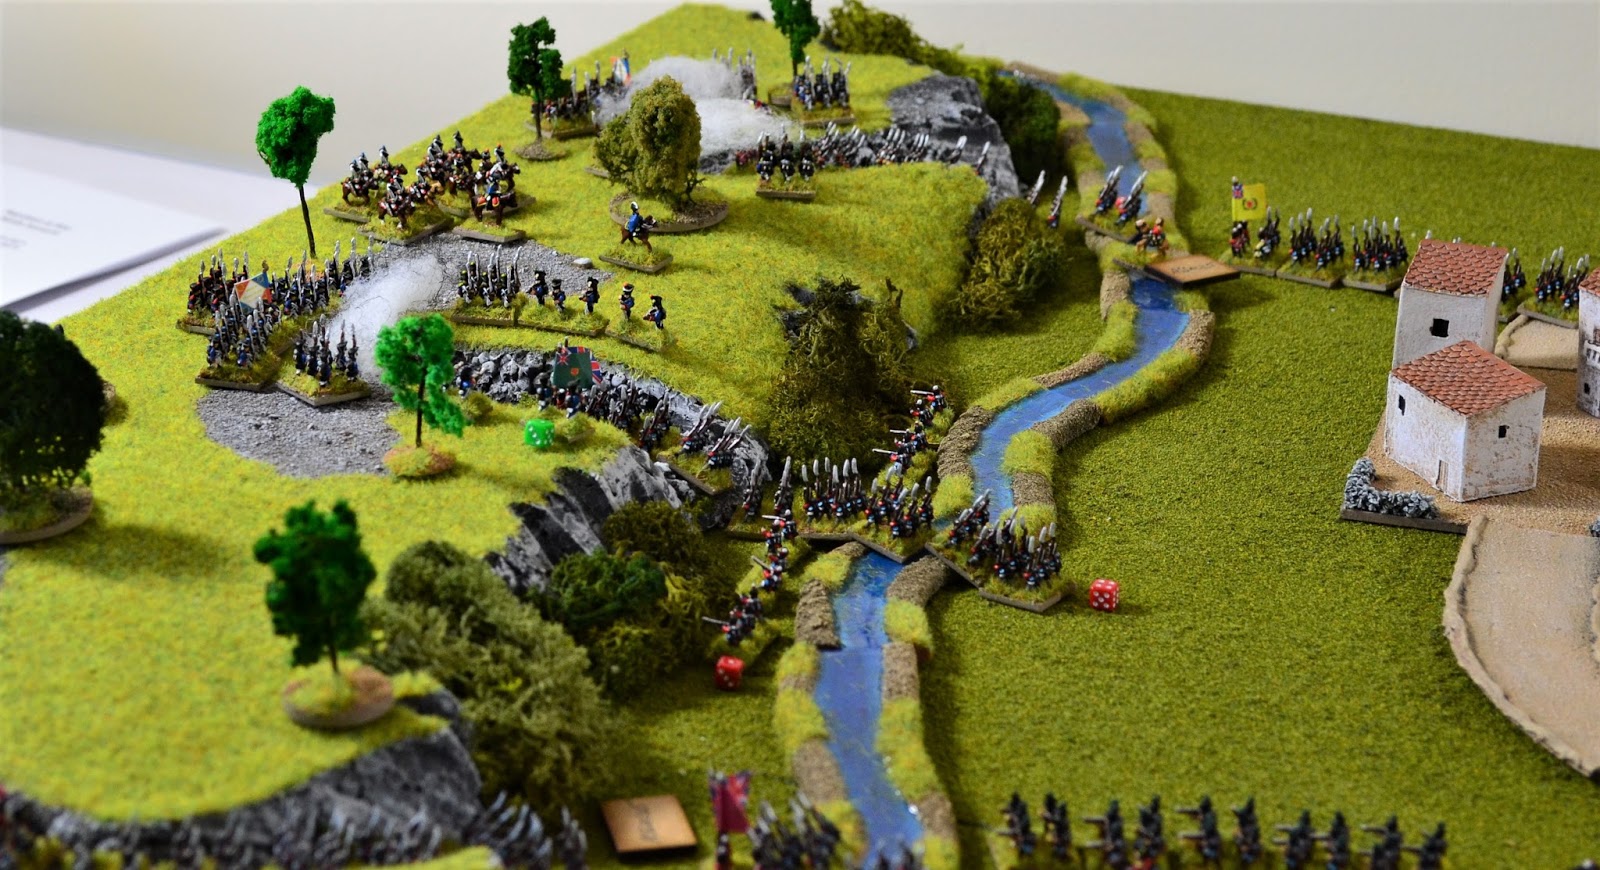
Overview of the battlefield with the village of Rolica to the right and Columbeira to the left. Southern Ridge with its gullies are on the left of the battlefield. The French commander, Delaborde, occupied Rolica and the high ground to its left at the start in the face of the advancing Anglo-Portuguese army under Sir Arthur Wellesley.

Thomieres' Brigade occupies in and around Rolica, and Brennier's Brigade takes up position on the hill.

Nightingall's Brigade leads the British attack supported by Craufurd's Brigade. Hill's Brigade is in the background and Fane's in the foreground.

Hill's Brigade on the right flank.

Frontal view of the French force.

It is obvious to Delaborde that his heavily outnumbered force will be quickly overwhelmed in its current position. He therefore pulls his force back towards Southern Ridge.

The Allied force advances towards Rolica supported by gunfire from an artillery battery.

The first British units enter the now abandoned Rolica.

As the allied force passes through and around Rolica they can see the French in the distance making for the Southern Ridge. It is clear that they will be unable to intercept the French before they reach the heights.

The first French columns approach one of the gullies that will take them to the high ground.

As the French columns race towards the gullies, a screen of skirmishers attempts to delay the allies advance.

The French units hurriedly deploy along the ridge as the allies approach.

As the mainly British units stream towards the French position they face the prospect of a bloody assault up the narrow gullies.

The French await the assault ready to pour fire into the narrow ridge gullies.

In one of the centre gullies the French frantically haul an artillery battery onto the ridge with the British desperately close.

The 5th bn of the 60th Rifles charges through the eastern gully into the face of fire from all sides.

The scene is repeated along the ridge as the 2nd of 4 gullies is assaulted. The French cannot miss as they fire down into the crowded gullies from the flanks as well as in the face of the advancing British.

The initial attack by the 60th Rifles is beaten off with heavy casualties. The 45th Line replace them in the gully and with some trepidation advance towards the waiting French.

Meanwhile in the next gully there is success for the British. The 82nd (Prince of Wales regt) braves its losses and force the defending French from the gully summit. They are followed by the 29th (Worcestershire) Line.

The Nottinghamshire men of the 45th Line discover what the 60th had just gone through. They are enveloped in smoke as musket fire rains in from all sides. The 60th reform ready to support the 45th.

In the distance Hill's Brigade pours into the two westernmost gullies while in the centre, Crauford's Brigade moves in to support Nightingall. The British artillery pounds the ridge in support.

Nightingall's Brigade stream across the ridge having broken the French line. The French opposing the 45th fall back much to the relief of the latter.

Hill's Brigade struggles through their two gullies taking heavy casualties. It proves too much for them and both attacks fail.

Thomieres' Brigade routs from the ridge leaving Nightingall's and Fane's Brigades in command of the eastern end of the ridge. It now falls to Brennier's Brigade supported by the 26th Chasseurs a Cheval to hold up the British and Portuguese.

A close up of Craufurd's Brigade with the 91st Highlanders making their way towards the gully.

As British troops continue to pour onto the ridge it is obvious to Delaborde that Brennier's position is hopeless and orders him to withdraw bringing the battle to a conclusion.

Thomieres' Brigade occupies in and around Rolica, and Brennier's Brigade takes up position on the hill.

Nightingall's Brigade leads the British attack supported by Craufurd's Brigade. Hill's Brigade is in the background and Fane's in the foreground.

Hill's Brigade on the right flank.

Frontal view of the French force.

It is obvious to Delaborde that his heavily outnumbered force will be quickly overwhelmed in its current position. He therefore pulls his force back towards Southern Ridge.

The Allied force advances towards Rolica supported by gunfire from an artillery battery.

The first British units enter the now abandoned Rolica.

As the allied force passes through and around Rolica they can see the French in the distance making for the Southern Ridge. It is clear that they will be unable to intercept the French before they reach the heights.

The first French columns approach one of the gullies that will take them to the high ground.

As the French columns race towards the gullies, a screen of skirmishers attempts to delay the allies advance.

The French units hurriedly deploy along the ridge as the allies approach.

As the mainly British units stream towards the French position they face the prospect of a bloody assault up the narrow gullies.

The French await the assault ready to pour fire into the narrow ridge gullies.

In one of the centre gullies the French frantically haul an artillery battery onto the ridge with the British desperately close.

The 5th bn of the 60th Rifles charges through the eastern gully into the face of fire from all sides.

The scene is repeated along the ridge as the 2nd of 4 gullies is assaulted. The French cannot miss as they fire down into the crowded gullies from the flanks as well as in the face of the advancing British.

The initial attack by the 60th Rifles is beaten off with heavy casualties. The 45th Line replace them in the gully and with some trepidation advance towards the waiting French.

Meanwhile in the next gully there is success for the British. The 82nd (Prince of Wales regt) braves its losses and force the defending French from the gully summit. They are followed by the 29th (Worcestershire) Line.

The Nottinghamshire men of the 45th Line discover what the 60th had just gone through. They are enveloped in smoke as musket fire rains in from all sides. The 60th reform ready to support the 45th.

In the distance Hill's Brigade pours into the two westernmost gullies while in the centre, Crauford's Brigade moves in to support Nightingall. The British artillery pounds the ridge in support.

Nightingall's Brigade stream across the ridge having broken the French line. The French opposing the 45th fall back much to the relief of the latter.
Hill's Brigade struggles through their two gullies taking heavy casualties. It proves too much for them and both attacks fail.

Thomieres' Brigade routs from the ridge leaving Nightingall's and Fane's Brigades in command of the eastern end of the ridge. It now falls to Brennier's Brigade supported by the 26th Chasseurs a Cheval to hold up the British and Portuguese.

A close up of Craufurd's Brigade with the 91st Highlanders making their way towards the gully.

As British troops continue to pour onto the ridge it is obvious to Delaborde that Brennier's position is hopeless and orders him to withdraw bringing the battle to a conclusion.
This was the narrowest of victories for the Anglo-Portuguese having finally gained control of Southern Ridge on turn 15. One more turn and the French would have achieved their aim of delaying the allies for that period of time.
That's a very nice looking game. How do you feel that the rules coped?
ReplyDeleteI had a go myself at this battle earlier in the year, with results not too dissimilar from your own http://hereticalgaming.blogspot.com/2017/08/the-battle-of-rolica-1808-polemos.html
Thanks for your comments and I have had a look at your blog. I was impressed by the amount of detail you have gone into and I liked the way you recreated the battlefield with the raised ground formed beneath a cloth. I toyed with the idea of including orbats and some detail about the battle and on reflection I probably should have done. The main difference in our refights being that in yours the French engaged the British in their first position before disengaging. This is a little more difficult in GdeB. If the attacker is pressing you hard it can be virtually impossible to do, at least voluntarily. In this situation the French would be relying on a Brigade breaking following a morale test or individual units falling back, retreating or routing. Any of these could have consequences later on even if rallied. e.g. if a Broken Brigade breaks for a second time then it disperses. Therefore in my game the French played it safe and fell back to the more easily defensive position on the ridge.
ReplyDeleteAs you saw in my game I wanted to model the gullies and see if under these rules it would be possible to get an historically accurate result. I had to make modifications to allow the French to split their battalions to line the flanks of the gullies as well as the gully summits. Essentially those at the gully summits were classed as 'formed' in line and those on the flanks were unformed (they would have been dispersed amongst rocks and undergrowth). They are however firing down into a compact mass of men climbing the gullies and therefore I classed the targets as 'massed'. In the rules this is normally when 2 or more columns are in close proximity.
My replay had all units represented on a ratio of 1:20 rounded up or down to match the number of figures on a base. So all units were pretty much represented as per their strength in the actual battle.
Aside from the need for the French to retreat from Rolica to preserve their strength, I felt the rules coped well. You can tinker with them without breaking them which is useful if you have unusual situations. In my refight Delaborde knew he had absolutely no chance of victory against overwhelming odds but he did have an excellent defensive position and all he had to do was delay the allied attack. As you will have seen, in my game he came within a whisker of succeeding so all in all I was pleased with the way the rules operated and allowed for some very exciting firefights and melees in the gullies.
superb and inspiring. I appreciate seeing a game on the smaller table. Now following.
ReplyDeleteSuperb battle report, the photos are exceptionally clear, something I need to improve on in my own reports. Very close run affair. very enjoyable.
ReplyDeleteThanks Jack. Regarding the photos. I mount my camera on a tripod for most of the shots, especially close to the ground or close up shots. I struggled with poor lighting (I had a desk mounted daylight bulb trained on this game so not too bad) but have now installed daylight bulbs in my now permanent wargames room which makes a big difference.
DeleteI absolutely love your blog!
ReplyDeleteThanks Mike. Your comments are really appreciated. You never know when you are typing away if you are boring the backside off the reader! Encourages me to continue.
Delete