 |
| This action focuses on the 9th Legion's advance on Mona. The Cornovii tribe had previously indicated a willingness to be allies to Rome. As the 9th Legion marched through their territory they had a change of heart and rebelled. |
For this game I shall be using L'Art De La Guerre (ADLG) rules for the first time. The orders of battle will remain largely unchanged - more of this later.
 |
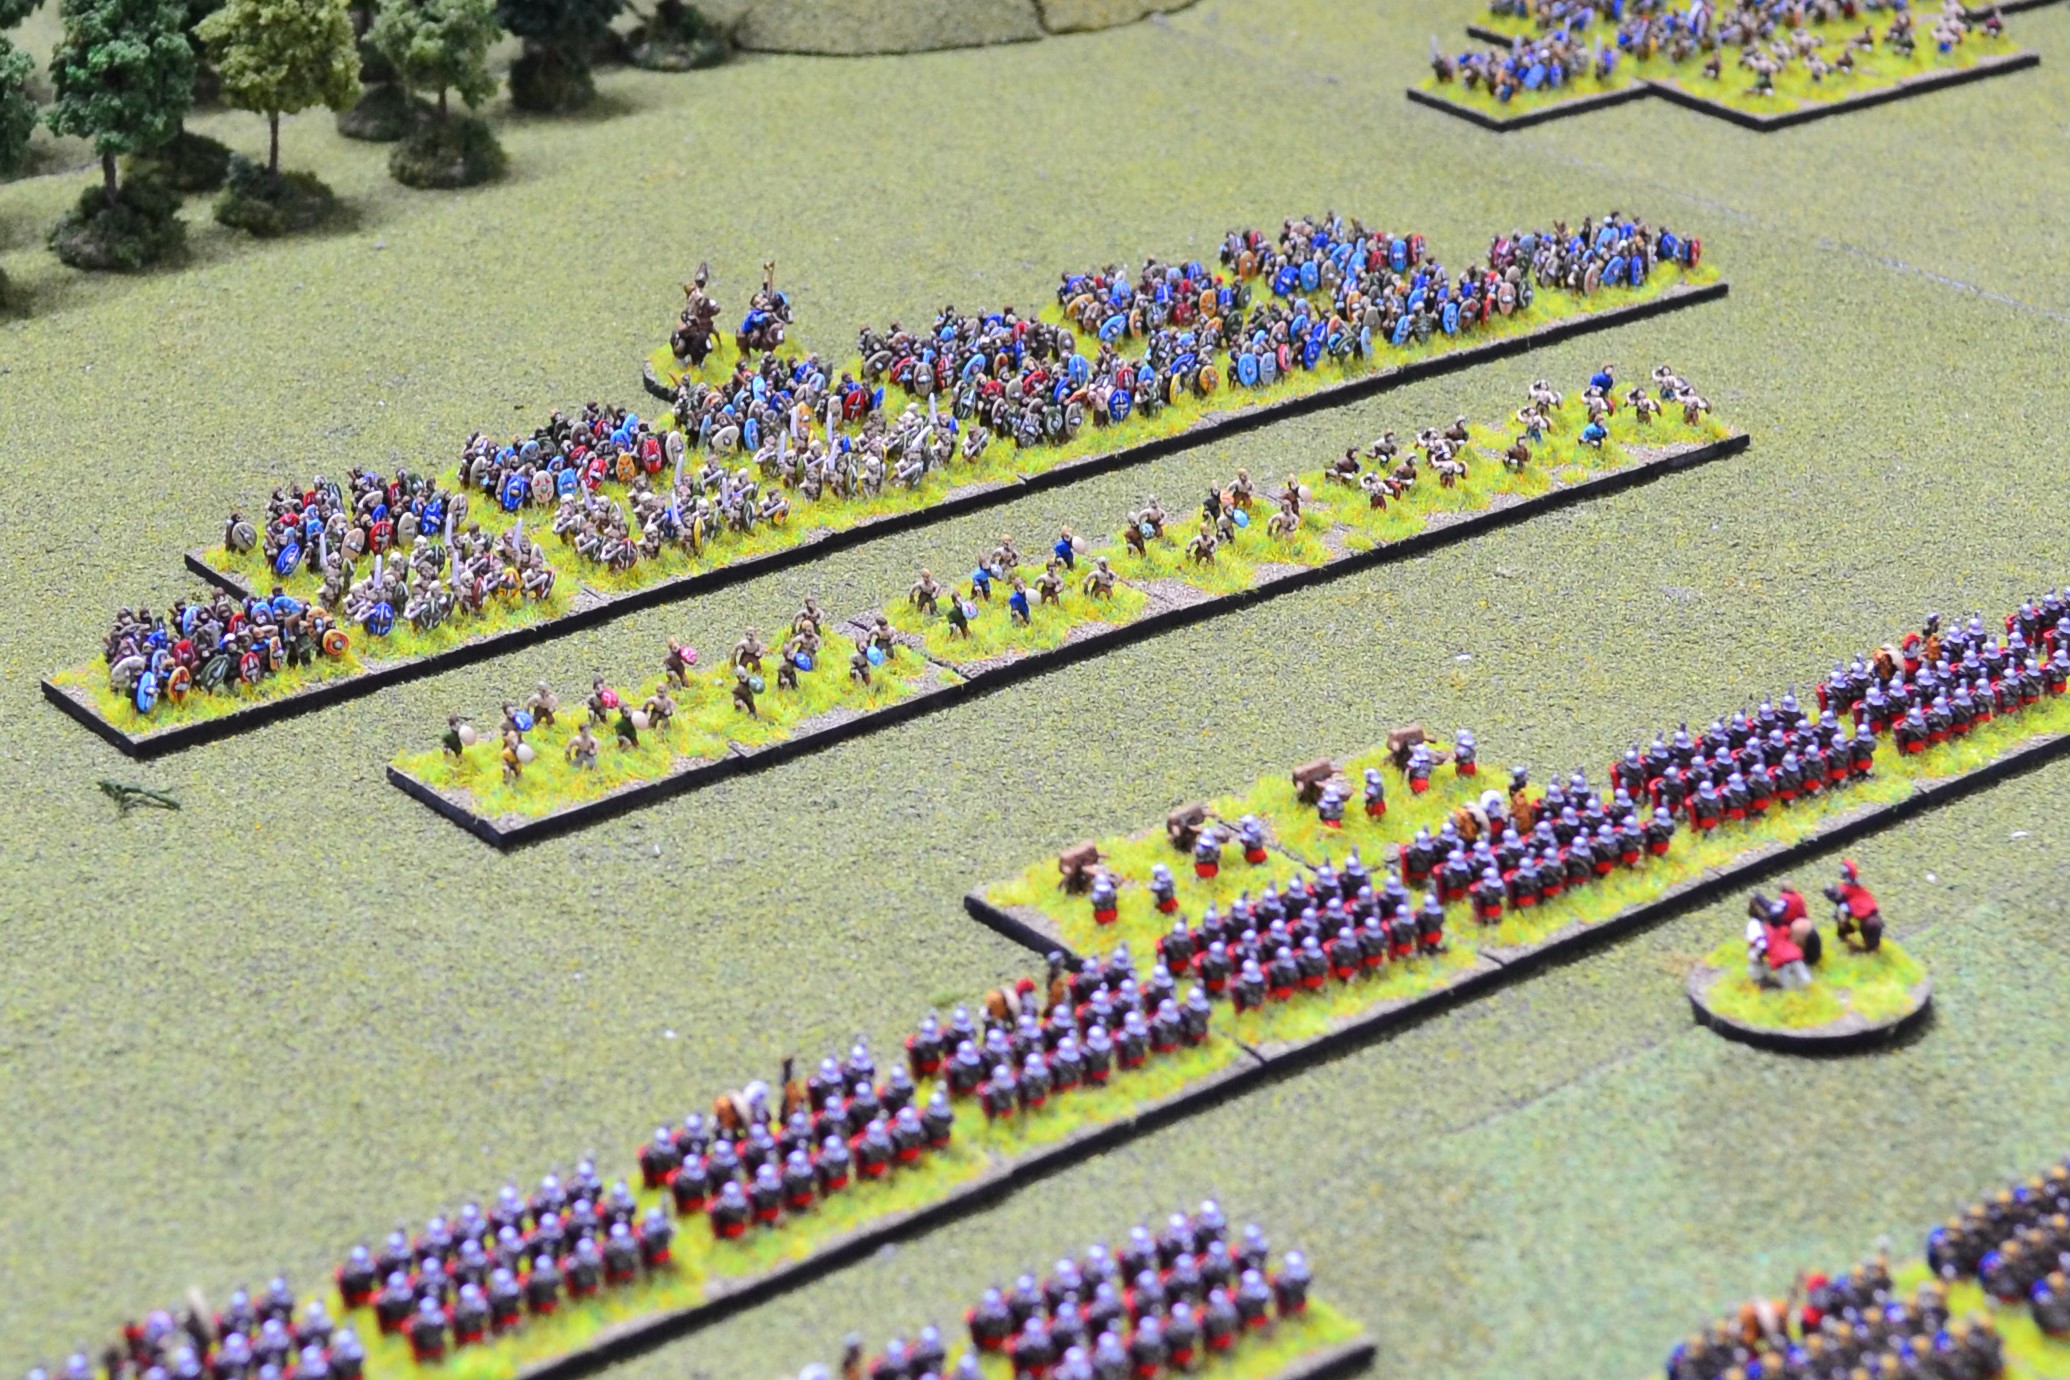
Initial dispositions. The Cornovii are the attackers on the left. They have a normal camp and the Romans on the right have a fortified camp.
I retained the 'Age of Hannibal' method of terrain placement which, I felt, was more suited to solo play. All terrain cards were placed face down by each side with just minor adjustments when revealed.
The river is impassable apart from the ford. At the top of the photo, the stream is classed as difficult terrain. Both woods are also difficult. |
Continued -
ORBATS
The orders of battle required some re-adjustment. I am not a huge fan of points but does help when attempting to create roughly equal forces. The point allocation is very different in AoH compared to ADLG. Previous games had them pretty much equal but ADLG awarded them a little over 200 points compared to over 400 for the Romans. I therefore, used all my painted figures apart from chariots, and could only bring the Cornovii up to 316 points!
I decided to play it out as is and see how they performed under these rules. The rules themselves, are geared for primarily 200 points and provides command adjustments for larger games. In this instance I used their guide for 300 point armies where each side as 4 commands rather than the usual 3. At 400 points the Romans should have had 6 but as they already had a significant advantage I kept them to 4.
Initial dispositions:
 |
| The Cornovii centre (right of photo), left and cavalry reserve. 3 stands of naked warriors in the central (main) command are their elite. i.e. slightly mad! |
 |
| The Cornovii right flank. |
The river provides a headache for the Cornovii chieftain reducing the opportunity for outflanking the Romans. Nevertheless the Cornovii right flank command is tasked with capturing the ford and turning the Roman left.
The central command will keep the Roman centre under pressure while their left aims to turn the Roman right flank. The cavalry reserve will be used to exploit any gaps or weaknesses.
 |
| For the Roman centre and right it is all fairly routine. Hold the line and let the warbands batter uselessly at their solid wall. The Roman right has its cavalry thrown out to the flank ready to intervene as and when needed. |
 |
| A little more complicated for the Roman left. The Batavians are tasked with holding the ford with the 4 legionary stands acting as a link to the main Roman force. |
 |
| On the Roman left flank the Batavian auxiliaries rush to block the ford as the warbands approach. Slingers pepper the Batavians but fail to make an impression. |
 |
| The warbands surge across the ford to be met by the Batavians who absorb the charge with ease. The elite auxiliaries quickly despatch the first warband disordering the stand immediately to their rear. |
 |
| The Batavians may be elite but they are also impetuous. Having defeated the first warband they launch into their own uncontrolled charge destroying another stand and ploughing into a third. The slingers continue to shoot at the second Batavian auxiliary unit finally causing disorder. |
 |
| In the centre the main Cornovii command emerged from the treeline and advanced on the Roman centre. Roman artillery opened up but failed to cause much disruption. |
 |
| The Cornovii cavalry reserve hurriedly move towards the gap between the woods in order to support the centre and hopefully outflank the Roman legionaries. |
 |
| Over on the Roman right flank the massed warbands approach. The Roman commander moves his cavalry with the intention of outflanking the Britons. |
 |
| It is difficult to manoeuvre the warbands requiring double command points in order to do so. All they can do is respond to events and two warbands turn to meet the cavalry charge. They succeed in holding it but one warband is perilously close to destruction. The remaining warbands continue towards the legionaries of their right flank command. |
 |
| The situation in the centre as the Briton cavalry move up as planned. |
 |
| The elite warband fanatics launch their charge immediately when within reach of the Roman artillery who are caught before being able to retreat. They are comprehensively destroyed and the fanatics continue into the waiting legionaries. |
 |
| The fanatics are quickly joined by other warbands who smash into the legionaries. They successfully disorder several of them but the Britons come of worst with most disordered and the loss of 2 warband stands. |
 |
The Cornovii right flank commander quickly realises that crossing the ford is proving futile and hurries his remaining force through woods circumventing the river.
|
 |
| Back in the centre, the Britons are utterly annihilated by Roman discipline. Just 1 fanatic stand remains in melee with the rest destroyed. |
 |
| In a desperate attempt to break the Roman line, the Cornovii commander launches his remaining warbands into the legionaries who remain holding fast. |
 |
| Initially the Cornovii cavalry reserve commander sought to assist the warbands by pinning several bases of legionaries in place with the light horse launching their javelins. |
 |
| The rapid deterioration in the centre called for desperate measures and the light horse was replaced by charges of the medium cavalry leading to the loss of one of their stands. |
 |
| More bad news for the Cornovii on their left flank. Warbands hit the legionary line but were caught in the flank by Roman cavalry and this is the result! All gone. |
 |
| The remaining warbands suffered a similar fate when another charge was made. Only one had any success eliminating a cavalry unit and desperately fighting on against a second (far left). The Cornovii left flank is now virtually non-existent. |
 |
| The Batavian auxiliaries have now virtually cleared the ford although the last warband is proving to be more resilient and is fighting back inflicting another cohesion marker. The auxiliaries are now in danger of being destroyed. |
 |
| The Cornovii right flank force emerge from the woods only to be met by the Roman left whose commander saw the potential danger and moved to counter them. Any thought of relieving the ford had now pretty much evaporated. |
 |
| The Batavians emerge totally successful having destroyed all 4 warbands attempting to cross the ford. Only 2 stands of slingers remain. |
 |
| The remaining Britons on their right flank are completely blocked by legionaries and flanking cavalry. Any attempt at a breakthrough proves futile. |
 |
| An all too brief victory for the Britons on their left flank. Joined by their commander in a last ditch attempt to salvage some pride, the last warband successfully destroys another cavalry base. |
 |
| Cornovii medium cavalry is utterly destroyed as they attempt to force through the legionary ranks. Together with other losses takes the Cornovii past their break point. The victorious Romans lose only 2 stands of artillery and 2 of cavalry. An overwhelming victory. |
This proved to be a very easy victory for the Romans who were never really put under pressure.
It is early days yet with only the first outing with these rules. But so far, they appear to be more to my liking than AoH. They are more complicated but not overly so, providing a more in-depth gaming experience.
I intend using these rules again for the next game but will need to reconsider the orbats to make for a more challenging experience. In order to do that I aim to balance out the points to around 300 each. It will almost certainly mean dropping off several Roman units but these will remain on the orbats for the campaign. Those absent units will be off foraging, garrisoning, patrolling etc.
Turning now to the strategic situation:
 |
The Roman phase of Turn 7 sees the 9th Legion advancing across north Wales towards Mona. They meet up with the Deceangli tribe who declare themselves alllies.
Elsewhere, the remaining legions move further west now that the east has been pacified. The 2nd Legion is tasked with supporting the 9th. The 16h will seek to secure the north and the 20th the south west. |
 |
It is now turn 8 and the Dobunni tribe have rebelled. The 2nd Legion performs an about-turn and engages the Dubunni.
The 9th Legion have crossed into Mona to finally deal with the annoying Druids. |
The next game will be the 2nd Legion v the Dubunni followed by what may be the last of the campaign against the Mona.


Another fine game there Jon, but it did feel like a stroll in the park for the Romans, who never seemed to be under any pressure. Do you think that was down to the rules, the scenario or a mix of both? Would it possibly have been more of a test for the Romans using AoH do you think?
ReplyDeleteI think the Britons would have faired better under AoH but that said, in points terms, they were disadvantaged. I had not counted on quite to that extent though. The scenario played a part. The presence of the river hindered any outflanking moves which was the best hope for the warbands. I am in the midst of prepping the next game which should give the Britons a more even game.
ReplyDeleteYou mentioning Hail Caesar has got me looking at that again and may give it a roll out at some point. My only experience of it was using 15mm figs a good few years ago and it did not really appeal at that time but I need to take a closer look.
I only considered HCII because it has a common C&C system for most of the games I play, such as Black Powder II, BKCII etc. I find this makes it much easier to chop and change periods, as you are not having to learn a completely different set of rules each time. I tried different sets some 10 years or so ago and spent too much time looking at the rules or trying to remember if a rule belonged to one ruleset or another!
DeleteKeeping to the same family of rules certainly resonates Steve.
DeleteAnother great looking game Jon.
ReplyDeleteA difficult ask for the Britons to attack if they have a smaller force but still that is one of the advantages of solo gaming. You don't have to be fair to have a good game.
Many thanks Ben.
DeleteThe Romans seemed to be at their buzzsaw best in this fight. Interested to see in future games if it is the rules or the disparity in force that drove this.
ReplyDeleteThe Britons did suffer from horrendous dice rolls so hopefully the next game will be little more balanced.
DeleteHi Jon, I play a lot of L'Art de la Guerre and Ancient Brtons is one of my 15mm Armies. The Roman legions are tough to beat head on with their Impact and Armour advantages. Time is not on the Britons side and impetuous charges will kill the Britons. I have beaten a Roman Army by using terrain such as hills and forests to deploy my warriors in to prevent impulsive charges, deploying ambushes, even dummy ambushes will help slow the Romans down. Keeping my main warriors in the center back to buy time for the chariots and light cav to roll in the Roman flanks and get behind the legions. These rules don't give the British commanders a lot of command points therefor it's impossible to prevent an impetuous charge on command points alone, you must use whatever terrain you can. That is what my Roman opponents will play to, they'll move up to charge distance and wait for me to fail rolling enough command points and then the game is a repeat of Watling Street. Other aspects of the rules is - we have found artillery has very little impact unless it's heavy. Points per side have to be balanced as you've found out. The terrain generation rules in L'ADLG have created some odd setups.
ReplyDeleteHi Jon, just to add a couple of more things regarding the rules. I play my Britons with my commanders included in units, the two reasons are 1. it saves a few points which normally allows another unit or two, 2. the main reason is the commanders get a free move, this means if they are included I can use that to move the unit they are included with and any touching adjacent units get the free move too. Also when bases are grouped together a single command is supposed to be 6 bases wide, this means excess units have to be in a second rank or you split them into two commands which means they each require a command point to move - this can be something else that will affect the Roman deployment. By the way I really enjoyed reading this series of postings, definitely has me itching for a campaign.
DeleteMany thanks for your really helpful advice Steve. I am still getting my head around many aspects of the rules and mistakes have been made. There is a tendency to slip back into my DBM mode when playing these particular rules when barbarian armies could prove devastating to the Legions. I had not considered the terrain and ambush aspect and will look at that more closely. I am part way through the next game with both sides fielding roughly 270 points and 4 commands each. The Britons are going for a sizeable flanking move and although early in the game, it is looking more concerning for the Romans.
DeleteI am pleased you are enjoying this run of postings. You never know when posting this stuff, which is just my take on the hobby, whether readers will like it or not.