 |
| MAP 8 |
 |
| MAP 4 |
 |
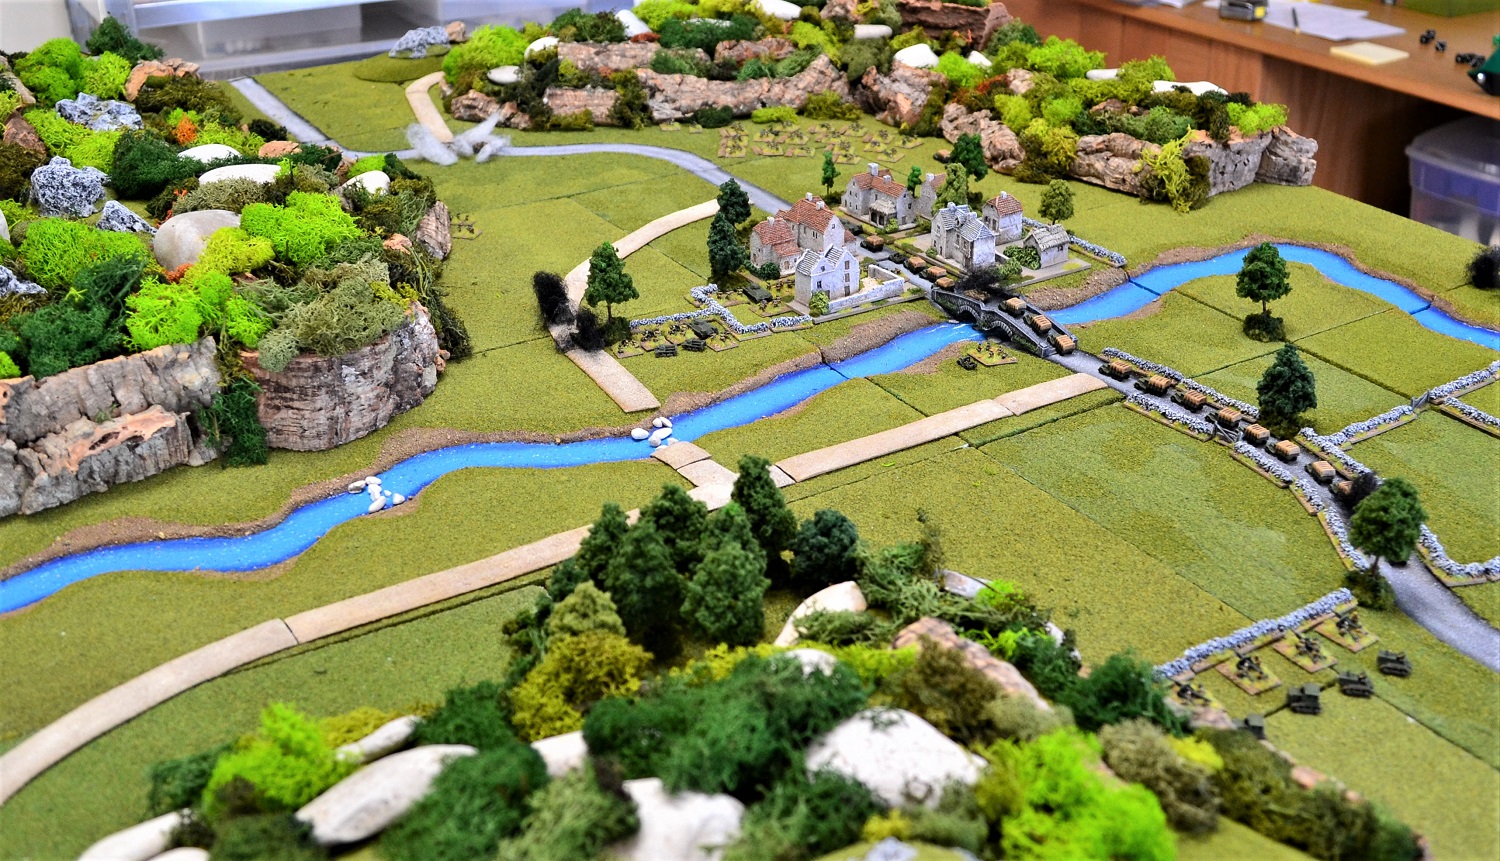
| An overview with the first half of Map 8 added. |
 |
| Despite the command penalty, the T34 battalion HQ successfully activated his units, although only the once, which was fortunate for the Germans. The armour halts on the bridge awaiting infantry support not knowing what is lurking in the village. |
 |
| Troops of the 1st Motorised battalion along with the last of the 45mm anti-tank guns make for the ford west of the village. |
 |
| The retreating Germans are alarmed by the sight of approaching T34's but manage to put some distance between them. The Panthers turn where the valley narrowed and opened fire on the closest of the Russian tanks with view to buying time for the infantry. |
 |
| The Panthers proved to be devastatingly accurate scoring 12 hits on the lead T34. The latter though proved its ruggedness saving 6 of the hits (on a 5 or 6) but alas not enough to prevent its demise. |
 |
| The German infantry take a rough track off the main road taking them out of view of the pursuing Russians. |
 |
| An overview at the end of turn 1. Several Russian command failures once again prevented them from making good progress. |
Turn 2
 |
| A succession of command failures continues to dog the Russians. Most importantly, the armoured battalion commander fails in his attempt to deploy his tanks behind cover before firing on the Panthers. The force CO attempts to use his command roll to activate the tanks but also fails! The Panthers duly punish the T34's with another destroyed. They also suppress a 45mm anti-tank gun as it attempted to deploy behind the wall. |
 |
| The 1st Motorised battalion had some success moving some of its units into the village. |
 |
| Likewise the 3rd Motorised who continues to advance towards the village. |
 |
| An overview at the end of turn 2 with the Panthers firmly lodged in the narrow pass. |
 |
| A little more success this turn with the T34's now firmly in position behind cover in the village although not yet able to fire on the Panthers. More of the 1st Motorised move through the village. The Panthers are not so effective this turn targeting 3 of the T34's within the village. Several hits are scored but none are suppressed nor close to being destroyed. |
 |
| The 3rd Motorised continues to make slow but steady progress. |
 |
| Another turn, another command blunder for the Russians. The single unsuppressed 45mm AT gun deploys and prepares to fire on the Panthers only to fall back (gun next to the river). |
 |
| Although not enough activations to fire on the Germans, the Russians do successfully deploy in cover within the village. |
 |
| The 3rd Motorised also make good progress advancing around the right flank. |
 |
| Overall a rather ominous sight for the Panthers as the village perimeter becomes alive with Russians. |
 |
| A successful call through to the 120mm mortar battery elicits a round of mortar shells on the Panthers (middle top). Although they cannot knock them out the German tanks can be suppressed. This they successfully do to 2 of the tanks but alas not the HQ Panther. The Russians need not have worried though as the Germans fail their command rolls! The German silence gains the Russians valuable breathing space. Elsewhere the Russian CO orders the empty trucks to collect the lagging naval battalion. |
 |
| The 3rd Motorised battalion with the engineers platoon keep close to the valley side to remain clear of troops providing supporting fire from the village as they advance on the German position. |
 |
| A barrage by the field artillery battery failed to make and impression on the Panthers. The T34's however managed to suppress one. The 1st Motorised fired everything they had at another Panther successfully suppressing the before turning their attention to the German infantry platoon and sniper team both of which were destroyed. The Panther commander ordered the last unsuppressed Panther to withdraw hoping to extricate himself on the other Panther as soon as they are able. |
 |
| An overview shows the arrival of the naval infantry battalion now embarked on trucks along the main road. |
 |
| A rather uneventful turn with many units quiet as a result of command failures including the T34's. Both their battalion HQ and the force CO failed to activate them. The two remaining Panthers were again suppressed by mortars and artillery fire. |
 |
| The 3rd Motorised battalion made a determined charge to take out the Panthers. Supporting fire from the village failed utterly (more of that later) leaving the Panthers unsuppressed. Both platoons leading the charge (one rifle and one SMG) were suppressed by the Panthers but nevertheless had a clear advantage in close combat supported by 4 further units. The Panther facing the brunt of the attack rolled very high on its saving rolls resulting in the first round of combat being a draw with 2 hits scored on each. The second round proved to be a disaster for the Russians with the Panther the clear victor. |
 |
| The aftermath with the 3rd Motorised having lost its 2 attacking platoons and the 4 supports retreating suppressed. |
 |
| The end of turn 7 with the Panthers now having withdrawn. The key to the failure of the Russian attack can be seen by the position of the T34's. When attempting to activate in support of the 3rd Motorised they rolled a command blunder. The result a retreat to their rear! With the next phase of Map 8 about to begin, the Russian commander has a great deal to consider. The Panthers are proving to be his worst nightmare! |
 |
| The rest of Map 8 has been added. With no activity by the Germans I have not bothered going through several turns to reposition the Russians. They have therefore been moved to their final positions before the next phase of the campaign not counting it as a turn. This is the view that now greets the Russians. |
 |
| An overview of the board as it is now set up. |
 |
| Two views of the lead Russian forces. |
 |
| With no Germans in sight the Russians have no idea of what may lay around the mountain spur jutting into the pass. Their heavy mortars and field artillery battalion only have a narrow field of vision and anything hidden behind the spur will be protected from them unless they are able to relocate. The Russian commander decides that overwhelming strength thrown into the narrow gap is their best chance of success although fraught with danger. Heavy casualties are anticipated. Leading the charge will be the 3rd Motorised battalion (currently dug in) supported by the anti-tank company of AT Rifles, and the medium tank battalion consisting of the 6 surviving T34's. The 45mm anti-tank battalion and Regimental Infantry Gun company join the front line. |
 |
| The 1st Motorised battalion provides rear support. On the road in the background are the trucks carrying the 2nd Motorised battalion followed by the naval battalion. |
 |
| The 120mm mortar battalion deployed but with not targets so far. |
 |
| The field artillery battalion likewise. |
 |
| The 3 recce platoons of the Recce battalion nervously advance along both sides of the pass. One successfully spots a Panther tank located between a small rocky hill and the northern slope of the mountain spur. It communicates what it sees to the 3rd Motorised HQ who immediately orders the advance. |
 |
| The 3rd Motorised lead the advance and was immediately set upon by a Panther and 3 German infantry platoons using opportunity fire from positions adjacent to, and on the rocky hill. A Russian platoon from B company was destroyed. They failed to activate to provide a response and held their position as the T34's rolled forward. 5 of the T34's were in a position to fire on the Panther scoring only 2 hits but successfully suppressing it. A German mortar suppressed a T34 and a platoon from C company of the 3rd motorised fell to concentrated fire from German infantry. |
 |
| Germans lurking on the rocky hill pouring misery on the advancing Russians. |
 |
| Russian command and control again proved underwhelming although some progress was made. Anti-tank firepower needed to be maximised and a decision was take to move up the 76mm field guns to utilise their anti-tank capabilities (bottom of photo). As if to prove a point, two Panthers rolled into view ahead (top of photo) but remained mysteriously quiet (failed command rolls by the Panther HQ and the force CO!). |
 |
| Using initiative fire, the 4 unsuppressed T34's concentrate their fire on the Panther (bottom middle marked by black smoke). Scoring an incredible 14 hits on 16 dice signalled the demise of the German tank even though it managed to save 6 of those hits. This triggered the 2 Panthers (top right) using opportunity fire destroyed one of those T34's. The Russian tanks now moved to the position shown in the photo in the command phase and opened fire on the Panther HQ tank scoring two hits but failing to suppress it. |
 |
| Another view of the tank firefight. |
 |
| In an extremely aggressive move, the 3rd Motorised HQ ordered a close combat assault on the German infantry positions. Two MMG's (bottom right) fired on one of the German platoons prior to the charge successfully suppressing it. Three close combats were conducted. In the photo these are on the right with the red dice, to the left of the burning tank on the hillside, and on the left on top of the rocky hill. The Russians won the combat on the right destroying the German platoon, but lost both others with the loss of two platoons. |
 |
| The aftermath of the close combats with most of the Russians pushed back. A rare moment of inspiration by the Russian commanders when the 3rd Motorised successfully activates his battalion for a 3rd time ordering all available units to fire on the German positions successfully destroying another platoon. |
 |
| The Russian CO successfully called in a strike by the 120mm mortar battalion on the Panthers successfully supressing the HQ tank. It was now the turn of the T34's, including an anti-tank rifle platoon, to use opportunity fire on the Panthers successfully knocking out another. Only the suppressed HQ Panther now remained. The German commander decided it was now prudent to withdraw but only had minimal success recalling his units. One such is the halftrack in the middle of the photo. It had embarked a platoon but failed to activate leaving it exposed! |
 |
| On the whole a more successful command and control turn for the Russians apart from the 1st Motorised suffering a command blunder causing the entire battalion to retreat a full move (middle of photo). This would now deprive the 3rd Motorised and T34's of their promised support! |
 |
| The Russians missed an opportunity to destroy a halftrack with its embarked SS rifle platoon when the 3rd Motorised HQ having been alerted to its location by a recce unit, failed to call in the 120mm mortar battalion to target it. Consolation though when the T34's successfully knocked out the HQ Panther tank (bottom right). |
 |
| The Germans had a much more successful series of command rolls enabling the surviving units to retreat clear of the Russians. |
 |
| The relative position of the Russian forces as the Germans exit the table. Neutralising the Panther threat came as a great relief to the Russian commander. His elderly T34's were clearly outclassed and he must hope that he has seen the last of them. |
 |
| A final overview before we move onto the next map. |
Incredible detail, good mapping of decisions by both commanders.
ReplyDeleteMany thanks Pancerni.
DeleteWell that was tough for both sides at times, with a right old dust up between the T-34's and the Panthers. Once again it was very easy to follow the action, with both sides having some failed command rolls or blunders just when you don't want them. Sounds familiar to me as it tends to happen in my games.
ReplyDeleteOut of interest are you leaving hits on at the end of a turn, or taking them off? I prefer the former.
Many thanks for that Steve. Regarding the hits. This is something I have been agonising over and still unsure. I am presently taking hits off, and in a game such as this which is more a succession of skirmishes, it works fairly well. I do have concerns though such as when the Panthers are in hard cover. They will be virtually impossible to destroy without overwhelming firepower.
DeleteI will be trialling leaving hits on soon and seeing how they compare. My only concern being that it could be extremely bloody although it reduces the impulse to fire everything on one unit to knock it out!
We started leaving hits on, as for us it gave a better game. It meant that we spread our shooting, which seemed more realistic to us, rather than ganging up on one tank to try and knock it out etc. Also it meant that infantry couldn't blindly advance in the open, as they would soon come a cropper. The big difference though was that units dug-in or in hard cover, actually started to 'degrade' over a Turn or two, rather than sitting there almost invulnerable for the whole game. I look forward to reading your thoughts on leaving hits on when your try it.
DeleteI may even try it on the finale of this campaign when Map 10 arrives which will be a larger affair. What you highlight makes sense and addresses many of my concerns. Another issue I have is marking hits (currently using different coloured micro dice for hits and suppression). I try and reduce battlefield clutter as much as possible and this will increase by leaving hits on. How do you address this issue or do you find it not too much of a problem?
DeleteI too use small dice, which are 6mm or 7mm, so not too big against my 10mm figures and vehicles. You can see them in action on my Blog linked below. I use white for hits, red for hits/suppression and blue for initiative actions or opportunity fire. I've got used to them and they are easy to see at a distance when playing a game, either solo of with a friend, which is very useful, especially in bogger games or with a lot going on in a Turn etc.
Deletehttps://wwiiwargaming.blogspot.com/2021/05/breaching-trasimene-line-italy-1944-day.html
That's a great looking game you have there Steve and the dice markers do not overwhelm the models. I am using 5mm which tend to be a little more prominent with 6mm figures. You have convinced me to give this a try on the final battle of this campaign.
DeleteHoly cow, Jon, what a fight! Quantity does, indeed, have a quality all its own! It started off as a textbook orderly withdrawal for the Germans, then really went south. I thought the Germans were in big trouble when the Red 120mm mortars and 76.2mm field guns suppressed them, but somehow they dodged rounds from the T-34s and fought off the swarm of Soviet infantry, but it turned out it was all just a bridge too far. I still can't believe the Germans lost the whole company of Panthers.
ReplyDeleteLooking forward to the next fight! Great work man, that was a real nailbiter.
V/R,
Jack
Many thanks for your kind comments Jack. I honestly thought that at least 2 of those Panthers were going to escape having given the Russians a very bloody nose, but it was not to be! The Russians are still paying a heavy price though.
ReplyDeleteMy pleasure, Jon, I appreciate you sharing these batreps with us, they've been great.
DeleteAnd I'm with you, I thought the Germans would be able to pull at least a couple of those Panthers back; how badly will losing all three Panthers hurt the Germans in future fights? (My apologies if an Order of Battle for the forces has been posted earlier and I missed it)
V/R,
Jack
Thanks Jack. The German orbats will be added at the end. Idea being that the reader will be as unaware as the Russians as to what they are up against.
DeleteI like your style ;)
DeleteV/R,
Jack
Well that was interesting what a price the Russians are paying for some small advances.
ReplyDeleteNever heard of this Russian General called Command Failure 🤔😳
Its General Command Failure that's costing them so dearly!
DeleteWow, that was a really eventful stage of the action. So many Russians, but they seem to be blundering along rather than bludgeoning through—had their fair share of the former!
ReplyDeleteOnce again, a visual delight.
Regards, James