1st Winchester
15th May 1862
Rules: Guns at Gettysburg
Table Size: 6' x 4'
Figures: 6mm Baccus
Orders of Battle:Continued -
This game provided the opportunity of testing out one of the Tiny Wargames terrain mats. Originally planned for a 4'6" x 3' table I extended it out to 6' x 4' matching the dimensions of the mat.
The game is taken from a Guns at Gettysburg scenario book. The Confederate objectives are to inflict more than 50% casualties on the Union force and capture Camp Hill and Brewers Hill. They have 24 moves before end of play.
 |
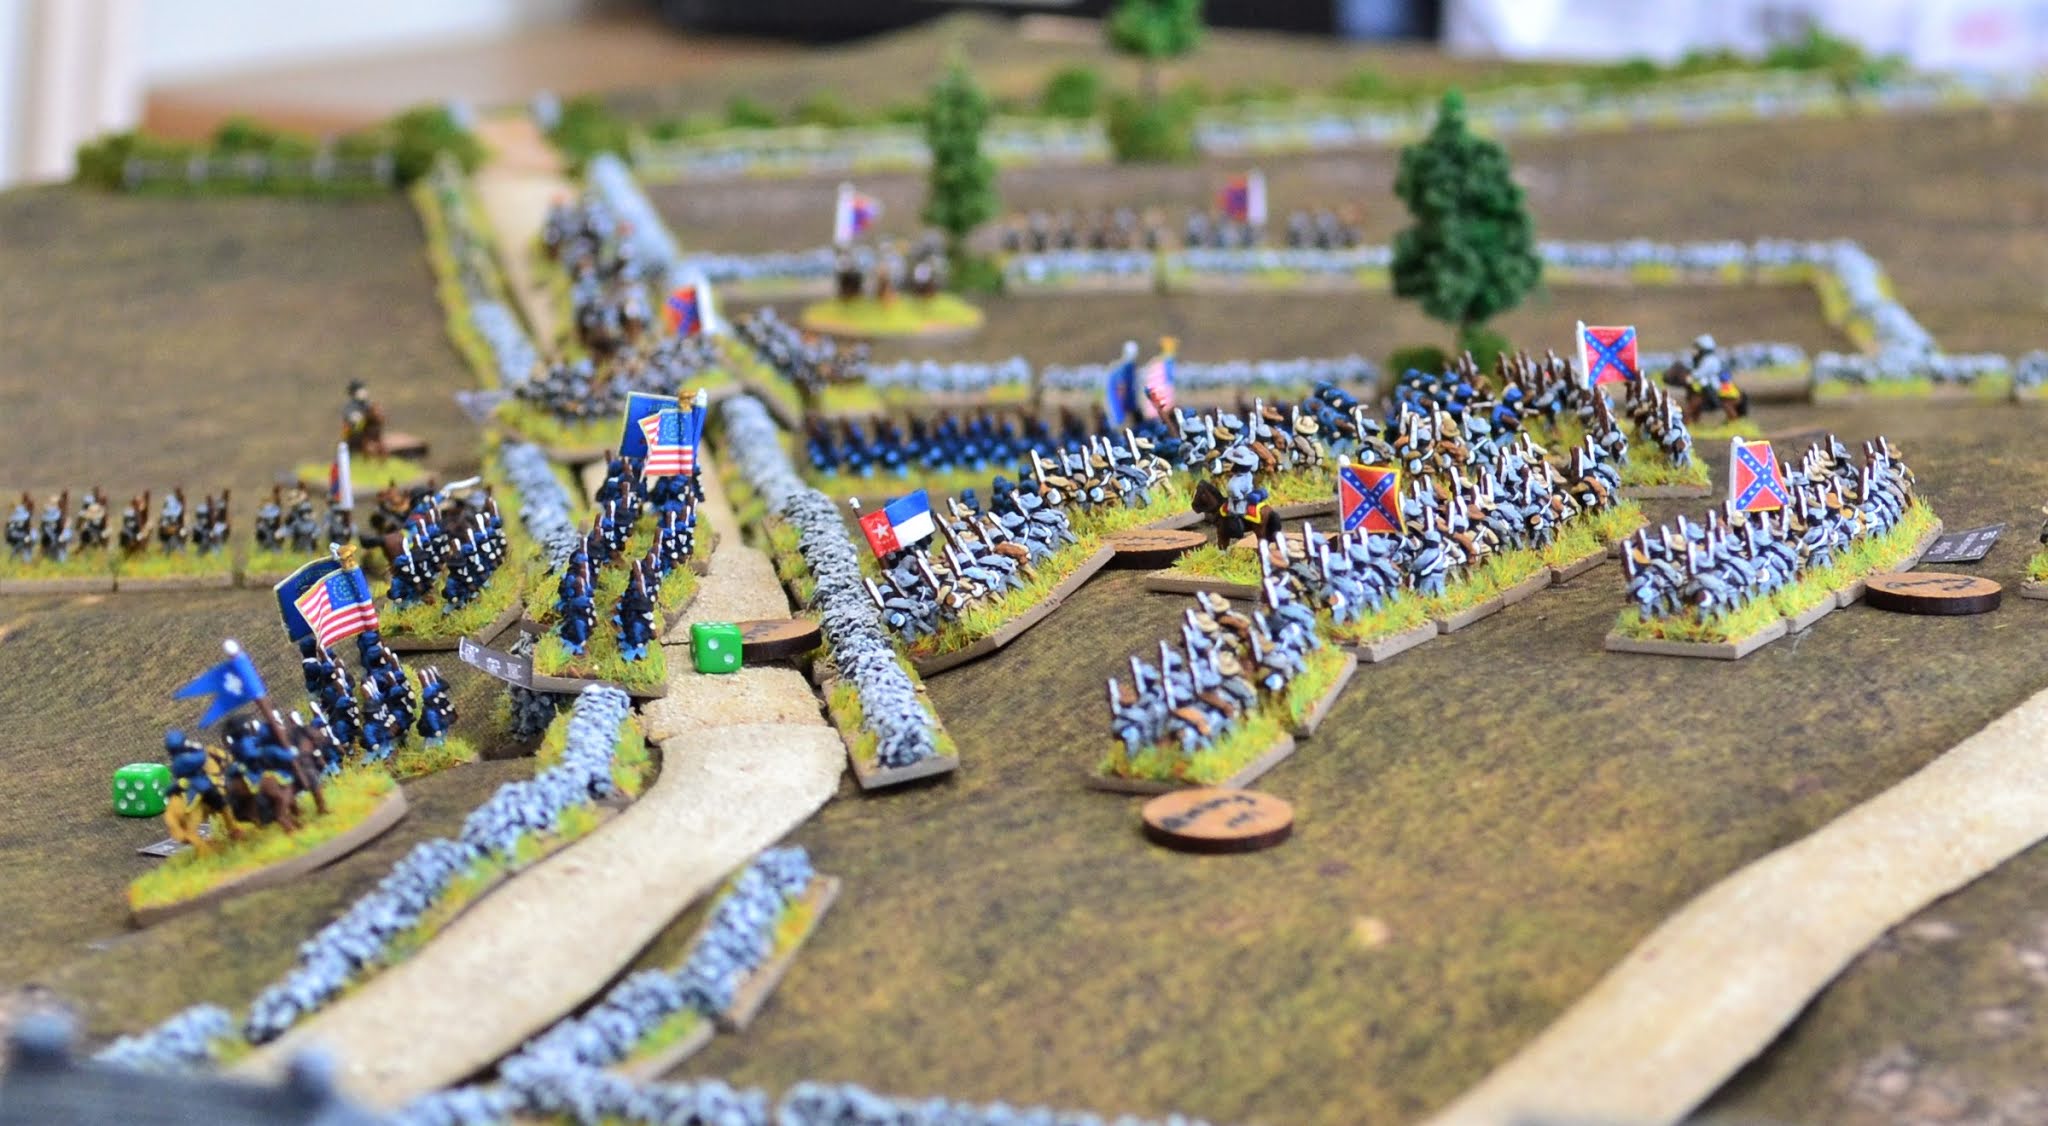
| Overview at the start. |
 |
| Gordon's Brigade on Brewer's Hill |
 |
| Donelly's Brigade on Camp Hill |
 |
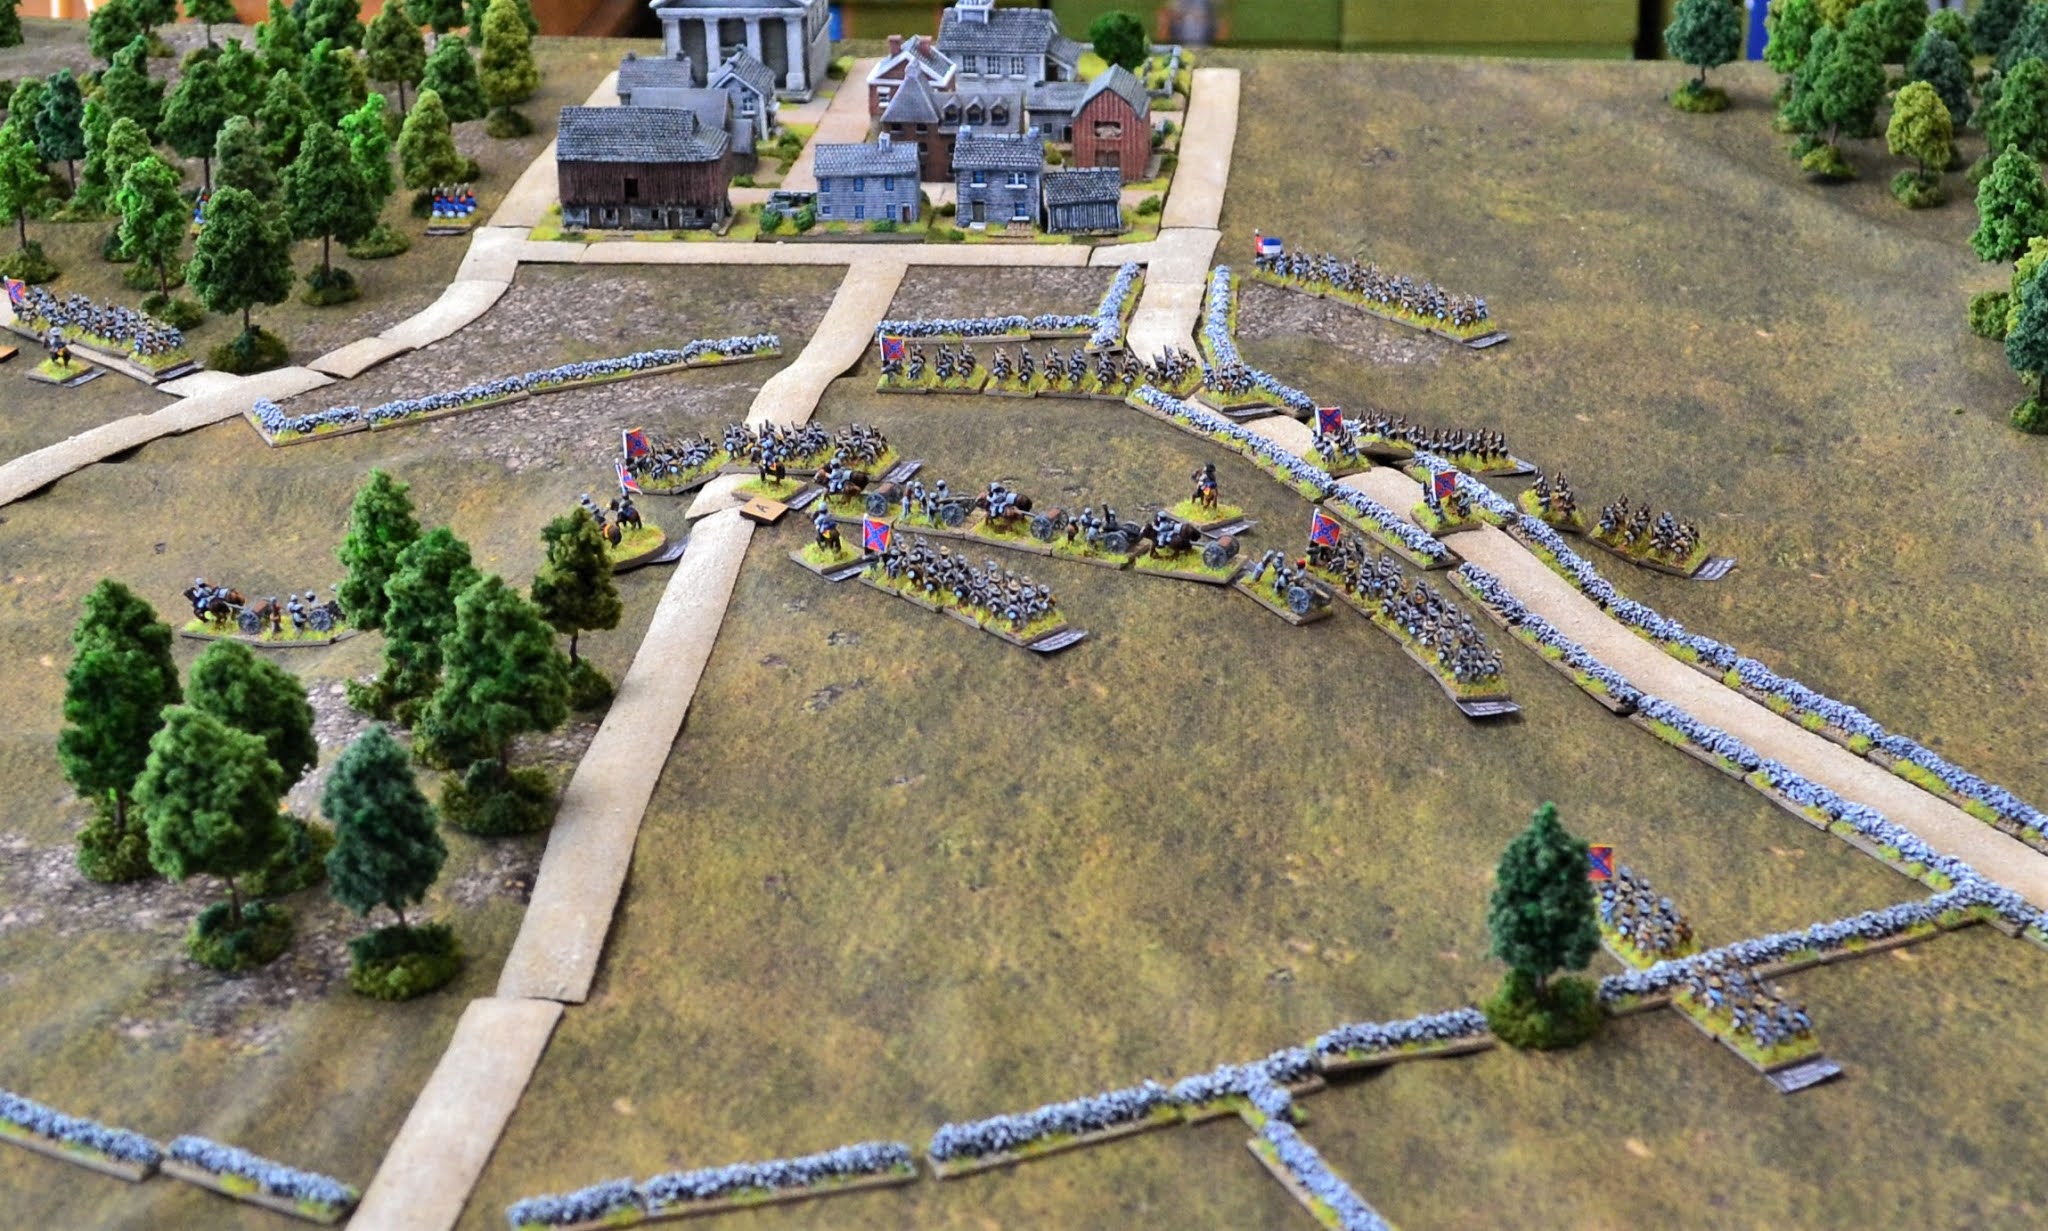
| Trimble's Brigade advances along the Front Royal Road |
 |
| Union reinforcements arrive. |
 |
| Taylor's Louisiana Brigade arrives along the Valley Turnpike. |
 |
| Jackson's troops engage with Gordon's Brigade on Brewer's Hill |
 |
| Fulkerson's Brigade prepares to charge the Union troops of Donnelly's Brigade. |
 |
| Trimble's Brigade struggles to make progress towards Camp Hill suffering heavy casualties. |
 |
| The 5th New York Cavalry charge regiments of Trimble's brigade but are halted through heavy and sustained musketry. |
 |
| An Overview of the battlefield at this stage of the game. The Confederates have yet to make an impression on the Union line. |
 |
| As Winder's Brigade with Jackson engages Gordon's Brigade on Brewer's Hill, the 1st Michigan Cavalry (far left) charges a Confederate regiment. They suffer heavy casualties in the process and fail to charge home. On the far right, the 10th Maine has reinforced Gordon taking up position in the woods. |
 |
| On the opposite flank, Trimble's Confederate brigade has been well and truly seen off by Donelly's Brigade. |
 |
| Donelly was unable to capitalise on his success as pressure built up from his right flank. Fulkerson in the centre had overridden the Union troops holding the wall and with Taylor now swinging his battalions from the Valley Turnpike towards Camp Hill, Donelly began pulling his troops back to defend his hilltop position. |
 |
Winder's brigade struggled to make any headway onto Brewer's Hill but did successfully destroy the
1st Michigan Cavalry through steady and accurate musketry. |
 |
| Donelly looks on with increasing concern as Taylor's Louisiana regiments approach his thin blue line. To make matters worse his attendant battery of artillery has run low on ammo. |
 |
| Winder's main attack had been devastated with the Union troops holding firm on Brewer's Hill. The combined 2nd and 4th Virginia regiments on the left offered some hope having seen off the 1st Michigan Cavalry. |
 |
| Taylor's Brigade had no such problems on Camp Hill casually sweeping all before it. |
 |
| The dismounted 8th New York Cavalry made a valiant but ultimately futile effort in halting the Confederate advance. |
 |
The rapidly retreating Donelly's brigade.
|
 |
| Another view of the victorious Louisiana infantry. |
 |
| The scene of total Confederate victory on Camp Hill with the morale of the Union troops collapsing leading to a universal rout. |
 |
The Louisiana Tigers with another regiment from Taylor's brigade supports the struggling regiments of Campbell's brigade in capturing the woods outside Winchester. They are held by the green troops of 10th Maine and another regiment from Gordon's brigade. The Louisiana Tigers turns the tide and routs the 10th Maine.
|
 |
When all appeared lost for Winder's brigade, the commander of the 2nd/4th Virginians inspires them to a dramatic charge up the slopes of Brewer's Hill routing the defending Union regiment in the subsequent melee (bottom right).
|
 |
| Having maintained superb discipline, the 2nd/4th Virginians swing into the 3rd Wisconsin that had been causing the Confederates so much grief. The Union troops turned to meet them which proved a double-edged sword as the depleted Confederates that had been on the receiving end of their musketry charged into their rear. This was enough to destroy the Wisconsin Regt. The 2nd Massachusetts had wheeled their line to meet the new threat and delivered a shattering volley into the yet to be reformed Confederates. A charge by the fresh 2nd Mass had little difficulty in sweeping the summit of rebel infantry. |
 |
| Taylor's and Trimble's sweep across Camp Hill in an attempt to finish the job on Brewer's Hill before time runs out. |
 |
| It was not to be though and the battle ends with the Union troops still holding Brewer's Hill. |
The final result was a narrow Confederate victory. They achieved 2 of their 3 targets, capturing Camp Hill and inflicting more than 50% casualties on the Union. The latter though held on to Brewer's Hill leaving a final score of 2:1 to the Rebels.
This battle proved be a conundrum for the Confederates. Neither wing was sufficiently strong enough to capture their objectives without the assistance of Taylor's large brigade. In hindsight it may have been more beneficial for Fulkerson's 2 regiments to march straight on towards Brewer's Hill leaving Camp Hill to Taylor and Trimble. Those 2 regiments may have turned the tide on Brewer's Hill. At the time though the Confederates were undecided which flank Taylor would support.
I had mixed feelings regarding the terrain mat. I tried several methods for creating hills including using clothing and for Camp Hill, some of my polystyrene hills. The latter provided a more stable surface but the main bugbear was figures 'skiing' down slopes! I also found it a trial smoothing out the mat (it had been ironed first). It will certainly feature again though. It is easier to generate undulating terrain than using my terrain tiles so for some battlefields it may be a necessity.
On a final note, the more observant among you may have noticed some of the fences turn into stone walls during the game. All should have been stone walls but I lacked the number required, hence the fences. I therefore made more as the game progressed replacing fences as walls came off the production line!


Jon, this is a terrific looking game. Your terrain, troops, and photos are a real treat for the eyes.
ReplyDeleteMany thanks Jonathan
DeleteLovely sweeping view of the battlefield. The scale makes the town look ‘right’, nice job.
ReplyDeleteMany thanks Norm.
DeleteA close run thing for sure! A great looking game and once again it really shows the benefits of 6mm figures. Terrain mat 'skiing' is a tricky one to resolve and 'realistic' hills suffer the same effects too, based upon my experiences. I suppose it's one of those things we have to accept, unless you stick sandpaper to the bases to gain some grip.
ReplyDeleteThanks Steve. I have yet to try it out but I am hoping the fleece mat from Geek Villain may have a little more friction. Not an easy one to resolve unfortunately.
DeleteGreat looking game, and a valiant defense by the boys in blue, but not quite good enough!
ReplyDeleteMany thanks Peter.
DeleteI've just seen this post - always nice to see a 6mm battle report done well. Can I just ask about the fences shown in the fourth pic ("Trimble's Brigade advances..."). These are very nicely done and I wondered whether they were DIY or bought in ? I've recently made some of the 'snake' style fences (using spaghetti of all things, inspired by Per Broden's site !). These look so finely detailed. Keep up the good work.
ReplyDeleteMany thanks for your comment. I am not 100% certain but seem to recall that they were from Total Battle Miniatures who produce a stone and rail fence http://www.totalbattleminiatures.com/bigbattalions/6mm/americana.html
DeleteInteresting regarding the spaghetti. I considered it but could not quite get my head around using foodstuffs for terrain. Probably my loss!
Thank you Jon. I'll have a look at the TBA fences as they really are superb in your pic. The spaghetti does actually work (to my eternal surprise). Amazingly strong stuff and a ready source of nibbles if you get really, really desperate...
ReplyDeleteI really must check out the spaghetti. My home made versions are a little chunky for 6mm and will be interesting to see how they compare.
Delete