This was a first attempt at this battle using the Deluxe Edition General de Brigade rules.
Foy's 9th
Division were tasked with capturing Germoincourt before attacking
Quatre Bras. Bachelu's 5th
Division took the right flank attacking towards Quatre Bras from the
north supported by the 2nd
Cavalry Division. The Guard Light Cavalry anchored the left flank.
Most of Perponchers 2nd
Netherlands Division were positioned in Bossu Wood and across to the
village of Quatre Bras.
Bachelu's division swept
aside the 27th
Dutch Jaeger as they swung towards the north of Quatre Bras. Foy's
division however struggled to capture Germoincourt due to the
stubborn resistance of the 5th
Dutch Militia. They only fell back after suffering severe losses and
delaying Foy's advance.
Merlen's Netherlands
light cavalry brigade arrived followed by Picton's 5th
Division who were immediately moved towards the allied left flank
blocking Bachelu's march. Pack and Kempt's brigades lead supported by
the 5th
Hanoverian Brigade.
Meanwhile Jerome's 6th
Division arrived on the French side and moved to attack Bossu Wood.
They were followed by the heavy cavalry of the 11th
Cavalry Division which moved to support Bachelu.
With pressure steadily
building along the allied line the arrival of the Brunswickers came
at a critical time. The infantry and artillery advanced to occupy the
central position including Quatre Bras and across to the western end
of Bossu Wood. As they arrived the 2nd
Netherlands Division crumpled under the French onslaught. The
Dutch/Belgians streamed from Bossu Wood in full flight having put up
minimal resistance. The Dutch/Belgians to the immediate front of the
Brunswickers performed better but finally broke leaving the gap to be
filled by them.
The Brunswick Cavalry
Brigade joined the allied left flank attempting to counter the threat
by the considerable numbers of French cavalry. They had initial
success against the French Dragoons but this was quickly reversed by
charges of Cuirassiers. The Dutch/Belgian cavalry performed poorly
with the 6th
Dutch Hussars routing from the field. All was not lost though as Pack
and Kempt's Brigades had stopped Bachelu's Division in its tracks
with Campy's brigade suffering particularly badly.
Then disaster struck! An
event that will go down in history as “the ride of the 6th
Chasseurs” very nearly destroyed Picton's Division. With the
general mayhem and confusion of battle, the battalions of Kempt's
Brigade who had been instrumental in stopping Bachelu's battalions,
failed to take account of the close proximity of the 6th
Chasseurs. Seeing the British battalions still in line the 6th
Chasseurs charged. The closest battalion, the 28th
Line, failed to form square and promptly routed before the cavalry
struck. As the Chasseurs continued the 32nd
Line and the 79th
Highlanders also fled from the onslaught. The Chasseurs finally made
contact with the routing 28th
Line who were promptly ridden down. The impact on Kempt's Brigade
proved devastating and they routed from the field (a failed Brigade
morale check and all retreating or more than 35% casualties). The
Chasseur charge finally came to and end with blown horses.
This one charge and left
a huge gap on the allied left flank and the loss of an elite brigade.
Only the Hanoverian conscripts were left to plug this gap.
Alten's 3rd
Division now arrived and were rushed to the allied right flank to
face Jerome's Division which were now emerging from Bossu Wood. The
Brunsickers desperately hung on to the centre although part of the
village was eventually captured by Foy's division.
The allied left flank had
become something of a stalemate with the French cavalry repeatedly
charging the allied squares. French artillery was however, having
some effect gradually whittling away at the strength of the allied
battalions. The Hanoverians in the ground to the immediate north of
Quatre Bras were struggling however, as a combination of Foy's
division and the surviving battalions of Husson's Brigade gradually
pushed them back.
Cooke's Guard Division
now arrived with Maitland's Brigade deployed to shore up the
Hanoverians and recapture Quatre Bras. The situation was now
stabilised as the guards successfully threw back the French. Byng's
Brigade with the divisional artillery formed a line across the centre
to support the Brunswickers.
Then disaster struck on
the allied right flank. Jerome's division, obviously fired up with
their successes so far, piled in to Alten's Division routing several
battalions and destroying his two artillery batteries. This caused
Kielmansegge's Hanoverian Brigade to break leaving just Halkett with
the 69th
Line and 73rd
Line in position to stop the French horde. Jerome's 2nd
Brigade under the command of Soye, ejected the Brunswickers from the
western end of Bossu Wood and were now facing directly Byng's
Brigade.
With the Brunswickers
streaming past the British final defensive line, Soye launched 2 of
his battalions at the 2nd
Foot Guards but were met with a devastating volley which caused them
both to falter.
On the allied right flank
the 69th
and 73rd
Line battalions poured steady musket volleys into the French columns
buying valuable time to allow a hasty defensive line to be thrown up
to their rear, with the rallied surviving Hanoverians and
Brunswickers. With their exposed flanks and hopelessly outnumbered
it was only a matter of time before the 69th
and 73rd
were overwhelmed. When they did finally break it coincided with the
Guards being driven out of Quatre Bras and the Brunswickers and
Hanoverians tasked with holding the right flank calling it a day in
the face of Soye's advancing battalions.
With the total collapse
of the allied right flank and with the loss of Quatre Bras, the
allied army broke and fled the field.
A special mention must be
given to the British 3rd
battalion of the 1st
Line who steadfastly held on to the far left of the line like a rock
seeing off attacks by infantry, Cuirassiers and artillery barrages.
It had lost almost 50% of its number by day end and never once fell
back from its position.

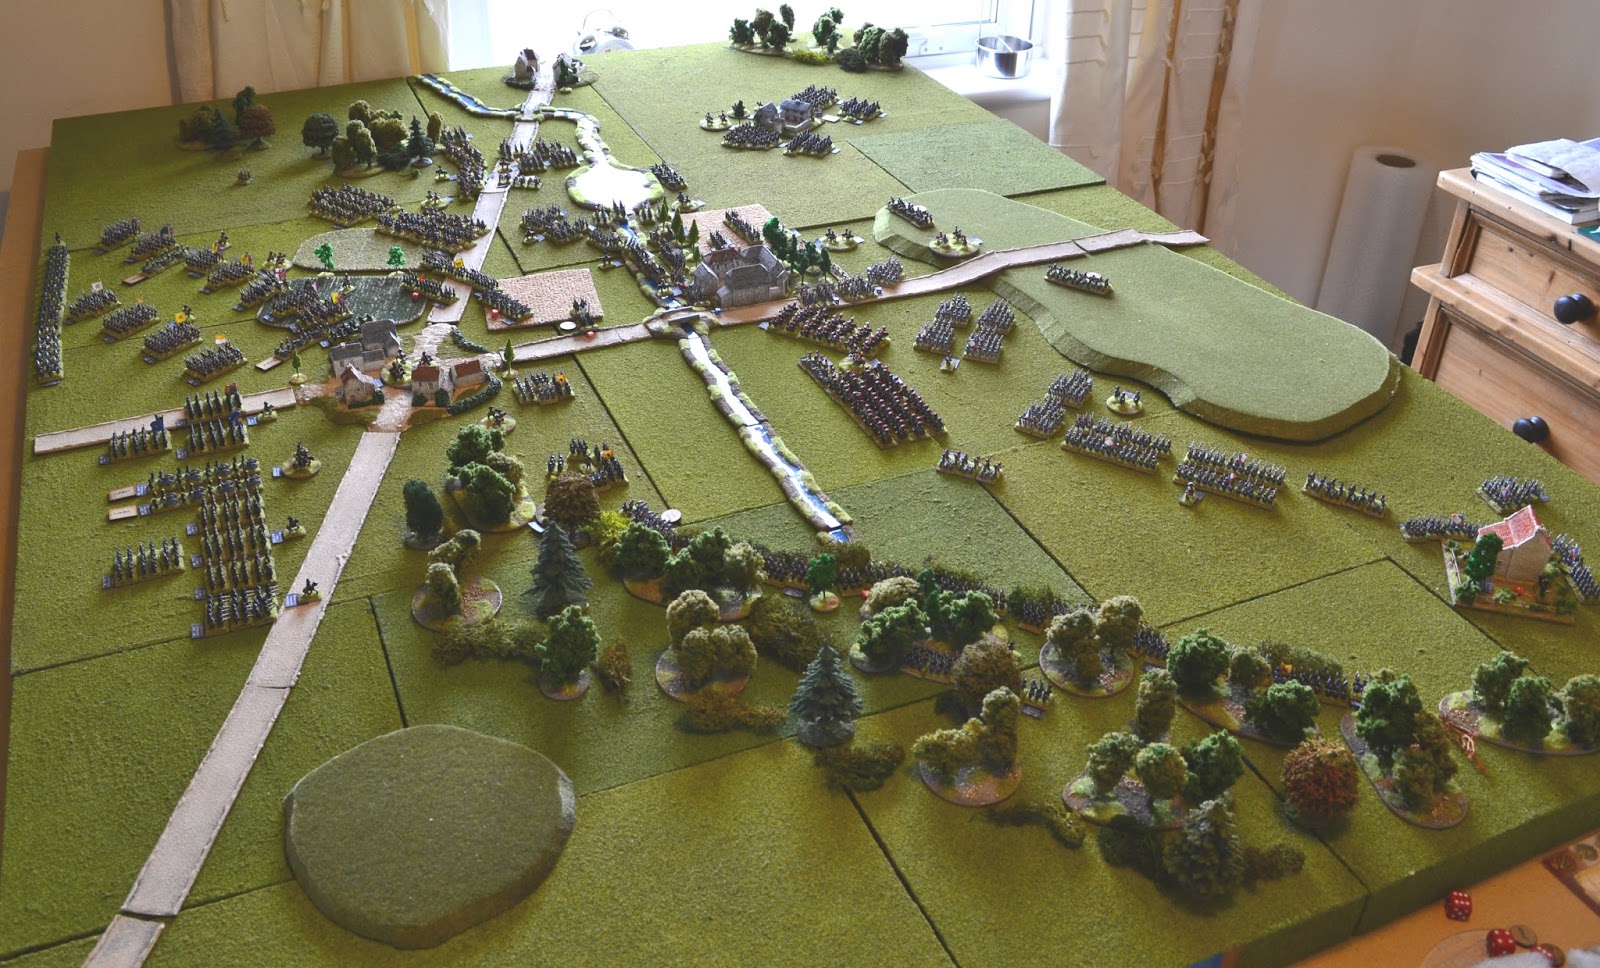
Initial Set up

Perponcher's Division occupies Bossu Wood

Bachelu and Foy's Divisions

French eye up Germoincourt defended by Dutch 5th Militia

Guard Light Cavalry

Perponcher's Div in and around Quatre Bras

5th Dutch Militia finally expelled from Germoincourt

Arrival of Picton's Division

Action around Quatre Bras

Foy's Division attacks Quatre Bras

Ground view of French assault towards Quatre Bras
Overview as Brunswickers arrive.

Picton's Div holds left flank

Picton's Div deploying

Stand off on the left flank

Quatre Bras from the French lines

Jerome's Div passing through Bossu Wood

Alten's Div holds allied right flank

Pressure builds on the allied right and centre
Hi, how did you handle movement through the Bossu Wood ?
ReplyDeleteHi Devastating Double D. Troops moved as per the rules. i.e. classed as difficult terrain and therefore infantry moves at half speed.
Delete